Showing posts with label knowledge how-to. Show all posts

Sunday, March 17, 2013

Get Better at Rock Climbing...Today! (Page 2)


Bouldering in Unaweep Canyon in Colorado
V4 boulder problem in Western Colorado
III. MENTAL
   There can be no doubt that climbing is almost equally mental as it is physical. So when is your mental state getting in the way? And what can be done to improve it? Here are a few tips to help improve your mental climbing acuity.
   A. Fear- All climbing inevitably engages some degree of fear. Fear is good; it stimulates adrenaline which helps you focus and sharpens your body's abilities to perform. This is why we have adrenal glands in the first place. Only a great fool would call themselves a "fearless" climber. Those are the sort of climbers I don't like to partner with. However, excessive fears are debilitating and will ultimately hinder your ability to climb at peak performance. Two types of fears in particular are especially non-productive: fear of failure/embarrassment, and the fear of falling. Both of which are quite common and somewhat easy to remedy.
     Fear of Failure- this is perhaps the silliest and easiest type of fear to rid yourself of. Being afraid of looking bad in front of your friends will hurt your performance. Don't hold yourself to the standards of others. While some friendly competition against your friends and/or peers will help keep you motivated, climbing is an individual sport. Measure your success against yourself only. Remembering that you are trying mainly to have fun and not send every climb you attempt the first time is a good way to keep yourself from falling into this trap.
     Fear of Falling- this is a common and natural fear, and one that stands in the way of many climbers, especially ones that are at the beginner/intermediate level. While it is important not to ignore the possibility of a dangerous fall, being afraid to fall on well-protected routes is a major hindrance for your climbing. It will keep you from attempting routes at the top-end of your skill level and create a mental block on your climbing progress. This is evident for some climbers who will struggle with a certain move while leading but will fire through the same move when on top-rope. The best way to get over your fear of falling is to fall. Find a good belayer who knows how to perform a safe "soft catch" and take a few lead falls. On a safe climb, start with some short falls in the 5-8 foot range and build up to 15 footers. Soon you will learn to embrace and even enjoy falling and this fear will no longer be present.
Bouldering near the Colorado National Monument in Colorado
   B. Focus
     Another important aspect of your mental conditioning is learning to focus. There are many techniques for focusing your mind, and you may have to find the ones that work best for you. Most trainers in athletics of all types, however, will teach you a combination of visualization, breathing, and meditation. Instead of staring up at a climb you are about to attempt convincing yourself it is too hard for you and imagining all the things that could go wrong, instead convince yourself that the route is within your ability and you are in the best condition to do it. Picture yourself making the moves in detail. Imagine yourself succeeding, standing at the top of the climb having sent it. And remember that if you don't there is always tomorrow. During the climb, if you find yourself starting to lose your focus, take a moment to breath a few times and re-channel your energy. Most of all, remember that climbing is fun.

IV. NUTRITION
   Much can be said about nutrition and sports training, so I would go into too much detail here. Good nutrition, however, is a crucial part to getting your body to perform at its optimum levels and is therefore extremely important if you are training to climb. Eat well before a climb and after and you will find yourself feeling better and performing like you never dreamed. For the sake of this article I will break nutrition down into two categories: things that are good to eat, and things that aren't. For a more detailed nutrition regimen I would suggest seeking out any number of great resources that are already available.

THINGS TO EAT:
-Good carbs (in moderation) such as whole grains, oats, pastas.
-Foods high in healthy fats such as avocados, olive oil, etc. Remember that good fat is good and not all things that are "Low Fat" are healthy. Fat keeps your body satisified longer than carbs, making you feel hungry less often.
-Fruits and vegetables (but everybody knows this). If you struggle with the veggies, I suggest making smoothies or finding a taste for drinks such as V8.
-A high quality protein source is also crucial, lean meats relatively low in fat like chicken or turkey consumed as soon after a hard workout as possible will help your muscles recover and grow stronger. Protein supplements like Whey powder can also be helpful but avoid consuming too much protein, as it can lead to conditions such as gout.

THINGS NOT TO EAT:
-bad carbs high in refined sugars like soda, candy, milk chocolate, cakes, or any sweets. This group of foods is perhaps the worst thing you can consume for your body.
-Excessive amounts of saturated fat such as fatty red meats, butter, etc.
-And avoid excessive amounts of alcohol and drugs, these will certainly NOT help you to send that project!

V. SAMPLE ROUTINE 
Here is a sample workout routine that can be customized to suit your particular climbing needs and current physical conditioning. This particular workout lends itself to gym climbing where you can climb a lot of pitches in a short amount of time, as well as mix sport and/or trad with bouldering. However, this routine can be customized based on what you have available at your local climbing areas.

1. Cardio-
     A. 40 min jog. 5 min warm-up. 30 min running at a sustainable pace, gradually building in intensity followed by a 5 minute cool down walk. 3-4 times per week.

2. Climbing-
     A. 50 feet of easy warm-up climbing 2-3 number grades lower than your hardest redpoint.
     B. 250 feet (2-3 single pitch routes of 50-100' length) of onsight climbing from one letter grade to one number grade below your hardest redpoint (i.e. if your hardest redpoint is 5.11b, climb 5.10b to 5.11a onsight).
     C. 100 feet of downclimbing
     D. 75 feet of a project climb at or near your redpoint level. (recommended max: 5 attempts)
Or
           5-10 boulder problems at or near your redpoint level
     E. 2-5 boulder problems with 15-25 pounds of weight (either in the form of a weight belt or a partially loaded backpack. Could also substitute 50-100 feet of weight routed climbing 2-3 number grades below your redpoint limit. (Avoid strenuous crimps while weighted as they can cause tendon injury. Instead focus on jug holds and other "open" grip positions).
     F. 2 sets of 100 foot "sprints", climbing routes that are easy for you (3-4 number grades below your redpoint limit), focusing on moving fast without resting but still maintaining good form.

NOTE: It is recommended to alternate spending one day focusing on power and projects and the next focusing on reps and endurance on lower grades. Customize your routine to find and work your strengths and needs.

3. Muscle-
     A. Push-ups- 2 sets (enough reps that push your muscles to near failure)
     B. Sit-ups- 2 sets
     C. Wrist curls- 2 sets (enough weight to cause muscle failure in 20-30 reps).
     D. Reverse wrist curls- 2 sets
     E. Other- consider your personal weaknesses. For example, if your weakness is pure strength focus on lat pulls, bench press, bicep curls and other strength exercises.

A 5.8 traditional climb in Monument Canyon
This entire routine should be performed 3-4 times a week for a solid month, at which time re-evaluate and customize your routine for at least another month or for as long as you continue to see results. It is good, however, to take a full week off from a strenuous climbing routine every two months. Gradually increase your reps, aiming for what is known as the "Overload Principal," or increasing at a rate of about 10% per week. For example, if you are doing 20 reps, move up to 22. Or if you are lifting 150 pounds, bump it up to 165 (but don't do both!). Lower weights and higher reps will benefit endurance more, increasing weight will increase strength. Gradually increasing your workout will continually challenge your muscles and stimulate them to grow. Keeping your workout static will only maintain your current conditioning level.

All of this is a very brief and abridged theory about getting better at climbing. If you are serious about improving your climbing ability, I would suggest using this article as only one reference. I recommend reading broadly about the topic. Motivation and passion will go a long way toward helping you reach your climbing goals. If you start to find that climbing is not becoming fun, stop and re-evaluate what you are doing. Be honest and trying to pinpoint the source of your feelings. Although training is not always enjoyable, keep your eyes on the prize and always remember that climbing is supposed to be fun. Be safe and enjoy yourself out there. Climb on!

-Brian Wright

OTHER HOW-TO ARTICLES

Beginner's Guide to Crack Climbing- An introduction to crack climbing sizes and basic crack climbing technique.
Mountaineering 101- A basic look at mountaineering, including recomended gear, training and technical skills and more.
No Trace Ethic- A guide to abiding "No Trace" ethic to preserve the place we like to mountaineer for many years to come.

Visit THE ARCHIVE: A list of most of our articles sorted by department

find us on facebook

Follow us on Twitter!

Copyright notice: This website and all its contents are the intellectual property of www.coloradomountaineering.com and its authors. None of the content can be used or reproduced without the approval of www.coloradomountaineering.com.

Climbing and mountaineering are dangerous!! Please see the DISCLAIMER page
For information about how to contact us, visit this link


Get Better at Rock Climbing... Today!

Climbing at the Sun Tower in Unaweep Canyon
Traditional climbing in Unaweep Canyon
Getting better at rock climbing, every climber wants to do it, not everyone knows how. There are some crazy theories out there, some good and some not as good. But if you really want to improve your climbing in the shortest time possible, there are a few tricks that will help you turn that project from a dream into a send. This article is a brief look at some time-tested methods that are guaranteed to make you a better climber.

I will break this article into several sections and end it with a sample one-month workout routine that will help you see results fast.

I. NON-CLIMBING TRAINING
An important aspect of training for climbing is conditioning your body to be in the ultimate shape for rock climbing. But what does this ultimate shape look like? Bulky and ripped with muscles?  Lean and slender? The truth is there is a good medium. Too much muscle is as bad as too little, as muscle is heavy and will weigh you down. Consider Ashima Shiraishi,  the young climbing prodigy who recently gained notoriety for being the youngest person to climb V13 and 5.14c. Ashima is very small and light, and her strength-to-weight ration allows her to make gymnastic moves on the tiniest holds.

One thing that is for certain, however, is that excess body fat should be your first priority. Unlike muscle it obviously doesn't add to your strength and acts like an anchor while on the wall. When I first started climbing, I was about fifteen pounds over my ideal climbing weight. Losing that extra flab alone allowed me to go from a shaky 5.8 climber to a shaky 5.10 climber. Chances are, you know if you are a little overweight. As a climber you have to be very lean to climb at your peak.
   A. Cardio/overall fitness
     Cardio fitness is important. It helps you shed excess weight and will help you build stamina. If you are overweight and need to lose some pounds, I recommend a vigorous cardio workout three or four times a week. This could mean a 40 minute run, an hour of hard swimming, or a difficult hike. Anything that gets you breathing hard and sweating and gets your heart rate up into the training range (about 80% of your max) for at least 30 minutes consistently. If you are already at or near an ideal weight, you can reduce this to two times a week and lessen the intensity.
   B. Muscle training
     Lifting weights has some benefit for climbing, but while building head-turning biceps might be good to impress the ladies (or guys) it does little to help you send that 5.12 project you've been dreaming about. Most of your muscle training should be focused on working muscles that oppose the most frequently used climbing muscle groups. For example, climbing is a forearm-intensive activity, so working out the extensor muscle group (the muscles opposite the forearm) with exercises such as reverse wrist curls will help keep you from becoming too lopsided and risking injury. Basic muscle exercises, however, like push-ups, sit-ups, wrist curls, lat pulls, etc, can have some benefit if you feel you are lacking in overall strength. Climbing, however, is the best training for climbing, as will be discussed in the next section.

A 5.12a sport climb at the Puoux in Glenwood Canyon
The author on Urban Cowboy (5.12a)
II. ON THE ROCKS
     The best way to become the climber you always wanted to be is to climb, and climb a lot. But haphazardly attacking the wall at your local gym, consistently flailing on climbs that are too hard for you, or climbing the same routes over and over, are all ways to slow your progress, and soon you will find yourself plateauing and wondering why you don't seem to get better despite how often you are tying in. Here are a few ideas regarding making the most your actual climbing time.
   A. On-sight climbing- One of the quickest ways to find yourself stuck on that proverbial plateau  is to climb the same routes over and over. The cure to this is simple: focus your time climbing on-sight! Always find new routes and new areas. The more rock you are exposed to, the easier you will be able to adapt to anything new you might encounter. Running laps on climbs you know by heart may be good for endurance, but your muscle memory is locked and you gain very little skill. Try to spend 2/3rds of your climbing time on rock that is brand new to you. At the gym, try climbing "random" routes where you pick your way as you go. Difficulty is less important than you might think, but exposing your body to new holds, new positions, and new sequences will make your skill level skyrocket.
   B. Projecting- Although it is good to spend most of your time climbing onsight, projecting has benefits too. For one, having a "dream project" helps keep you motivated and working hard to improve. It also challenges you to force your body to improve. You may discover new types of sequences that you never thought of. The key to projecting is not to become too fixated. Try your project for awhile and move on, but don't focus only on one climb.  Beware, however; projecting a climb that is overly difficult for you, one where you make very little progress on any given day, is not productive and a quick way to find yourself feeling stuck.
   C. Downclimbing- A highly neglected aspect of climbing. It is easy to reach the top of a route, feeling tired, as simply yell "ready to lower". If you do this, however, you are missing out on a chance to work on a necessary and valuable skill: downclimbing. Downclimbing teaches you balance and makes you think about the rock in ways you may never have thought of. I suggest doing it as often as possible. Just remember while downclimbing to be safe and don't try it on a route that might put you in danger.
   D. The Gym- Gym climbing is a good way to build your strength and work on technique in a user-friendly and relatively safe setting. However, the gym is not real rock, and spending too much time at the gym can actually hurt your outdoor skills in some ways. Gym climbing is good for bad weather days and the off-season. You can work out hard, get many reps in, and improve your skills. On the other hand, those neon holds are often not very much like what you will really encounter and make route reading far too easy. The best way to get better at real climbing is to climb outside as much as possible, and supplement this with indoor climbing when the outdoors aren't available.
   E. Rest days- Another huge mistake many climbers make is to climb too much. You must give yourself plenty of good days of rest. One key to remember is that you don't gain strength during workout days, only while you sleep and rest. If you are climbing hard 5 days a week you are breaking your muscles down and not allowing them time to rebuild. Your strength gains will not be as much as if you climb 3-4 days a week and allow your body time to recover.


Visit THE ARCHIVE: A list of most of our articles sorted by department

find us on facebook

Follow us on Twitter!

Copyright notice: This website and all its contents are the intellectual property of www.coloradomountaineering.com and its authors. None of the content can be used or reproduced without the approval of www.coloradomountaineering.com.

Climbing and mountaineering are dangerous!! Please see the DISCLAIMER page
For information about how to contact us, visit this link


Monday, February 4, 2013

5.9 Ain't What it Once Was: An Exploration of Grade Inflation in the Yosemite Decimal System

The Yosemite Decimal System is a complicated entity fully worthy of dissertation-like exploration. But the YDS is an empirical system not a intellectual one, and any attempt to reduce it to research and discussion is bound to be flawed. If you are new to the Yosemite Decimal System, a good place to start is our article from January 2012 that provides a basic understanding of its history and of its general grade ratings.

A 5.10a rock climb in Western Colorado
A 5.10a sport climb in Colorado
There is much discussion, particularly between the older and younger generations, about a particular YDS phenomenon in the climbing and alpine world often called grade inflation. I work occasionally as a route setter at a local climbing wall. After designing and executing a project I was sure (and was confirmed by three other climbing friends, all of which can onsight 5.10 and one of which who can onsight 5.12) was 5.10b/c, a climber that was 48 years old and has several decades of climbing experience suggested 5.9+ as the rating. Surprised by this, I voiced my doubt and had him try another climb nearby which I originally rated 5.11a but after a few ascents downgraded to 5.10d. Again, this was confirmed by the same three friends. After struggling a bit but finishing the climb, this 48 year old climber suggested once again that this climb was 5.9+, only adding this time that it was "maybe" 5.10a. I was shocked, and this time I protested saying that this rating was simply impossible. After a lengthy discussion, at best I could convince him that it was at least 5.10b but he would concede no higher. While I was thinking "sandbagger," he suggested perhaps the difference was due to "a different generation" in a smug tone I interpreted as elitist.

While this encounter is not proof of anything other than the subjective nature of any grading scale in general and the Yosemite Decimal System here in particular, it got me wondering about the familiar theory of grade inflation all over again. Does it exist and why? Visit beta websites that allow users to vote for "consensus" ratings on routes such as Kor-Ingalls on Castleton Tower or The Mace near Sedona, Arizona that were established several decades ago or more and you often find that the new consensus is higher, sometimes considerably, than the original suggested rating. Is it that modern climbers, influenced by the safety of clip and go sport climbing, have been softened by the loss of "boldness" from the mainstream climbing realm? Or that many climbers climb for years and never learn to place a cam or a piton?

True Grit (5.8) a sport climb in Unaweep Canyon, Western Colorado
While considering this question, my research took me to a broad spectrum of places. In order to understand the issue of grade inflation, it seemed vital to understand its history. As noted in our history article, the YDS scale was invented at Tahquitz Rock as an extension of the Sierra Club's terrain rating scale that was used to grade alpine routes of all levels (class 1 being trail walking and class 5 being technical climbing). Ratings were established from 5.0 (easiest technical climb) to 5.9 (hardest technical climb at the time). The climbs at Tahquitz Rock, therefore, became the baseline routes by which all others would be compared. However, when you review the history of the rating at Tahquitz, you find a peculiar thing: the original ratings, the ones that were supposedly designed to anchor the entire system, have migrated slowly and steadily upward.

White Maiden's Walkaway on Tahquitz Rock's Maiden Buttress is an 800 foot multipitch trad route that was established in 1937 as one of the baseline routes at the 5.1 rating. Subsequent guidebooks over the years show that the rating has slowly risen to 5.3 then 5.4 and now some guidebooks list it 5.5. A survey of the consensus votes on one popular beta website reveals that one quarter of the climbers suggesting 5.6. Has the scale really bumped five number grades? Would that mean that modern 5.15 is simply what 5.10 was in 1937? The short answer is yes... and no.

The truth is the scale has inflated. As it has been refined, the higher grades have become more important and useful by modern standards. After all, many climbers today will lead their first climb at 5.6 or 5.7. The difference between 5.0 and 5.2 is almost indistinguishable. In truth, everything from 5.0 to 5.4 is a vague blur and often seems to overlap with class 4. In the days before the scale was opened to the mathematically illogical 5.10 rating (subverting the notion that class 6 climbing was aid climbing) in the early 1960's, when a climber encountered a climb that was at the very limit of the time it had to be rated 5.9. Sometimes the most devious of these would get a feeble 5.9+ modifier. That's not to say all 5.9's were the same, they just had no other rating to apply to these cutting edge climbs. When the scale finally opened, it was ultimately refined and slowly expanded as the sport advanced.

Today, the YDS and other scales are continuing to expand together. The YDS and the French scale, for example, have locked in step progressing at identical increments as a small group of international climbers establishes and confirms new futuristic climbs. As the grades expand slowly, one letter increment at a time, and benchmark routes are established at the new grades, the scale(s) have become more refined than in the older days. The aforementioned grade inflation does not seem to occur at these higher grades, and certain routes that have been held up as examples of certain grades have rarely changed over the years. If anything they tend to get downgraded as the beta develops and more ascents are made.

grade inflation in the YDS system for grading rock climbs
The author on a 5.12 (or is it 5.9+?)
sport climb in western Colorado
What all of this seems to mean is that modern climbers are not soft compared to their predecessors, despite the explosion of popularity in the safer mode of sport climbing. What the sport climbing explosion has allowed for is climbers to focus on pure difficulty, and people are sending routes that those who established the YDS scale could never have imagined 80 years ago. While the lower end of the scale might be softer than it was decades ago, the upper end of the scale has now been pushed higher than ever in all aspects of the sport, not just in bolt protected sport climbing. The so-called world's hardest off-width, The Century Crack (5.14b), was free climbed in Canyonlands National Park in Utah in 2011, as well as the hardest trad line in famed Indian Creek: Carbondale Short Bus (5.14- PG-13). Bold alpine first ascents have occurred in the Ruth Gorge in Alaska and elsewhere across the world. Alex Honnold soloed Half Dome, El Cap, and Mt. Watkins in a single day. While the sport has gone mainstream and become safer in many ways, boldness is still very much alive and rewarded. Though grade inflation has occurred notably over the decades in the lower grades, the higher grades have remained relatively stable, only expanding as new generations are able to push the sport further and further into the future.

Visit THE ARCHIVE: A list of most of our articles sorted by department


find us on facebook

Copyright notice: This website and all its contents are the intellectual property of www.coloradomountaineering.com and its authors. None of the content can be used or reproduced without the approval of www.coloradomountaineering.com.

Climbing and mountaineering are dangerous!! Please see the DISCLAIMER page
For information about how to contact us, visit this link


Thursday, January 24, 2013

Spring Loaded Camming Devices (SLCDs): An Explanation of the Modern "Cam"

The invention of the spring loaded camming device (commonly called simply "cams") in the 1970's revolutionized the climbing world. The ability to quickly and safely protect parallel-sided cracks opened up the world of traditional climbing to whole new realms. Perhaps no single gear invention, except maybe sticky rubber, has so directly affected the type and difficulty of routes that climbers are able to attempt. This article examines the world of spring loaded camming devices.

Trad gear
 trad gear with a smattering of cams
I. HISTORY OF THE CAM (SLCD)
The invention of cams was progressive in nature, but the first patent for a spring loaded camming device was filed by Greg Lowe in 1973. It wasn't until Ray Jardine took this idea, however, and developed his version in 1978 did the use of cams truly begin. Jardine called these original units "Friends". Although technology has developed with cams to make them more user friendly, versatile, or specialized to a particular type of crack, modern camming units work much the same as the original Friends.

Today there are several manufacturers that make their own version of the SLCD, especially Wild Country, Black Diamond, Metolius and a few others. Most companies have several different types of cams that serve different purposes, i.e. cams that are wider with more surface contact to spread the load on softer stone, or cams that have flexible stems for awkward and horizontal placements. All cams, however, function based on the same basic principles of physics.

II. CAM USE 101

Properly placed with the apex of the rounded lobes oriented at 90 degree angles from the orientation of the stem (see figure a), cams function by the action of the stem pulling on the rounded lobes of the cam which rotate and become locked with opposing outward force. The outward force generated is two times the downward force, which generates enough friction when properly placed to protect even a very nasty fall. A perfect cam placement is very solid but relies on a few key components.

The first key element is the rock itself. Not even a perfect placement is worth anything if the rock isn't strong enough to withstand the high forces generated in big fall. For this reason, avoid detached flakes and exceptionally brittle sandstone or other soft rock types.

cam placement
(figure a.) a cam in a mock crack
with near perfect retraction
The second key element is shape of the crack which you are protecting. In perfectly parallel cracks, cam placements are easy. Sink them firmly in but not too deep so that they might walk deeper and become irretrievable. In jagged, angular cracks, finding the best spot to place a cam can be tricky. It is best to place a cam in the most parallel-sided part of a crack as you can find, avoiding being near flares, widenings or pockets or anywhere the cam could walk out and become dislodged. It is best to find a placement with constrictions above and below to avoid this possibility.

The third key element is the correct sizing and placement of the cam. Ideal placement is when the cam is between 50 and 90 percent retracted. Some cams have indicators showing you when a cam is at its ideal angle. It is also important to place the cam deep enough without making it hard to retrieve as well as orienting the stem in the anticipated angle of a possible fall. Keep in mind, this is only a very basic overview and mastering all of this takes many hours of practice.

III. DIFFERENT TYPES OF CAMS
As mentioned above, there are many different types of cams on the market today and knowing which is best depends a lot on you. At a basic level, modern cams consist of a stem and a set of either 3 or 4 lobes. Three-lobed units have a narrower head and can therefore fit in small points in the crack. Four-lobed units have more surface area and therefore have more holding power. It is also possible to buy offset cams where the lobes are wider on one side than the other. These specialty cams are the best way to protect flaring cracks where regular cams might not suffice. Another specialty variation is the flexible stem which allows the cam to better redirect forces when protecting horizontal cracks and other misshapen features.

Cam sizes comparison
A comparison of common sizes from large (Black Diamond Camalot C4 size 5),
medium (Black Diamond Camalot C4 size 1), and very small (Black Fixe Hardware Alien)

Comparison of cams
A comparison of the head width between a 3-lobed and 4-lobed cam of similar size
IV. CONCLUSION
Camalots are a modern trad climbers best friend. They are the technological development that allow us to climb parallel sided cracks with ease and confidence as well as allow us to climb "clean" without using rock-damaging metal gear like pitons and nails. Learning how to properly use cams is a crucial part of today's trad climbing world. While all cams are the same at their core, there is a lot of variation between different companies as well as different models of cam within the same company. Make sure to do plenty of research, bearing in mind your own climbing ability and style before investing in a set of cams to fill your rack.

V. FURTHER RESOURCES
When considering what kind of cam you want to add to your rack, it is important to do your research. Here are a few sources to further your understand of SLCDs and what is available on the market:

Rock Climbing Anchors by Craig Leubben- On Amazon.com

Black Diamond's official page covering rock protection

Wild Country's official page covering their rock protection

Metolius's official page

find us on facebook

Copyright notice: This website and all its contents are the intellectual property of www.coloradomountaineering.com and its authors. None of the content can be used or reproduced without the approval of www.coloradomountaineering.com.

Climbing and mountaineering are dangerous!! Please see the DISCLAIMER page
For information about how to contact us, visit this link


Wednesday, August 22, 2012

Single Hardest Move vs. Route as a Whole: The Great Ratings Debate

INTRODUCTION

I was a paddler long before I was a climber, so I am used to the idea of rating difficulty in terms of the total problem not the single hardest move. In whitewater, when grading the difficulty of a rapid you factor in everything from technical difficulty to length and consequences. A very short rapid with a large, safe pool at the bottom would get a lower rating then a rapid that was just as difficult but is backed up by a long, dangerous runout. A long series of moves at the same difficulty would get a higher rating than any of individual moves on their own.

I became a rock climber through mountaineering. It started with an ascent of our local mountain Mt. Sopris (12,953’). Needless to say that after that first, fateful climb an addiction to the high country ensued and I found myself spending nearly all of my free time researching and climbing as many mountains as I could. Time that would have been better spent studying for finals and writing papers was instead spent studying topos and researching mountaineering history. I climbed many easy (class 2 or lower) Colorado peaks and tiptoed into class 3 with routes such as East Slopes of Snowmass Mountain, and the Sawtooth. Soon I was drawn into the class 4 mountains and, feeling strong, I couldn’t help but dream of what lie beyond.

Arriving at Longs Peak near the end of a twenty-fourteener summer to attempt the Keyhole Route, I couldn’t help but look at the amazing cliffs and bastions of the north and east faces and dream of ascending it by a technical route. Kiener’s route on Longs Peak beckoned to me with a siren call. I had to learn technical climbing skills so I could climb these high peaks.

Today I have become just as addicted to rock climbing as its own pursuit as I am with mountaineering and alpine. I will always be a climber with a lust for something bigger than the crag, but I also love the relaxing simplicity of cragging at any of the climbing walls near my home in Glenwood Springs, Colorado.

THE RATING GAME

The Diamond on Longs Peak
One of the things that fascinates me about both rock and mountain climbing is grading terrain. At once rating terrain is both amazingly subjective and intricately precise. How can it be both of these things?

In the United States we are stuck, for better or worse, with the Yosemite Decimal System. It might be useful to review a little YDS history. The YDS system started when the Sierra Club needed a way to grade various hikes and climbs in the Sierra Nevadas. They created five “classes” from class 1 (trail walking) to class 5 (technical rock climbing). A few years later, climbers at Tahquitz Rock found it necessary to subdivide the 5th class grade which encompassed a very large range of possible difficulty. The climbers of the era devised a decimal-based scale that went from 5.0 to 5.9. To abridge a very long saga, as climbers advanced and technology increased there came a need to open the scale. As of now the scale has been pushed to 5.15b. Only an elite and highly exclusive group of climbers have ever climbed at this level.

But what about those ratings? How do we define them? The challenges in creating a rating system for something as complex as rock difficulty are so numerous that at times the whole endeavor seems ridiculous. On the other hand, while you encounter discrepancies, regional interpretations, differences in rock type, differences in climbing discipline, the YDS has proven to be useful not only as a guide for us to climbs that properly challenge our abilities but also as a tool for measuring our own improvement as well as for comparing ourselves against others.

In a previous article, I attempted to broadly define the various levels of the YDS system. All sorts of interesting feedback, both positive and negative, flooded in in response. In this article I seek not to share my own opinion about a single, specific YDS topic, but to explore two different schools of thought when grading rock and terrain.

THE DEBATE

 I originally learned the YDS under the impression that the system rated the technical difficulty of the single hardest move. I found this method faulty, because although two routes might be the same in technical difficulty one inevitably be harder for any number of various reasons (i.e. it is much longer). On the other hand it comes closer to removing subjectivity than the other option, the route as a whole, which somehow has to account not only with a climber’s technical ability but also their physical conditioning.

For years, I believed wholeheartedly that YDS adhered to the single hardest move philosophy. You knew what an .11b move felt like and if you encountered one on any point of a climb than that was what the climb was rated. Even if the entire climb was 5.7 with a single 5.11b move it would be rated 5.11b. If another climb was stacked with hard moves one after the other with no rests but no single move was harder than 5.11b than the climb would also be rated 5.11b. There is the problem with this method. But still, as a climber, I feel better knowing that the climb will never be any harder than 5.11b (my current redpoint limit) and if I cant pull the route it simply means I need to train harder to build endurance for the more sustained 5.11b.

Recently, however, I was discussing ratings with a good friend and a much more experienced climber than myself (he climbed the Diamond at age 16, has bagged numerous big wall routes and committing trad/alpine routes, and currently enjoys redpointing 5.13c in Rifle Mountain Park) talked about how some 5.12a routes in Rifle don’t have any moves harder than 5.11b but are so long and pumpy that they get the 5.12a rating. Clearly this is a route as a whole mentality. In some ways I find this encouraging, because I know I am physically capable of pulling a 5.11b move. In theory, then, if I trained hard enough I should be able to climb this 5.12a. But if I climbed a 5.12a route wouldn’t that mean that I could pull a 5.12a “move”? Or can we not rate the difficulty of a single move? Must we have a series of moves before we are able to generate a rating? The confusion endures….

I’ve often heard people say things like, “It’s basically a juggy 5.7 to a V2 boulder problem with some more 5.7 above that.” Does this mean that the Sherman V-scale is better for rating a single move? But I have never believed this to be true either, for I have heard some of the best boulderers quoted after applying ratings like V14 or V15 saying “there is no single move harder than V13 but since it is a link-up of so many hard moves, I believe it is V15”. I always believed that the V-scale was designed to look at the boulder problem as a whole and YDS looked at the single hardest move. That same friend led a trad climb of his own at a local crag which he had rated 5.12c. The route was about 30 feet of 5.10c-ish climbing to a crux bulge with easier climbing above that. The crux was only about 3 moves. My friend described it as a V6 boulder problem and claimed to have had a very difficult time rating this climb. He was sure it was V6 but couldn’t for the life of him settle on a YDS equivalent. It was “too hard to rate just a couple of moves” he claimed.

With so many factors when it comes to rating a climb, it is amazing that we can even come to a general consensus at all. Still YDS is not without its uses. Although it seems like there is a huge variation at times in different people’s opinions about the difficulty of a climb, there is also a general consensus on many routes. 

CONCLUSION

I have always looked at the rating of a route based on its single hardest move. How positive is the hold? How big of a reach? What positions do you have to put your body in to make it? All of these factors make up the difficulty of any given move. I liked the single hardest move philosophy because in my mind it made it easier to pin down the given technicality of a specific grade and it eliminates a level of subjectivity about physical conditioning. Recently, however, I have been starting to wonder if this idea is erroneous and that the route as a whole is truly the more accurate way to evaluate a route’s difficulty. I hope here now, to get feedback and see what you all think.

Visit THE ARCHIVE: A list of most of our articles sorted by department

find us on facebook

Copyright notice: This website and all its contents are the intellectual property of www.coloradomountaineering.com and its authors. None of the content can be used or reproduced without the approval of www.coloradomountaineering.com.

Climbing and mountaineering are dangerous!! Please see the DISCLAIMER page
For information about how to contact us, visit this link


Sunday, January 15, 2012

A Beginner's Guide to Crack Climbing

One of the great things about modern rock climbing is its many facets. I know plenty of very good climbers who are happy doing nothing other than boulder problems and hard limestone face climbs. Some of these climbers are content to never have the burden of learning to climb cracks, much less venture up one while placing their own gear on lead. I am sure there are very good, perhaps even great, climbers like this out there who are probably sadly deficient when it comes to true crack climbing. A better, more rounded climber climber will master both crack and face climbing, and without question learning and/or improving your crack I.Q. can do nothing but improve your overall climbing ability and therefore your performance on boulders and faces only stands to improve also. 
about to get started on a desert fingercrack
Indian Creek, UT has become THE place to learn/hone/perfect "true" crack climbing skills. The reason that "The Creek" has become the cracking Mecca is due to its large collection of aesthetic, uniform cracks. Some IC cracks are continuous in one size for an entire pitch. Others might widen or gradually pinch as you go, forcing you to run the jamming spectrum. Indian Creek deserves its reputation as a premier climbing destination, but there are other great places to climb excellent cracks all over the world, including right here in Colorado. Unaweep Canyon outside Grand Junction and the South Platte area in the central/eastern portion of Colorado's Rockies are both noted for quality granite cracks. Little-known Escalante Creek in-between Grand Junction and Montrose has often been called "Colorado's Indian Creek". While I understand the comparison between the respective climbing styles of Indian Creek and Escalante, the feel of the two of them are quite different, in my opinion. Lumpy Ridge and other climbing destinations in Rocky Mountain National Park also have noted and famous crack climbing.

CRACK SIZES
The crucial thing about climbing cracks is understanding the sizes. Learn the respective jams for each size, practice them judiciously, and you are well on your way to being a crack climber. Also, throw what you think you know about grades out the window. I find that cracks tend to be rated almost on a scale of their own and the correlation between the ratings of crack and face climbs is vague. Depending on your experience level with cracks it is quite possible you will climbing a few grades lower or, less likely, even higher than what you climb on a bolted face route. 

The following is a breakdown of differing crack sizes. The supplied gear notation is my size. Yours may very well differ. I am 5'9 with hands that are probably on the small side of average I would guess, though I have no data to back that up. This is just a general guide to the size crack that would take the gear I use based on empirical knowledge. It varies a bit depending on the crack and the orientation of the placement. The more uniform and smooth the crack the more accurate the gear. 

Tips
Black Diamond Camalot Size: nuts & C3's
Growl. Some of the hardest types of cracks are these beasts. A tips crack is one where you can only get your fingers in to the first knuckle or maybe just past. While often secure, fingertip cracks are painful and strenuous. Add in the fact that you can get no feet in this crack and you could be in for a tough climb. Face holds for your feet can help, as can laybacking if you don’t feel secure with your jams.
fingers

Good Fingers
Black Diamond Camalot Size: #.3-.4
It's hard to beat a good finger crack! You know good fingers when you find them. Bomber, secure, not always comfortable, but steady and trustworthy.

Off-Fingers
Black Diamond Camalot Size: #.5- #.75
Can't get your hand in, can't get a secure fingerjam, this size range is one of the hardest. Depending on your foot and shoe style, you might not be able to get a toe in either. Off-fingers is often broken-up into sub-categories, such as Rattly Fingers, Ringlocks, and Ratchets, each of which takes a distinctly different jamming technique. You might encounter other names for jamming techniques in the range including butterfly jams and finger stacks.
ringlocks

Thin Hands
Black Diamond Camalot Size: #1
Not quite big enough for the thumb-to-palm perfect hand jam, but big enough that you can squeeze most of your hand inside. Thin hands aren’t bad, especially because the amount of toe you should be able to get in this crack.

Perfect Hands
Black Diamond Camalot Size: #2
The favorite size for most climbers. A section or full climb of perfect hands can be one of the most serene experiences in climbing.
perfect hands

Wide/Cupped Hands
Black Diamond Camalot Size: #3
Wide hands are not quite big enough for fists but rattly with good hands jams. You must "cup" yours hands and rotate them to cam into place. This can be a tricky and uncomfortable size.

Fists
Black Diamond Camalot (C4) Size: #4
Fist jams are just under the OW designation and good fist jams can be
cupped hands
bomber. The only catch to fist jam is its lack of size-adjustibility. In your hand is just a little too small, it might feel like you're going to fall.

Off-width

The dreaded Off-width (often abbreviated OW on topos and in guidebooks) is one of the most feared, dreaded, and despised of climbing terrain types. On the other hand, for the hardy the off-width presents a physical and mental challenge that no other climbing mode can match. Climbs like "Lucille” (5.12+/5.13-) at Vedauwoo in Wyoming and "Belly Full of Bad Berries” (5.13) at Indian Creek are two classic testpiece OW climbs. Recently, two British climbers ascended "Century Crack" on the White Rim in Canyonlands National Park, assessing a 5.14b grade to the climb, making it the hardest OW in the world. The two climbers have repeated many of America’s and the world's hardest off-width pitches and claim “Century” to be the hardest. However, some debate their claim of an ascent as they used pre-placed cams for the redpoint.

Off-widths can be broken down into a huge range of sizes:

almost past the OW on P2 of Otto's Route
(III 5.9) Independence Tower
Hand Stack- The next size up from a fist jam, the hand stack is when you (obvious) stack two hand jams together (crossed with both palms out) into a crack. You can cup and cam this stack to adjust to a range of sizes. [BD C4 #4)

Hand/Fist Stack- A little wider and you will have to resort to the hand/fist stack. Not as secure as hand stacks, the hand/fist jam has more range than the fist/fist stack that follows. [BD C4 #5]

Fist/Fist Stack- Grunt, a rattly, unpleasant size. Self explanatory, there are several techniques in this range depending on the size of the crack. Fist/nestled fist where the knuckles of one hand is pointed into the crack and the knuckles of the other are pointed into the wall is one type, this is for cracks that are slightly smaller than the fist/fist crack.

Arm bar/chicken wing- When you need something bigger yet, but still cant get your whole body inside, you can resort to the arm bar or the chicken wing. Both of these jams rely on camming your arm inside a crack that is somewhere between ~8 and ~12 inches depending on the size of your arm. Chicken wings are steady and good for resting but can be painful if not locked properly.

CHIMNEY

Chimneys are a mixed blessing. They are usually secure but often difficult to protect. There are really only two sizes of chimneys: squeeze and regular. Squeeze chimneys are bigger than OW in that they allow your whole body into the crack, only it is a tight fit as less secure than a “regular”, full-size chimney. As previously mentioned, protecting chimneys can be tricky. While the advent of specialized pro like Big Bros and large SLCDs has helped this problem, often your best bet is smaller cracks and other features inside the chimney.

FOOTWORK

Just like in sport climbing, what you do with your feet is as important (maybe more important) than what you do with your hands. As with finger/hand/fist jams, the foot or toe jam that you perform is going to vary by the size of the crack, however, the technique for all of the sizes is generally the same. Start by raising your foot and rotating it onto its side, forcing your knee out perpendicular to your body. Set your toe in the crack and lock into place by twisting your knee upward. This cams your toes and/or foot into the crack.

For off-width cracks you will need to use other types of jams like the heel-toe, where you jam your foot in a crack lengthwise, and knee jams, etc. Face holds can be crucial when a crack seams out or gets too small for toe jams. Smearing can also save you for liebacks and other blank sections. Keep in mind the size and profile of your shoe when climbing cracks. Having the right gear can make difference between a send and fall.

find us on facebook


Copyright notice: This website and all its contents are the intellectual property of www.coloradomountaineering.com and its authors. None of the content can be used or reproduced without the approval of www.coloradomountaineering.com.

Climbing and mountaineering are dangerous!! Please see the DISCLAIMER page
For information about how to contact us, visit this link


Saturday, January 7, 2012

A Guide to the Yosemite Decimal System

INTRODUCTION


I am often asked by friends new to mountaineering or climbing just what the grade numbers mean. What is the difference between class 3 and class 4? What is the difference between a 5.7 climb and a 5.10 climb? Just what is a 5.15? And what about those letters? Is it really possible to accurately and effectively subdivide a grade like 5.10 into four, lettered subgrades? Not to mention Aid and protection ratings and the vague Roman numeral grades. This article is an attempt explore a very complex and dynamic grade scale that is the Yosemite Decimal System for grading terrain.

You hear a lot of numbers thrown around in discussions of route difficulty. It's important to remember that any attempt to reduce something as complex as a mountaineering route to a few numbers is bound to be flawed. Any class rating is an oversimplification at best and is certainly not capable of telling the full story about the route you will experience. Attitude, body shape, climbing style, etc, will play major factors in a route's perceived difficulty. Difficulty ratings also don't incorporate other issues, such as protection, rock quality, belay/rappel anchors, weather conditions, rock conditions, etc. Difficulty ratings are also subject to local interpretation, and you might here terms like "soft" or "sandbagged" applied to certain crags. In my backyard, Rifle Mountain Park--a famous limestone sport climbing area--is often called "sandbagged", meaning that the grades climb harder here than other places.

It is also important to note the difference between gym, sport, traditional (trad), and alpine climbing. A person comfortable at 5.10 on bolts or at the gym may panic on a 5.7 trad climb. Alpine routes especially bring their own unique difficulties, and even low 5th class (which I have labeled as "easy") can be quite advanced considering the length of these routes and the objective hazards of a mountain environment. Always seek as much information as you can before attempting a route. Consult locals, buy route guidebooks, and surf your favorite web-beta climbing site to maximize safety.

That being said, difficulty projections are useful to gain a rough idea of the technical demands a given route will entail. A knowledge of the scale, therefore, is important. Consider the following article as a rough guideline to understanding the current system for grading terrain in the United States. Bear in mind two things about my opinion of these grades: I have a Western Colorado bias, which might compare to your local understanding in different ways. Our climbs might be rated harder than yours, or they might be easier. It is hard to say. The truth is, however, that the only way to really understand a grading system such as the Yosemite Decimal System is to experience the rock and subsequent ratings for yourself.

Class 1Class 2Class 3Class 4Class 5

HISTORY

The original Yosemite Class System was created by the Sierra Club in the 1930's to taxonomize the difficulty of various hikes in the Sierra Nevadas. Class 1 was simple  trail walking, and class 5 was considered technical climbing. It was soon discovered that class 5 encompassed such a large group of rock that it was sub-divided into a decimal system. This decimal extension was created and developed in Southern California to classify the difficulty of various routes at Tahquitz and Suicide Rocks. The "old-school" scale started at 5.0 was capped at 5.9. As climbers and their gear got better, even harder climbs were being sent, and the need arose to open the scale. The YDS scale has now been pushed to 5.15c, though only a handful of such routes exist in the world.

YDS CLASS

General terrain difficulty grading system (U.S.):

Difficulty LevelTypeDescriptionAlpine Examples
Class 1Trail walkingThis includes everything from paved concrete at the easier end of the level to very steep but well-defined alpine trails. Using your hands for balance even occasionally is usually not necessary. Mt. Elbert, Northeast Ridge;  
Class 2Off-trail hikingUneven terrain or very rough trails that require considerable attention to footwork. Hands are possibly used on occasion for balance but not relied upon for significant periods. Torreys Peak, South Slopes; Holy Cross North Ridge
Class 3ScramblingHands are now used for upward movement continuously. Holds may be selected and tested but are plentiful and very easy to grip. Third-class terrain is probably never fully vertical. Most people do not need a rope to ascend class 3. An indicator of class 3 is that most people can downclimb it facing outward.Longs Peak, Keyhole Route; Mt. Evans, The Sawtooth
Class 4Hard scrambling/easy climbingHands used continuously for upward movement. Class 4 is sometimes close to vertical but has very good and abundant holds. Some people may want a rope on class 4 terrain but most will not. A key difference between class 3 and 4 is that many people feel the need to downclimb class 4 facing inward.Capitol Peak, Northeast Ridge; Pyramid Peak, Northeast Ridge
Class 5Technical climbingRequires considerable knowledge of ropework, knots, and protection to climb. Although "free-soloing", or climbing without a rope, is admired and even revered by some as the purest form of climbing, it is a rare sort of person that enjoys climbing significant class 5 pitches without a rope. Most people will want rappel, not downclimb, a class 5 pitch, especially if it is of significant length. Longs Peak, North Face; Vestal Peak, Wham Ridge


A 5.12a sport climb in Colorado

5.8+ dihedral in Colorado National Monument
5.7 trad near Carbondale


A breakdown of the YDS 5th class subgrades:

Difficulty LevelTypeDescriptionExamples
5.0-5.4Easy climbingFace: Very good and plentiful holds. This is generally considered "easy" climbing. Usually less than vertical with large jug holds or many otherwise positive holds. Sometimes there seems to be some overlap with easy class 5 climbs and harder class 4 climbs. Short sections of low class 5 are often soloed by experienced climbers.

Crack: It is hard to find a crack that is sub 5.6. If there is such a thing it is almost assuredly sub-vertical and accompanied by numerous face holds.
Longs Peak, North Face; Vestal Peak, Wham Ridge
5.5-5.6Easy moderateFace: Getting a little more challenging now. Often vertical with very good and plentiful holds or slabs with easy-to-find edges. Holds are abundant for climbers of any height and almost ladder-like in quality.

Crack: Probably sub-vertical and likely with plentiful accompanying face holds. Solid comfortable, jams throughout and very little "awkward" places.
Spearhead, North Ridge; Lumpy Ridge, Batman and Robin
5.7-5.9ModerateThis is probably the most popular range and the domain of the weekend warrior. Reasonably athletic, first-time climbers with no experience can sometimes climb at this level on top rope, especially 5.7s and 5.8s. In the alpine realm, however, these routes can be quite advanced.

Face: Plentiful holds that are mostly positive. Climbs of this range can be fully vertical but are almost never overhanging. Some 5.9s could possibly be overhanging for very short sections.

Crack: Just sub-vertical to vertical cracks in the good sizes, espcially thin to perfect hands. Sometimes fingers, espcially if face holds present.
Petit Grepon, South Face; Crestone Needle, Ellingwood Arete; Independence Monument, Otto's Route
5.10-5.12AdvancedRock of this level requires considerable technique and skill. Many climbers never achieve this level, 5.12 in particular. Usually requires considerable time investment to acquire. Routes rated 5.10 or above are usually subdivided into letter grades a, b, c, and d. Though there is often much debate over these letter grades, there is a noticeable difference between a 5.10a and a 5.10b. This is an elite level for trad climbing, as many people climb one or two number grades lower when placing gear.

Face: Requires use of very small holds, crimps, side-pulls, gastons, underclings stemming, etc, a great deal. 5.10s can be overhanging with very good holds. 5.12s are often overhanging with technical movement like dropped knees, etc. 5.12 slabs are very blank.

Cracks: Very difficult cracks with the bare minimum of accompanying face holds. 5.12 cracks are often in the ringlock size or in a better size but overhanging.   
Longs Peak, Casual Route; Sunlight Spire, Standard Route;Eldorado Canyon, The Naked Edge
5.13-5.14Elite Let's face it, climbing at this level is for the very best. Poor holds, monster overhangs, little rest, gymnastic ability, all qualities you are likely to find on a route at this level. Climbing 5.13s and 5.14s requires many hours of dedicated perseverance and considerable natural ability.

Face: This is hard for me to say, I have never climbed at this level, though I have seen a lot of 5.13 and some 5.14 climbs. They are almost always overhanging and requiring amazing use of body position to utilize angled sloper grips. A 5.13 slab is extremely rare.

Crack: Gnarly tips cracks, possibly overhanging, no face holds. There really arent a ton of cracks of this level out there. Overhanging off-widths can get this rating, like Belly Full of Bad Berries in Indian Creek. Recently, the supposed "hardest off-width in the world" was put up in Canyonlands National Park, Utah. Dubbed "The Century Crack" it is a heinously long, flat overhanging off-width that was freed and given a 5.14b rating.

Check out this video of Mason Earle tackling Squamish's Cobra Crack, one of the most famous 5.14 trad climbs in the world. 
Rifle Mountain Park, Zulu; Clear Creek Canyon, Prime Time to Shine
5.15VirtuosoVery few climbers in the world have ever achieved this level and all are essentially household names. Chris Sharma, Tommy Caldwell, Dave Graham, Adam Ondra, and a handful of others complete the list. Though Tommy Caldwell never graded it officially, Flex Luthor, a sport climb in Colorado, was generally considered the first 5.15 in the United States. Caldwell redpointed the route in 2003, and only commented that it was "significantly harder than [neighboring] Kryptonite", which was the first route in the U.S. graded 5.14d. Luthor has yet to be repeated and thus the rating un-confirmed. Here is a video of Chris Sharma and Adam Ondra working what is now known as the hardest climb in the world.Fortress of Solitude, Flex Luthor, La Dura Dura, Spain


5.7 granite trad climb in Unaweep
5.10b overhang on the West Slope

SAFETY/PROTECTION RATINGS

Since the YDS system accounts only for the technical difficulty of the hardest move, a need arose to somehow quantify the quality of protection, and therefore safety, of a given route. Consequently, James Erickson developed a safety grade based on movie ratings. It is important to note, however, that these ratings are given with the assumption that the leader has placed gear perfectly as the route allows. In other words, in inexperienced hands ANY climb can get the most dangerous rating.

G: Good. Protection is more than adequate, with placements available to minimize the fall factor. A leader who places gear properly should never be in danger of hitting ledges or the ground in the event of a fall.

PG: Pretty good. Protection is considered adequate, although moments where there is ledge-fall potential may exist. It is rare to see either a G or PG rating attached to a climb, as it is only when a climb is PG-13 or higher is it noted in guidebooks.

PG-13: Moderate. Protection is generally good with perhaps a section where there is potential for a long, risky fall. This rating is often applied when protection for a climb is not totally adequate but not bad enough to merit a full R or X rating.

R: Runnout. Even with perfect gear placements there are long sections of unprotected rock where if a lead climber fell they would be subject to a long, dangerous fall likely resulting in serious injuries.

X: Extremely runnout. Similar to the R rating, only taken to an extreme. If a leader falls on an X-rated climb, death is a real possibility.

GRADE RATINGS

The American system also includes a Roman numeral "grade" that attempts to evaluate a climb in terms of both time required and technical difficulty. The grading system attempts to combine factors such as: length, commitment, routefinding, difficulty of hardest pitch, average pitch difficulty, number of technical pitches, and others.

Grade I: Short climb requiring a couple hours or less of any difficulty. Single or two-pitch climbs are usually graded I though the numeral is not usually included on the difficulty rating.

Grade II: Half a day to 3/4 of a day of any difficulty. Most 14er hikes in Colorado are graded as II. Otto's Route on Independence Monument near Grand Junction, Colorado is usually graded II.

Grade III: Most of a day with some technical climbing. Long semi-technical climbs such as Ellingwood Ridge on La Plata Peak in Colorado can also receive a Grade III rating.
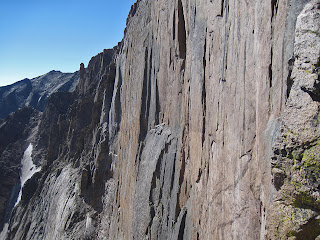
Longs Peak's The Diamond
Grade IV: A full day of technical climbing with the hardest pitch being at least 5.7 in difficulty. The Casual Route on Longs Peak is Grade IV.

Grade V: Requires a day and a half with the hardest pitch being at least 5.8 in difficulty. Very long multi-pitch climbs often requiring aid climbing. The Yellow Wall on the Diamond is usually graded V.

Grade VI: Multi-day climb with many technical pitches requiring difficult free climbing and aid as well. Most of the famous routes on El Cap in Yosemite are Grade VI as well as climbs such as the Hallucinogen Wall in Black Canyon National Park and the North Face of Mt. Hooker in the Wind River Range.

Note: While the grading system specifically lists criteria such as "takes multiple days," advances in the sport have proven these factors as unreliable. Grade VI routes on Halfdome and El Cap, after all, have been climbed in a day or less by modern pioneers.

AID RATINGS

The last component you are likely to see in a rating for a climb in the United States is an aid rating. Aid climbing occurs when terrain becomes too difficult for a leader to climb free and resorts to climbing on gear itself, rather than the rock. Pitons, gear grabbing, etriers, cam hooks, etc, are all components of aid climbing. Personally, I don't do a lot of aid climbing as of now, so the following descriptions are greatly in-debted to Mountaineering: The Freedom a the Hills, a book that anyone interested in alpine climbing should own, and several other sources.

A0: Fixed protection in place, such as a bolt ladder. Sometimes when a free climber pulls on a quickdraw or camalot they will say they did some "A0" on that particular climb.

A1: Easy aid placements, and almost every placement is capable of holding a fall.

A2: Generally good placements, but they may be difficult to place. Intermittent bad placements are also possible.

The Titan, home of the famous aid route Sundevil Chimeny (5.9 A 3)
A3: Hard aid. Requires active testing of placements. Each pitch takes a very long time to lead and there is potential for some very big falls, up to around 80 feet or so. Most falls, however, are not particularly hazardous.

A4: Serious aid. Big half-rope length falls with potential for grounding. The vast majority of placements are only capable of holding body weight. In a sense, this is almost like the "R" rating in the safety section.

A5: Placements hold only body weight for an entire pitch. Any lead fall for the entire pitch is going to be factor 2 (i.e. twice the length of the rope that is out) or the fall will directly ground the leader. Comparable to the "X" rating in the safety section.

A5+/A6: Occasionally people have proposed an A6 grade for several climbs, though many deny the possibility that such a grade can exist. Supposedly, and A6 climb is like an A5 with body weight placements for an entire pitch but with bad anchors as well.

Aid climbs can also be rated C0-C5 which means basically the same thing except that a route can be climbed without the use of pitons, bolts, or drilling. This category is called "clean aid". Once a route has gone clean it is expected that subsequent climbers will honor this style and not further mar the rock.

This article, written by Richard Jensen, is an intriguing read and will help provide an empirical understanding of aid climbing. Further investigation of climbing figures like Royal Robbins, Warren Harding, Jim Beyer, Layton Kor and others will help you understanding more about the sport of aid climbing in America and its illustrious history.

CONCLUSION

Clearly, the system for rating the difficulty of a climb is complicated and takes a long time to master. There is plenty of room for subjectivity and debate. One person's 5.7 is another's 5.9. While some people shun such ratings debates, I actually find them interesting, as long as people do not take them too seriously. True climbers wont waste too much time in rating's debates but instead will be out on the rock, having fun no matter what a climb is "rated". Still, after reading this article you can look at a rating such as IV 5.10c R A3 and have an idea of what to expect from such a climb.

APPENDIX A- Comparison chart for difference difficulty grades:

YDSV-ScaleUIAAFrenchFont.
5.0--II----
5.1--III1--
5.2--III2--
5.3--IV3--
5.4--IV4a--
5.5--IV+4b--
5.6VB-V4c1
5.7VBV+5a2
5.8VB+VI-5b3
5.9V0-VI5c3+
5.10aV0VI6a4
5.10bV0VI+6a4
5.10cV0+VII6a+4+
5.10dV1VII6b5
5.11aV1+VII+6b+5
5.11bV2VII+6c5+
5.11cV3VIII-6c+6A
5.11dV4VIII7a6A+
5.12aV4VIII7a+6B
5.12bV5VIII+7b6C
5.12cV6IX-7b+6C+
5.12dV6IX7c7A
5.13aV7IX7c+7A+
5.13bV8IX+8a7B
5.13cV9X-8a+7C
5.13dV9X8b7C
5.14aV10X8b+7C+
5.14bV11X+8c8A
5.14cV12XI-8c+8A+
5.14dV13XI9a8B
5.15aV14XI+9a+8B+
5.15bV15XI+9b8C

FURTHER READS

-14ers are Dead!!!
-Hardest Move vs. The Route as a Whole: A Discussion of Grading Difficulty
-Ten Class 3 Colorado Classics
-Ten Class 5 Colorado Classics
-Five Hardest 14er Cruxes

Visit THE ARCHIVE: A list of most of our articles sorted by department

find us on facebook

Follow us on Twitter!

Copyright notice: This website and all its contents are the intellectual property of www.coloradomountaineering.com and its authors. None of the content can be used or reproduced without the approval of www.coloradomountaineering.com.

Climbing and mountaineering are dangerous!! Please see the DISCLAIMER page
For information about how to contact us, visit this link