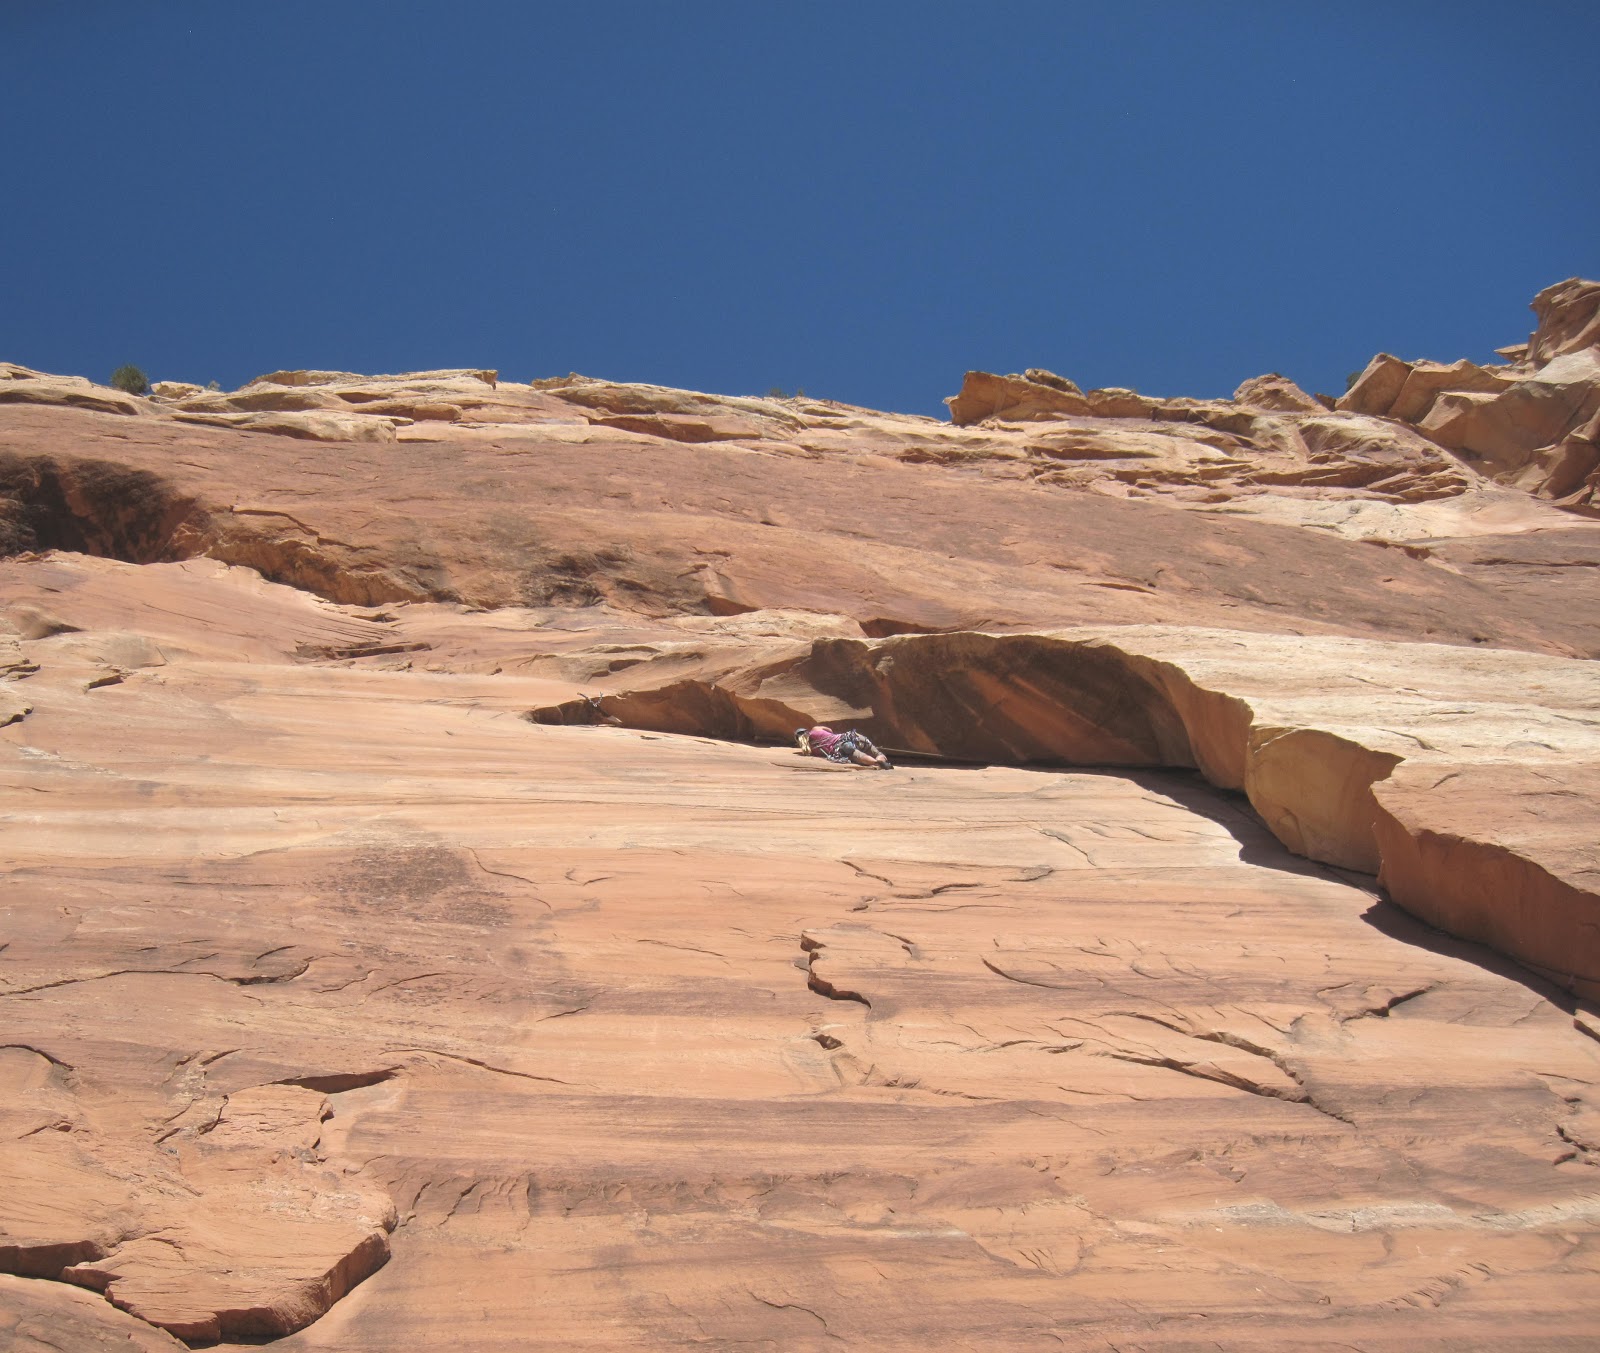
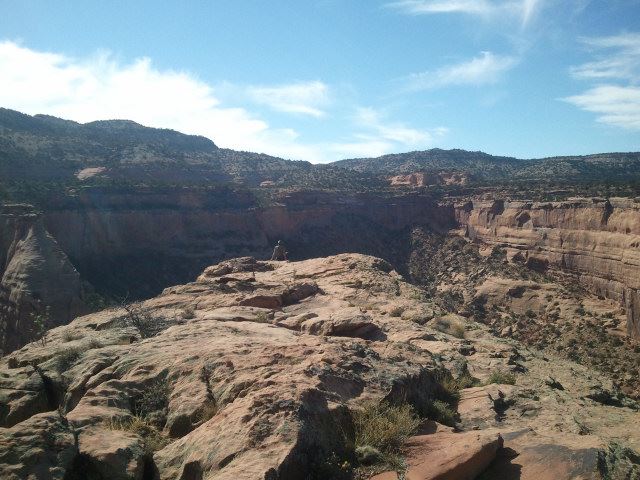
Showing posts with label crack climbing. Show all posts

Thursday, January 17, 2013

Area Profile: Monument Canyon

OVERVIEW
Independence Tower ahead
approaching Independence Tower
in Monument Canyon
Monument Canyon is one of the premier destinations for hiking, climbing, and canyoneering in Colorado National Monument. The broad, sandstone canyon is home to many amazing rock formations and towers such as the Kissing Couple, the Coke Ovens, and, most famous of all, Independence Monument. This canyon is also home to a wealth of sport and trad routes ranging from moderately difficult to expert only. For the less technically-adept Monument Canyon offers simple hiking, bouldering, and scrambling in a pristine sandstone setting. This is a playground of recreational opportunity in a classic southwestern setting. The Colorado National Monument feels like a displaced (albeit far less-expansive) version of the Castle Valley area in Utah and the climbs more resemble what you would expect to find there than typical Colorado climbing areas.  

GETTING THERE

Upper Monument Canyon Trailhead: on Rim Rock Road in the Colorado National Monument, 8.1 miles from the park's west entrance.

Lower Monument Canyon Trailhead: Follow Grand Avenue from downtown Grand Junction west where it turns into Broadway and crosses the Colorado River. Continue on this road 8 miles through a neighbrhood and past many intersections (the road becomes Highway 340) until you reach a small dirt road marked with a sign for Lower Monument Canyon. This turnoff is notoriously easy to miss so be alert. There is a small parking lot here at this popular trailhead.

HISTORY

Pulling the crux of Otto's Route
The history of the Colorado National Monument and Monument Canyon inevitably begins with John Otto. It was thanks largely to Otto's efforts that the government recognized the Monument's value and placed it under national protection in 1911. Otto was named the park's first "custodian". Among other things, Otto established many trails through the park. He was also fond of bolting and chiseling into the rock when the climbing was too difficult. Though this, of course, is not an accepted practice in this part of the world now, Otto pioneered these routes during a different age. Signs of his work are visible on Liberty Cap trail, in Devil's Kitchen, and, most notably, on Independence Monument here in Monument Canyon. Otto's bolted rebar routes are sometimes jokingly called "Otto Ferrata".

The route Otto established on Independence Monument is still the easiest and standard route today. Named after its developer, Otto's Route is a four-pitch, 5.8+ Grade III. It is one of Colorado's few notable sandstone towers.

HIKING

Bighorn sheep in Monument Canyon
Monument Canyon offers a variety of hiking options, all stemming from the Monument Canyon trail. This 5.2 mile route gains almost 1,500’ of elevation as it winds along the broad shoulder of Monument Canyon. At various locations along its length it offers access to many side adventures, including Independence Monument, Wedding Canyon, numerous sport-climbing routes, and other features. While hiking in Monument Canyon, please try to stay on the trail. For all its ruggedness, the desert is a remarkably fragile environment.

The main trail is one of the more popular routes in the Monument. The trail contours along the western cliffs of Monument Canyon. The usually dry creekbed is almost always far below and away from you. The trail can be accessed from either the upper trailhead off Rim Drive or from the Lower Trailhead off Highway 340. The lower trailhead is popular for casual day hikers and is also the normal approach to Independence Monument and the climbs of the lower canyon. A fun day trip is to start at the upper trailhead and hike through to the bottom with a vehicle shuttle.

From the lower trailhead, it is 1 mile to the first climbing wall where the popular First Dihedral route is located. The second main wall comes around 1.3 or so and Independence Monument is at mile 2.3.

CLIMBING

trad climbing in Monument Canyon
Monument Canyon offers some of the best climbing in the Grand Junction area. Everything from tall, multi-pitch desert towers to technical sport climbs are available. There are some serious classics in Monument Canyon. Otto's Route on Independence Monument is the most obvious example but other routes such as First Dihedral, Get a Life, Desert Solitaire,and others are also excellent quality. The nearby Kissing Couple and Sentinel Spire also provide excellent, challenging and adventurous tower climbing.

Here are just a few of the routes in the Monument Canyon area:

Trad

Tower (by easiest route):
Atop Independence Monument

Independence Monument (4 pitches, 5.8+, Grade III)
Kissing Couple (5 pitches 5.11a, Grade III)
Pipe Organ (5 pitches 5.11+)
Sentinel Spire (3 pitches 5.10)
Get a Life (Clueless Tower) (5 pitches, 5.12c, Grade III)

Wall:

Trad climbing in the Colorado National Monument
Left Dihedral (2 pitches, 5.12- or 5.8+ for first pitch only)
Right Dihedral (1 pitch; 5.9)
Out of the Fryingpan (1 pitch, 5.9)
Route 2 (1 pitch, 5.9)
Route 4 (1 pitch, 5.9+)
Desert Solitaire (6 pitches, 5.11a A1, Grade III)

Sport

Circle, Square, and the Triangle (5.10a)
Wingate Warrior (5.11a)
Higher Mind Dynamics (5.11)
Friends Cant Be Trusted (5.12b)
(note: there is a bolting ban in the Monument. For full climbing regulations please check this link to the National Park Service website.)

A topo of the main wall in Lower Monument Canyon:

Route topo of Lower Monument Canyon


The routes in this photo:

1- Circle, Square, and the Triangle [Sport, 100 feet, 5.10a] **
2- Luhr's Route aka Right Dihedral [Trad, 90 feet, 5.8+] **
3- Higher Mind Dynamics [Sport, 100 feet, 5.11] *
4- Friends Can't Be Trusted [Sport, 110 feet, 5.12b] **
5- First Dihedral aka Left Dihedral (first pitch) [Trad, 50 feet, 5.8+] ***
6- First Dihedral aka Left Dihedral (second pitch) [Trad/aid, 70 feet, 5.10+ C2 or 5.12a] **
7- Carter Route [Trad, 100 feet, 5.9] *
8- Euro Route [Trad, 100 feet, 5.11 (class 4 scramble just to get to base)]*

other photos:

A trad climb in Colorado National Monument
Sport climbing in the Colorado National Monument
Bighorn Ram in Colorado National Monument
Desert tower climbing in Colorado
Independence Tower in Colorado National Monument
Monument Canyon in Colorado National Monument

This is only a small sample of the climbing in the area and there is likely still potential for development in the Canyon's hidden corners (which are numerous). This place is vast; the more effort you are willing to put in the more you are going to get out. For a deeper discussion of the trad and sport climbing in Monument Canyon check out the Mountain Project link in the external links section.

SPECIAL CONSIDERATIONS

Monument Canyon is within the borders of the Colorado National Monument. Check with the National Park Service for special regulations  One important rule for climbers is that bolting is no longer allowed within that canyon except to replace old dangerous hardware. The addition of new bolts is forbidden. Season raptor closures also affect several walls. Check with the National Park Service to find out when they are in effect.

TRIP REPORTS

Following in the Chipped Footsteps of a Pioneer
Is Otto's Route on Independence Monument a mega classic or chipped abomination? Explore this great route and the history of its creator.

What Does Independence Mean to You?- A weekend climbing in Unaweep and the Colorado National Monument, including a day at the Lower Monument Canyon slabs and an ascent of Otto's Route on Independence Tower.

Visit THE ARCHIVE: A list of most of our articles sorted by department

find us on facebook


Copyright notice: This website and all its contents are the intellectual property of www.coloradomountaineering.com and its authors. None of the content can be used or reproduced without the approval of www.coloradomountaineering.com.

Climbing and mountaineering are dangerous!! Please see the DISCLAIMER page
For information about how to contact us, visit this link


Monday, December 17, 2012

AREA PROFILE: Unaweep Canyon

INTRODUCTION

Unaweep Canyon is a vast and amazing venue for traditional and alpine style climbing. It's vast granite walls are filled with a lifetime of established routes as well as many many possibilities for future development. The boulder fields of Dakota and Burro Canyon Sandstone that you pass through en route to the granite offer an almost endless supply of boulders, many of which have been developed but many of which are yet to be explored.

HISTORY
The vast granite walls of Unaweep saw very little attention in terms of rock climbing until the 1980's and 1990's when climber K.C. Baum and his friends spent a lot of time in the canyon developing the main routes in the canyon, many of which are Unaweep classics still today. In the subsequent decades, development in Unaweep has been slow. In recent years a more exploratory group of young climbers, especially Rob Pizem and others, have developed new routes in the canyon. Many of these new routes are very difficult.

BOULDERING
In today's climbing landscape the vast boulderfields of Nine Mile Hill, a long sloping hill that precedes the main granite as you approach from the town of Whitewater, have grown more popular than the granite itself. These boulders consist of Dakota and Burro Canyon sandstone and are sometimes flaky and fragile. However, there are many classic areas, some of which were first climbed two decades ago or more. Some of the classic areas include the Fossil Boulder and the Plethora Boulders, Chinese Algebra, the Ice Cubes, just to name a few.

GETTING THERE

From Grand Junction take Highway 50 south towards Montrose and Delta. After 9 miles you will come to a small town called Whitewater. Exit Highway 50 to the west onto Highway 141 toward Naturita, CO. For the first 14 miles you will climb slowly up the slightly mis-named "Nine Mile Hill". The vast amount of the bouldering as well as several crags (such as the Grit Wall and the Peter Wall) are located along this section. The rock is almost entirely Dakota and Burro Canyon Sandstone. After about ten miles you will start to enter the granite inner canyon. You reach the turnoff for Divide Road at mile 14.5.

THE CANYON

Access Fund TH
The Access Fund trailhead is found 2.1 miles past the turn off to Divide Road. It provides access to some of the most popular cliffs in the canyon and for good reason. The Access Fund trail allows you to legally reach the base of the Sunday Wall, the Hidden Valley Wall, and the Fortress Wall: enough vertical terrain to provide many hours of entertainment.


Some of the most popular routes (left to right):

NameTypePitchesDifficulty
Beginner's Lucktrad15.7+
Napa Valleytrad55.11-
Don Juantrad15.6
Banditotrad15.9
Three's Companytrad15.8+
Echoestrad65.12d
Bridge of Airsport15.12a
Optical Illusionssport15.11c
Standard Routetrad15.7
Sweet Sunday Serenadetrad35.9
Sun Dancertrad25.8

Mother's Buttress
The Mother's Buttress area is probably the second most busy climbing area of the canyon. It is located 3.1 miles past the turn off to Divide Road, about a mile past the Access Fund trail. There are a variety of routes from some of the most user-friendly single pitch trad routes to some truly challenging and committing grade III multi-pitch adventures. The Upper and Middle Mother's Buttress are better known for long, challenging multi-pitch routes where the Lower Mother's Buttress is popular for its concentration of easy and moderate trad routes, some of which can be top-roped by scrambling up from the formation's east side.

Some of the more popular routes at the Mother's Buttress area:

NameTypePitchesDifficulty
Doppelgangertrad35.11
Questions and Answerstrad35.10+
Centuriontrad35.11b
Flora Doratrad35.11
Rise of the Phoenixtrad15.10a
Alex's Towertrad15.8
Mint Jamtrad15.8+
No Name Routetrad15.9+
Welcoming Partytrad15.7+
Guide's Routetrad65.9

Sun Tower
Dovercourt (5.7) Lower Sun Tower
The Sun Tower area is a collection of fun spires and cliffs that make for a good smattering of traditional and sport climbs. This area is not as busy as the Access Fund or Lower Mother's, so it is unlikely you will encounter a crowd of climbers here. The Sun Tower is located just east of mm 135 in the main canyon. The access is on private property but is allowed via a well-marked and developed trail.

NameTypePitchesDifficulty
Sunupsport15.8+
Crack of Dontrad15.6
Dovercourttrad15.7
Betty and Ray's Adventure trad35.6
Twin Owlstrad25.9
Daffy Duck Pinnacletrad25.10-


Other areas
This is only an introduction to the climbing available in Unaweep Canyon. Some of the other popular destinations include: The Mighty Mouse Wall, the Divide Wall, the Rainbow Buttress, the Grit Wall, the Unaweep Wall, Castle Rock, the Thimble, and others.

External Links
Unaweep Canyon on Mountainproject.com
Unaweep Canyon on Summitpost.org
The Sunday Wall on Summitpost.org

Visit THE ARCHIVE: A list of most of our articles sorted by department

find us on facebook


Copyright notice: This website and all its contents are the intellectual property of www.coloradomountaineering.com and its authors. None of the content can be used or reproduced without the approval of www.coloradomountaineering.com.

Climbing and mountaineering are dangerous!! Please see the DISCLAIMER page
For information about how to contact us, visit this link


Tuesday, October 16, 2012

What Does Independence Mean to You?


INTRODUCTION

Independence…. The word conjures up notions of patriotism, revolution, the American Dream. Since 1776 Americans have claimed the word as if it was our own creation. To me, however, at least for one weekend, the word came to mean something entirely different. It meant sandstone, pitons, and exposure. Off-widths, overhangs, and, of course, Otto.

It is October in an election year. Everyone wants to talk about politics. Some might say that this is an especially important election, a crucial and vital turning point for our country. Now I won’t say “I don’t care”, even though I might be tempted some days, but I will say that during this election season my mind has been a bit distracted, and the importance of the perpetual Elephant vs. Donkey boxing match has fallen a distant second to my final push to get as much rock and alpine climbing in as possible before Old Man Winter brings his inevitable complications. Next on our list was a climb we had been looking at for awhile: Independence Tower.

A BRIEF HISTORY

Otto’s Route is a classic of American Rock Climbing. While some may say that the climbing on Otto’s Route is too sandy, gnarled and unnatural to be even considered on the same level as other desert tower classics like Castleton, the Priest, or the Fisher Towers, I believe that the route’s unique history makes it more appealing rather than less.

In 1911 a man named John Otto chopped steps and drilled pockets for artificial pipe holds on the west side of the formation. On Independence Day he completed the climb donning cowboy boots and erected an American Flag on its summit. Now John Otto loved this monument. It is hard to judge him today by modern standards when over a hundred years have now passed since his accomplishment. To this day I know people that refuse to climb this route because it is “chipped”. But it’s not like some unworthy climber hacked their way up it by moonlight in the mid 1990’s, Otto’s Route is a rare example of very early North American rock climbing history.

PREPARATIONS

My girlfriend Ella and I decided to make a base camp in Grand Junction, Colorado for a four-day climbing stint culminating in our attempt of Independence Tower. My old college roommate lived in Grand Junction, and with a little libation-related bribery, we convinced him to host our Fall weekend in the desert.

The first day we thought we would warm-up with a little bouldering at a small but well-featured bouldering area just outside of Grand Junction on the border of the Colorado National Monument. This area, known as “Dynamite Shacks”, is home to several area classics, but the best and most famous is an amazingly shaped rock called the Millennium Falcon with a namesake problem that is probably the best juggy roof problem I have ever seen.
Millennium Falcon silhouette

Mt. Garfield in background

Manik sending the Millennium Falcon:


On the second day we decided to step it up and headed up to Unaweep to do some trad climbing. Unaweep is one of my favorite granite playgrounds. I am especially fond of it because of sentimental attachment. While I won’t say “I learned to climb there” (I am still learning to climb), it is where I did some of my first climbing. First on top rope, then later I did my first trad lead there. On this trip we headed to the Sunday Wall. Joined by friends, we decided to spend a relaxing day climbing single pitch.

After taking turns leading a few pitches we packed up our gear and drove down to Nine Mile Hill to spend the rest of our forearms bouldering in Unaweep’s vast fields of Dakota and Burro Canyon sandstone boulders.

On day 3, it seemed like a good idea to get back into sandstone, so we started up Monument trail to climb the Lower Monument Canyon slabs, a fun set of slabby dihedrals and face climbs. We were joined again by a group of friends, this time bringing our number up to five. Sandstone is one of my favorite types of rock. We climbed Luhr’s Route (5.8), First Dihedral (5.8), and onsighted a slabby sport climb just to the right called Circle, Square, and Triangle (5.10a). With five people, it took the better part of the afternoon shuttling each of us up, reloading for each climber to have their shot at leading. As the sun set after a perfect fall day in the high desert, we decided to finish off the rest of our forearms back at the Dynamite Shacks’ boulders.

Left Dihedral (5.8+)

Luhr's Route (5.8)

Leading Luhr's Route

Circle, Square and Triangle (5.10a)

After a dinner and a few beers at a local brewery by my alma mater (now called Colorado Mesa University) we settled in for the evening and organized our rack for the main event the following morning: Independence Tower.

THE CLIMB

I was awake early with excitement, and after breakfast we made our way back to the Lower Monument Canyon trailhead for the climb. Not long after starting the hike, we encountered a Bighorn Sheep ram and accompanying harem at very close range. We snapped a few pictures and continued, excited by this excellent omen. A great start to what we hoped was going to be a great day. 

It is a two and a half mile approach to the Tower, and with a backpack laden with a full trad rack and a stomach with two cups of dark coffee, we arrived at the base of the climb with our hearts hammering in our chests and sweat dripping from our brows. I made the decision to leave my long sleeve shirt behind in my backpack at the route’s base.

Bighorn Sheep in Monument Canyon

Proud Bighorn ram

We quickly sorted out the rack, tied in, and got ready to begin the climb.

Ella and I had struck a deal. She was anxious about the exposed and overhanging crux on pitch 4, so I offered to lead it as long as she battled through the off-width crux of pitch 2. She had just sent a gnarly off-width at the Sunday Wall called Three’s Company two days earlier. While no Pamela Pack, her dexterous climbing style has allowed her to fight through gnarly and awkward off-widths that battered and/or rejected me. Also joining us for the climb was a sport-climbing friend of ours who, having no experience with trad gear or with multi-pitch, was relegated to following and carrying the backpack (something he grumbled about more than once).

Having sorted out the logistics and affixed all the cams, slings and caribiners to my harness that I could possibly need on the climb, I called out “On Belay?” and having received a satisfying answer, took a deep breath and started up the first pitch.

Starting Pitch 1
For those of you who aren’t familiar with the route, pitch one is the longest pitch of the climb. It started with and easy ramp to a mini-chimney followed by a good crack made easy by numerous chopped steps, the first signs of Otto’s legacy. The long pitch in easy and well-protected, clocking in somewhere around 5.5/5.6. I ran it out twenty feet at times and cruised up to the belay ledge in good time.

Since Otto’s Route is almost entirely in the shade, and it being October, I quickly regretted leaving my long-sleeve behind. By the time all three of us had climbed and were on the belay ledge I was cold.

 Next up was the off-width. It loomed ahead looking a bit ugly. Ella took the sharp end and started up an easy ramp leading to the bottom of the most difficult part. The off-width, as it t urns out, is not as bad as it looks. Though there was some groveling and thrutching and swearing, Ella found Otto’s chopped holds and pulled through without undue troubles. She belayed us up to the ledge.

Otto’s Route is a friendly multi-pitch in the sense that all the belays are on huge ledges, often big enough to feel quite comfortable de-roping. We coiled our ropes here and passed through a skinny passage known as the Time Tunnel, which was narrow enough that I had to shift sideways to get my shoulders through.

Pitch 2 Off-width
The Time Tunnel

We emerged on a huge ledge that was partially bathed in sunshine, and I spent the next ten minutes warming up on the sandstone, enjoying a break. Pitch 3 and the crux at the top of pitch 4 towered impressively above us. The top was almost within reach, yet it was clear that things were about to get more interesting. While the rest of the route is essentially a sport climb, it is famous for its exposure and runouts. The first obstacle was a twenty-foot runout to clip the first piton on pitch 3. This was the place for the tri-cams we didn’t have. Otto had drilled holes in the rock, however, to install via ferrata style aluminum pipe holds. While the pipes are gone, the remaining holes make for perfect two-finger pockets. Climbing carefully, Ella clipped the first piton, paused for a deep breath, and climbed past two more somewhat widely spaced pitons to a crux mantle before the anchors at the bottom of pitch 4.

P3 & top P4
Pitch 3
I arrived second on the Sun Deck Ledge and started anxiously up at the famous/infamous pitch 4 and Ella belayed Manik up pitch 3. The first piton was very high and the exposure was impressive. I was more nervous than I thought I would be. We arranged everything for the final pitch and I remember blathering a bit nervously about a sudden lack of confidence I was experiencing, almost hoping that someone else would step up and lead, but feeling suddenly calm, I started slowly and cautiously up the prow towards the summit cap.

No Falls mode is familiar to anyone who climbs class 3 or above in the alpine realm. Knowing that any slip, any mistake at all, could cost you very dearly, perhaps even with your life, is part of adventure climbing and mountaineering. It is not that we venture to these places recklessly with some sort of “death wish”, as some might believe. To me it is more the experience of the total focus and confidence you can achieve when placed in such a situation that requires such utter control. For every accomplishment there is risk. Without the risk and without achievement, there is no going forward. Or in this case, up….

In reality, it didn’t take long to climb the fifty feet of ~5.3 to the first piton. And although the exposure is intense, with 400 feet of air on both sides, when you focus on your climbing you don’t really notice it. The climbing became steeper after the piton. Otto’s drilled pockets, however, were always present right where you needed them. And the worn chipped steps provided decent, albeit slippery, footholds. Resting on a pocket, I made an easy clip of the second piton. Although the crux move was still ahead, the fall potential was basically controlled on the overhanging terrain. Moving up on insecure feet, I clipped the final piton, hesitated a moment, and made an airy and excellent move to the final ledge and pulled the overhang with confidence. I heard Ella and Manik cheer below.

The final pitch
Crux moves

I top-belayed them both up and we mantled onto the summit. This is an amazing perch: a throne amongst a giant cathedral of sandstone spires and walls. We could here the voices of tourists and road bikers at various overlooks along Rim Road in the Park talking about us echoing through the canyon. “Look! There are people on top!” “What are they doing?!?” “How did they get up there?”

summit

From the top
We took in the moment and the scenery for fifteen to twenty minutes then decided it was time to get started on the descent. Descents are always anxious. Most accidents, after all, occurring on the way down. The downclimb off the summit block is a bit scary. Although there are really good handholds it is hard to see your feet, and the exposure is tremendous. From there we did a double-rope rap to the bottom of the third pitch, scrambled down the Time Tunnel, rapped from the top of pitch 2 to the top of pitch 1 (not sure if we could trust beta that you can rap to the ground from the top of P2 with doubled 60ms—which I am told now by several sources now that you can). From the top of pitch 1 we double-rope rapped to the ground and it was done. We had climbed Independence.

One last move for freedom

Story by: Brian Wright
Photos: Brian Wright, Manik Johnson

Visit THE ARCHIVE: A list of most of our articles sorted by department

find us on facebook


Copyright notice: This website and all its contents are the intellectual property of www.coloradomountaineering.com and its authors. None of the content can be used or reproduced without the approval of www.coloradomountaineering.com.

Climbing and mountaineering are dangerous!! Please see the DISCLAIMER page
For information about how to contact us, visit this link


Sunday, January 15, 2012

A Beginner's Guide to Crack Climbing

One of the great things about modern rock climbing is its many facets. I know plenty of very good climbers who are happy doing nothing other than boulder problems and hard limestone face climbs. Some of these climbers are content to never have the burden of learning to climb cracks, much less venture up one while placing their own gear on lead. I am sure there are very good, perhaps even great, climbers like this out there who are probably sadly deficient when it comes to true crack climbing. A better, more rounded climber climber will master both crack and face climbing, and without question learning and/or improving your crack I.Q. can do nothing but improve your overall climbing ability and therefore your performance on boulders and faces only stands to improve also. 
about to get started on a desert fingercrack
Indian Creek, UT has become THE place to learn/hone/perfect "true" crack climbing skills. The reason that "The Creek" has become the cracking Mecca is due to its large collection of aesthetic, uniform cracks. Some IC cracks are continuous in one size for an entire pitch. Others might widen or gradually pinch as you go, forcing you to run the jamming spectrum. Indian Creek deserves its reputation as a premier climbing destination, but there are other great places to climb excellent cracks all over the world, including right here in Colorado. Unaweep Canyon outside Grand Junction and the South Platte area in the central/eastern portion of Colorado's Rockies are both noted for quality granite cracks. Little-known Escalante Creek in-between Grand Junction and Montrose has often been called "Colorado's Indian Creek". While I understand the comparison between the respective climbing styles of Indian Creek and Escalante, the feel of the two of them are quite different, in my opinion. Lumpy Ridge and other climbing destinations in Rocky Mountain National Park also have noted and famous crack climbing.

CRACK SIZES
The crucial thing about climbing cracks is understanding the sizes. Learn the respective jams for each size, practice them judiciously, and you are well on your way to being a crack climber. Also, throw what you think you know about grades out the window. I find that cracks tend to be rated almost on a scale of their own and the correlation between the ratings of crack and face climbs is vague. Depending on your experience level with cracks it is quite possible you will climbing a few grades lower or, less likely, even higher than what you climb on a bolted face route. 

The following is a breakdown of differing crack sizes. The supplied gear notation is my size. Yours may very well differ. I am 5'9 with hands that are probably on the small side of average I would guess, though I have no data to back that up. This is just a general guide to the size crack that would take the gear I use based on empirical knowledge. It varies a bit depending on the crack and the orientation of the placement. The more uniform and smooth the crack the more accurate the gear. 

Tips
Black Diamond Camalot Size: nuts & C3's
Growl. Some of the hardest types of cracks are these beasts. A tips crack is one where you can only get your fingers in to the first knuckle or maybe just past. While often secure, fingertip cracks are painful and strenuous. Add in the fact that you can get no feet in this crack and you could be in for a tough climb. Face holds for your feet can help, as can laybacking if you don’t feel secure with your jams.
fingers

Good Fingers
Black Diamond Camalot Size: #.3-.4
It's hard to beat a good finger crack! You know good fingers when you find them. Bomber, secure, not always comfortable, but steady and trustworthy.

Off-Fingers
Black Diamond Camalot Size: #.5- #.75
Can't get your hand in, can't get a secure fingerjam, this size range is one of the hardest. Depending on your foot and shoe style, you might not be able to get a toe in either. Off-fingers is often broken-up into sub-categories, such as Rattly Fingers, Ringlocks, and Ratchets, each of which takes a distinctly different jamming technique. You might encounter other names for jamming techniques in the range including butterfly jams and finger stacks.
ringlocks

Thin Hands
Black Diamond Camalot Size: #1
Not quite big enough for the thumb-to-palm perfect hand jam, but big enough that you can squeeze most of your hand inside. Thin hands aren’t bad, especially because the amount of toe you should be able to get in this crack.

Perfect Hands
Black Diamond Camalot Size: #2
The favorite size for most climbers. A section or full climb of perfect hands can be one of the most serene experiences in climbing.
perfect hands

Wide/Cupped Hands
Black Diamond Camalot Size: #3
Wide hands are not quite big enough for fists but rattly with good hands jams. You must "cup" yours hands and rotate them to cam into place. This can be a tricky and uncomfortable size.

Fists
Black Diamond Camalot (C4) Size: #4
Fist jams are just under the OW designation and good fist jams can be
cupped hands
bomber. The only catch to fist jam is its lack of size-adjustibility. In your hand is just a little too small, it might feel like you're going to fall.

Off-width

The dreaded Off-width (often abbreviated OW on topos and in guidebooks) is one of the most feared, dreaded, and despised of climbing terrain types. On the other hand, for the hardy the off-width presents a physical and mental challenge that no other climbing mode can match. Climbs like "Lucille” (5.12+/5.13-) at Vedauwoo in Wyoming and "Belly Full of Bad Berries” (5.13) at Indian Creek are two classic testpiece OW climbs. Recently, two British climbers ascended "Century Crack" on the White Rim in Canyonlands National Park, assessing a 5.14b grade to the climb, making it the hardest OW in the world. The two climbers have repeated many of America’s and the world's hardest off-width pitches and claim “Century” to be the hardest. However, some debate their claim of an ascent as they used pre-placed cams for the redpoint.

Off-widths can be broken down into a huge range of sizes:

almost past the OW on P2 of Otto's Route
(III 5.9) Independence Tower
Hand Stack- The next size up from a fist jam, the hand stack is when you (obvious) stack two hand jams together (crossed with both palms out) into a crack. You can cup and cam this stack to adjust to a range of sizes. [BD C4 #4)

Hand/Fist Stack- A little wider and you will have to resort to the hand/fist stack. Not as secure as hand stacks, the hand/fist jam has more range than the fist/fist stack that follows. [BD C4 #5]

Fist/Fist Stack- Grunt, a rattly, unpleasant size. Self explanatory, there are several techniques in this range depending on the size of the crack. Fist/nestled fist where the knuckles of one hand is pointed into the crack and the knuckles of the other are pointed into the wall is one type, this is for cracks that are slightly smaller than the fist/fist crack.

Arm bar/chicken wing- When you need something bigger yet, but still cant get your whole body inside, you can resort to the arm bar or the chicken wing. Both of these jams rely on camming your arm inside a crack that is somewhere between ~8 and ~12 inches depending on the size of your arm. Chicken wings are steady and good for resting but can be painful if not locked properly.

CHIMNEY

Chimneys are a mixed blessing. They are usually secure but often difficult to protect. There are really only two sizes of chimneys: squeeze and regular. Squeeze chimneys are bigger than OW in that they allow your whole body into the crack, only it is a tight fit as less secure than a “regular”, full-size chimney. As previously mentioned, protecting chimneys can be tricky. While the advent of specialized pro like Big Bros and large SLCDs has helped this problem, often your best bet is smaller cracks and other features inside the chimney.

FOOTWORK

Just like in sport climbing, what you do with your feet is as important (maybe more important) than what you do with your hands. As with finger/hand/fist jams, the foot or toe jam that you perform is going to vary by the size of the crack, however, the technique for all of the sizes is generally the same. Start by raising your foot and rotating it onto its side, forcing your knee out perpendicular to your body. Set your toe in the crack and lock into place by twisting your knee upward. This cams your toes and/or foot into the crack.

For off-width cracks you will need to use other types of jams like the heel-toe, where you jam your foot in a crack lengthwise, and knee jams, etc. Face holds can be crucial when a crack seams out or gets too small for toe jams. Smearing can also save you for liebacks and other blank sections. Keep in mind the size and profile of your shoe when climbing cracks. Having the right gear can make difference between a send and fall.

find us on facebook


Copyright notice: This website and all its contents are the intellectual property of www.coloradomountaineering.com and its authors. None of the content can be used or reproduced without the approval of www.coloradomountaineering.com.

Climbing and mountaineering are dangerous!! Please see the DISCLAIMER page
For information about how to contact us, visit this link


Saturday, January 7, 2012

A Guide to the Yosemite Decimal System

INTRODUCTION


I am often asked by friends new to mountaineering or climbing just what the grade numbers mean. What is the difference between class 3 and class 4? What is the difference between a 5.7 climb and a 5.10 climb? Just what is a 5.15? And what about those letters? Is it really possible to accurately and effectively subdivide a grade like 5.10 into four, lettered subgrades? Not to mention Aid and protection ratings and the vague Roman numeral grades. This article is an attempt explore a very complex and dynamic grade scale that is the Yosemite Decimal System for grading terrain.

You hear a lot of numbers thrown around in discussions of route difficulty. It's important to remember that any attempt to reduce something as complex as a mountaineering route to a few numbers is bound to be flawed. Any class rating is an oversimplification at best and is certainly not capable of telling the full story about the route you will experience. Attitude, body shape, climbing style, etc, will play major factors in a route's perceived difficulty. Difficulty ratings also don't incorporate other issues, such as protection, rock quality, belay/rappel anchors, weather conditions, rock conditions, etc. Difficulty ratings are also subject to local interpretation, and you might here terms like "soft" or "sandbagged" applied to certain crags. In my backyard, Rifle Mountain Park--a famous limestone sport climbing area--is often called "sandbagged", meaning that the grades climb harder here than other places.

It is also important to note the difference between gym, sport, traditional (trad), and alpine climbing. A person comfortable at 5.10 on bolts or at the gym may panic on a 5.7 trad climb. Alpine routes especially bring their own unique difficulties, and even low 5th class (which I have labeled as "easy") can be quite advanced considering the length of these routes and the objective hazards of a mountain environment. Always seek as much information as you can before attempting a route. Consult locals, buy route guidebooks, and surf your favorite web-beta climbing site to maximize safety.

That being said, difficulty projections are useful to gain a rough idea of the technical demands a given route will entail. A knowledge of the scale, therefore, is important. Consider the following article as a rough guideline to understanding the current system for grading terrain in the United States. Bear in mind two things about my opinion of these grades: I have a Western Colorado bias, which might compare to your local understanding in different ways. Our climbs might be rated harder than yours, or they might be easier. It is hard to say. The truth is, however, that the only way to really understand a grading system such as the Yosemite Decimal System is to experience the rock and subsequent ratings for yourself.

Class 1Class 2Class 3Class 4Class 5

HISTORY

The original Yosemite Class System was created by the Sierra Club in the 1930's to taxonomize the difficulty of various hikes in the Sierra Nevadas. Class 1 was simple  trail walking, and class 5 was considered technical climbing. It was soon discovered that class 5 encompassed such a large group of rock that it was sub-divided into a decimal system. This decimal extension was created and developed in Southern California to classify the difficulty of various routes at Tahquitz and Suicide Rocks. The "old-school" scale started at 5.0 was capped at 5.9. As climbers and their gear got better, even harder climbs were being sent, and the need arose to open the scale. The YDS scale has now been pushed to 5.15c, though only a handful of such routes exist in the world.

YDS CLASS

General terrain difficulty grading system (U.S.):

Difficulty LevelTypeDescriptionAlpine Examples
Class 1Trail walkingThis includes everything from paved concrete at the easier end of the level to very steep but well-defined alpine trails. Using your hands for balance even occasionally is usually not necessary. Mt. Elbert, Northeast Ridge;  
Class 2Off-trail hikingUneven terrain or very rough trails that require considerable attention to footwork. Hands are possibly used on occasion for balance but not relied upon for significant periods. Torreys Peak, South Slopes; Holy Cross North Ridge
Class 3ScramblingHands are now used for upward movement continuously. Holds may be selected and tested but are plentiful and very easy to grip. Third-class terrain is probably never fully vertical. Most people do not need a rope to ascend class 3. An indicator of class 3 is that most people can downclimb it facing outward.Longs Peak, Keyhole Route; Mt. Evans, The Sawtooth
Class 4Hard scrambling/easy climbingHands used continuously for upward movement. Class 4 is sometimes close to vertical but has very good and abundant holds. Some people may want a rope on class 4 terrain but most will not. A key difference between class 3 and 4 is that many people feel the need to downclimb class 4 facing inward.Capitol Peak, Northeast Ridge; Pyramid Peak, Northeast Ridge
Class 5Technical climbingRequires considerable knowledge of ropework, knots, and protection to climb. Although "free-soloing", or climbing without a rope, is admired and even revered by some as the purest form of climbing, it is a rare sort of person that enjoys climbing significant class 5 pitches without a rope. Most people will want rappel, not downclimb, a class 5 pitch, especially if it is of significant length. Longs Peak, North Face; Vestal Peak, Wham Ridge


A 5.12a sport climb in Colorado

5.8+ dihedral in Colorado National Monument
5.7 trad near Carbondale


A breakdown of the YDS 5th class subgrades:

Difficulty LevelTypeDescriptionExamples
5.0-5.4Easy climbingFace: Very good and plentiful holds. This is generally considered "easy" climbing. Usually less than vertical with large jug holds or many otherwise positive holds. Sometimes there seems to be some overlap with easy class 5 climbs and harder class 4 climbs. Short sections of low class 5 are often soloed by experienced climbers.

Crack: It is hard to find a crack that is sub 5.6. If there is such a thing it is almost assuredly sub-vertical and accompanied by numerous face holds.
Longs Peak, North Face; Vestal Peak, Wham Ridge
5.5-5.6Easy moderateFace: Getting a little more challenging now. Often vertical with very good and plentiful holds or slabs with easy-to-find edges. Holds are abundant for climbers of any height and almost ladder-like in quality.

Crack: Probably sub-vertical and likely with plentiful accompanying face holds. Solid comfortable, jams throughout and very little "awkward" places.
Spearhead, North Ridge; Lumpy Ridge, Batman and Robin
5.7-5.9ModerateThis is probably the most popular range and the domain of the weekend warrior. Reasonably athletic, first-time climbers with no experience can sometimes climb at this level on top rope, especially 5.7s and 5.8s. In the alpine realm, however, these routes can be quite advanced.

Face: Plentiful holds that are mostly positive. Climbs of this range can be fully vertical but are almost never overhanging. Some 5.9s could possibly be overhanging for very short sections.

Crack: Just sub-vertical to vertical cracks in the good sizes, espcially thin to perfect hands. Sometimes fingers, espcially if face holds present.
Petit Grepon, South Face; Crestone Needle, Ellingwood Arete; Independence Monument, Otto's Route
5.10-5.12AdvancedRock of this level requires considerable technique and skill. Many climbers never achieve this level, 5.12 in particular. Usually requires considerable time investment to acquire. Routes rated 5.10 or above are usually subdivided into letter grades a, b, c, and d. Though there is often much debate over these letter grades, there is a noticeable difference between a 5.10a and a 5.10b. This is an elite level for trad climbing, as many people climb one or two number grades lower when placing gear.

Face: Requires use of very small holds, crimps, side-pulls, gastons, underclings stemming, etc, a great deal. 5.10s can be overhanging with very good holds. 5.12s are often overhanging with technical movement like dropped knees, etc. 5.12 slabs are very blank.

Cracks: Very difficult cracks with the bare minimum of accompanying face holds. 5.12 cracks are often in the ringlock size or in a better size but overhanging.   
Longs Peak, Casual Route; Sunlight Spire, Standard Route;Eldorado Canyon, The Naked Edge
5.13-5.14Elite Let's face it, climbing at this level is for the very best. Poor holds, monster overhangs, little rest, gymnastic ability, all qualities you are likely to find on a route at this level. Climbing 5.13s and 5.14s requires many hours of dedicated perseverance and considerable natural ability.

Face: This is hard for me to say, I have never climbed at this level, though I have seen a lot of 5.13 and some 5.14 climbs. They are almost always overhanging and requiring amazing use of body position to utilize angled sloper grips. A 5.13 slab is extremely rare.

Crack: Gnarly tips cracks, possibly overhanging, no face holds. There really arent a ton of cracks of this level out there. Overhanging off-widths can get this rating, like Belly Full of Bad Berries in Indian Creek. Recently, the supposed "hardest off-width in the world" was put up in Canyonlands National Park, Utah. Dubbed "The Century Crack" it is a heinously long, flat overhanging off-width that was freed and given a 5.14b rating.

Check out this video of Mason Earle tackling Squamish's Cobra Crack, one of the most famous 5.14 trad climbs in the world. 
Rifle Mountain Park, Zulu; Clear Creek Canyon, Prime Time to Shine
5.15VirtuosoVery few climbers in the world have ever achieved this level and all are essentially household names. Chris Sharma, Tommy Caldwell, Dave Graham, Adam Ondra, and a handful of others complete the list. Though Tommy Caldwell never graded it officially, Flex Luthor, a sport climb in Colorado, was generally considered the first 5.15 in the United States. Caldwell redpointed the route in 2003, and only commented that it was "significantly harder than [neighboring] Kryptonite", which was the first route in the U.S. graded 5.14d. Luthor has yet to be repeated and thus the rating un-confirmed. Here is a video of Chris Sharma and Adam Ondra working what is now known as the hardest climb in the world.Fortress of Solitude, Flex Luthor, La Dura Dura, Spain


5.7 granite trad climb in Unaweep
5.10b overhang on the West Slope

SAFETY/PROTECTION RATINGS

Since the YDS system accounts only for the technical difficulty of the hardest move, a need arose to somehow quantify the quality of protection, and therefore safety, of a given route. Consequently, James Erickson developed a safety grade based on movie ratings. It is important to note, however, that these ratings are given with the assumption that the leader has placed gear perfectly as the route allows. In other words, in inexperienced hands ANY climb can get the most dangerous rating.

G: Good. Protection is more than adequate, with placements available to minimize the fall factor. A leader who places gear properly should never be in danger of hitting ledges or the ground in the event of a fall.

PG: Pretty good. Protection is considered adequate, although moments where there is ledge-fall potential may exist. It is rare to see either a G or PG rating attached to a climb, as it is only when a climb is PG-13 or higher is it noted in guidebooks.

PG-13: Moderate. Protection is generally good with perhaps a section where there is potential for a long, risky fall. This rating is often applied when protection for a climb is not totally adequate but not bad enough to merit a full R or X rating.

R: Runnout. Even with perfect gear placements there are long sections of unprotected rock where if a lead climber fell they would be subject to a long, dangerous fall likely resulting in serious injuries.

X: Extremely runnout. Similar to the R rating, only taken to an extreme. If a leader falls on an X-rated climb, death is a real possibility.

GRADE RATINGS

The American system also includes a Roman numeral "grade" that attempts to evaluate a climb in terms of both time required and technical difficulty. The grading system attempts to combine factors such as: length, commitment, routefinding, difficulty of hardest pitch, average pitch difficulty, number of technical pitches, and others.

Grade I: Short climb requiring a couple hours or less of any difficulty. Single or two-pitch climbs are usually graded I though the numeral is not usually included on the difficulty rating.

Grade II: Half a day to 3/4 of a day of any difficulty. Most 14er hikes in Colorado are graded as II. Otto's Route on Independence Monument near Grand Junction, Colorado is usually graded II.

Grade III: Most of a day with some technical climbing. Long semi-technical climbs such as Ellingwood Ridge on La Plata Peak in Colorado can also receive a Grade III rating.
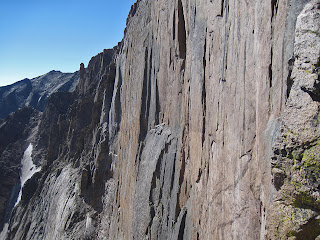
Longs Peak's The Diamond
Grade IV: A full day of technical climbing with the hardest pitch being at least 5.7 in difficulty. The Casual Route on Longs Peak is Grade IV.

Grade V: Requires a day and a half with the hardest pitch being at least 5.8 in difficulty. Very long multi-pitch climbs often requiring aid climbing. The Yellow Wall on the Diamond is usually graded V.

Grade VI: Multi-day climb with many technical pitches requiring difficult free climbing and aid as well. Most of the famous routes on El Cap in Yosemite are Grade VI as well as climbs such as the Hallucinogen Wall in Black Canyon National Park and the North Face of Mt. Hooker in the Wind River Range.

Note: While the grading system specifically lists criteria such as "takes multiple days," advances in the sport have proven these factors as unreliable. Grade VI routes on Halfdome and El Cap, after all, have been climbed in a day or less by modern pioneers.

AID RATINGS

The last component you are likely to see in a rating for a climb in the United States is an aid rating. Aid climbing occurs when terrain becomes too difficult for a leader to climb free and resorts to climbing on gear itself, rather than the rock. Pitons, gear grabbing, etriers, cam hooks, etc, are all components of aid climbing. Personally, I don't do a lot of aid climbing as of now, so the following descriptions are greatly in-debted to Mountaineering: The Freedom a the Hills, a book that anyone interested in alpine climbing should own, and several other sources.

A0: Fixed protection in place, such as a bolt ladder. Sometimes when a free climber pulls on a quickdraw or camalot they will say they did some "A0" on that particular climb.

A1: Easy aid placements, and almost every placement is capable of holding a fall.

A2: Generally good placements, but they may be difficult to place. Intermittent bad placements are also possible.

The Titan, home of the famous aid route Sundevil Chimeny (5.9 A 3)
A3: Hard aid. Requires active testing of placements. Each pitch takes a very long time to lead and there is potential for some very big falls, up to around 80 feet or so. Most falls, however, are not particularly hazardous.

A4: Serious aid. Big half-rope length falls with potential for grounding. The vast majority of placements are only capable of holding body weight. In a sense, this is almost like the "R" rating in the safety section.

A5: Placements hold only body weight for an entire pitch. Any lead fall for the entire pitch is going to be factor 2 (i.e. twice the length of the rope that is out) or the fall will directly ground the leader. Comparable to the "X" rating in the safety section.

A5+/A6: Occasionally people have proposed an A6 grade for several climbs, though many deny the possibility that such a grade can exist. Supposedly, and A6 climb is like an A5 with body weight placements for an entire pitch but with bad anchors as well.

Aid climbs can also be rated C0-C5 which means basically the same thing except that a route can be climbed without the use of pitons, bolts, or drilling. This category is called "clean aid". Once a route has gone clean it is expected that subsequent climbers will honor this style and not further mar the rock.

This article, written by Richard Jensen, is an intriguing read and will help provide an empirical understanding of aid climbing. Further investigation of climbing figures like Royal Robbins, Warren Harding, Jim Beyer, Layton Kor and others will help you understanding more about the sport of aid climbing in America and its illustrious history.

CONCLUSION

Clearly, the system for rating the difficulty of a climb is complicated and takes a long time to master. There is plenty of room for subjectivity and debate. One person's 5.7 is another's 5.9. While some people shun such ratings debates, I actually find them interesting, as long as people do not take them too seriously. True climbers wont waste too much time in rating's debates but instead will be out on the rock, having fun no matter what a climb is "rated". Still, after reading this article you can look at a rating such as IV 5.10c R A3 and have an idea of what to expect from such a climb.

APPENDIX A- Comparison chart for difference difficulty grades:

YDSV-ScaleUIAAFrenchFont.
5.0--II----
5.1--III1--
5.2--III2--
5.3--IV3--
5.4--IV4a--
5.5--IV+4b--
5.6VB-V4c1
5.7VBV+5a2
5.8VB+VI-5b3
5.9V0-VI5c3+
5.10aV0VI6a4
5.10bV0VI+6a4
5.10cV0+VII6a+4+
5.10dV1VII6b5
5.11aV1+VII+6b+5
5.11bV2VII+6c5+
5.11cV3VIII-6c+6A
5.11dV4VIII7a6A+
5.12aV4VIII7a+6B
5.12bV5VIII+7b6C
5.12cV6IX-7b+6C+
5.12dV6IX7c7A
5.13aV7IX7c+7A+
5.13bV8IX+8a7B
5.13cV9X-8a+7C
5.13dV9X8b7C
5.14aV10X8b+7C+
5.14bV11X+8c8A
5.14cV12XI-8c+8A+
5.14dV13XI9a8B
5.15aV14XI+9a+8B+
5.15bV15XI+9b8C

FURTHER READS

-14ers are Dead!!!
-Hardest Move vs. The Route as a Whole: A Discussion of Grading Difficulty
-Ten Class 3 Colorado Classics
-Ten Class 5 Colorado Classics
-Five Hardest 14er Cruxes

Visit THE ARCHIVE: A list of most of our articles sorted by department

find us on facebook

Follow us on Twitter!

Copyright notice: This website and all its contents are the intellectual property of www.coloradomountaineering.com and its authors. None of the content can be used or reproduced without the approval of www.coloradomountaineering.com.

Climbing and mountaineering are dangerous!! Please see the DISCLAIMER page
For information about how to contact us, visit this link