Showing posts with label trad climbing. Show all posts

Wednesday, October 11, 2017

Hayden Kennedy: A Celebration of Accomplishments

by Brian Wright

Colorado Mountaineering was sickened to learn yesterday about the deaths of Hayden Kennedy and his partner/girlfriend Inge Perkins. 

Screenshot from an interview where Kennedy describes his
decision to chop bolts off the Compressor Route on
Cerro Torre in Patagoina
Hayden Kennedy was a living legend in my mind, and a climber I looked up to as someone I could only dream of emulating. I first met him when he was still a young teenager learning how to whitewater kayak. I was an instructor at the local whitewater paddling shop at the time, and remember being impressed by Hayden and his entire family. I never got to know Hayden very well. In fact, he probably wouldn't have remembered my name if I saw him on the street. But I remembered him and I always felt a bit in awe of his understated skills and humility.

I was very touched by a poignant article he wrote for eveningsends.com just a few weeks ago. I read it last night after hearing the news of this terrible sequence of events. Some of his incredibly well-written words are even more moving in retrospect, knowing what was looming unknown in his near future. His article can be read here.

The details of this tragedy have been reported on by numerous news outlets. One informative article can be found on Climbing Magazine's website. The purpose of this post, however, is to celebrate some of Kennedy's accomplishments and share a few videos that highlight his tremendous success and skill as a mountaineer and a person.

Kennedy and Kyle Dempster discussing their climb on the South Face of the Ogre in Pakistan for which they won the Piolets d'Or, the most prestigious award in climbing. (Note: Dempster also died in a climbing accident in 2016 on a remote mountain in China)


Hayden dropping some cliffs during a telemark extreme skiing championship


Hayden discusses his decision to cut bolts of the Compressor Route on Cerro Torre in Patagonia


I was not able to find a video of Hayden making the first ascent of Carbondale Shortbus in Indian Creek. The old video I had linked in several posts has since been taken down. I have however linked a video of Nick Martino working this route, so you can get an idea of the challenge and skill this project required.


-------------------------------------------------------------------------------
Visit THE ARCHIVE: A list of most of our articles sorted by department

find us on facebook


Copyright notice: This website and all its contents are the intellectual property of www.coloradomountaineering.com and its authors. None of the content can be used or reproduced without the approval of www.coloradomountaineering.com.

Climbing and mountaineering are dangerous!! Please see the DISCLAIMER page
For information about how to contact us, visit this link


Thursday, July 27, 2017

VIDEO: Speed Climbing the Naked Edge

The Naked Edge is one of Colorado's most classic multipitch traditional routes. Located in Eldorado, this 6 pitch, 5.11b megaclassic was first climbed via aid in 1962 by Layton Kor and Bob Culp and later freed for the first time in 1971. The incredible, still stout testpiece remains of the most sought-after climbing ascents in the state.

This video shows Scott Bennett and Brad Gobright training to reclaim the speed ascent record of this line, which they had once held at 29:53.


Visit THE ARCHIVE: A list of most of our articles sorted by department

find us on facebook

Follow us on Twitter!

Copyright notice: This website and all its contents are the intellectual property of www.coloradomountaineering.com and its authors. None of the content can be used or reproduced without the approval of www.coloradomountaineering.com.

Climbing and mountaineering are dangerous!! Please see the DISCLAIMER page
For information about how to contact us, visit this link


Tuesday, July 12, 2016

Stranded on Monitor Rock Near Independence Pass

Monitor Rock. Trooper Traverse follows the prominent
 ramp/crack system in the center of the main face

We’re going to be on the news….

It was the only thought my panicked mind could summon. “Three rock climbers had to be rescued last night off Monitor Rock near Twin Lakes just east of Independence Pass. Reportedly, the group was stranded when their rope became stuck as they were rappelling from the 450-foot-tall rock.” Something like that. People on their couches at home would guffaw and grumble “idiots” before clicking around for something better. Now that we’d been in our predicament for over an hour, this scenario seemed not just possible, but likely.

On the positive side, we were on a solid ledge that had not one but two bolted anchors. At ten feet long, two feet wide and 350 feet off the ground, was it comfortable? No. But at least we were in no danger of falling. It was autumn, however, and evening was approaching. Though it had been a warm, bluebird day, once that sun went down, it was going to get cold.

“We can think this through,” said my wife, Ella, sounding much calmer than I felt.

“There is no reason to panic.”

“I also have this,” added my friend and often climbing partner, Trent. He reached into his backpack and retrieved a Spot Satellite GPS messenger. With one touch of the panic button, this little device would transmit an S.O.S along with our coordinates to emergency dispatch, and the finest in backcountry rescue services would be deployed to save us. But how long would it take them to arrive? Monitor Rock was 26 miles from Leadville, where it was likely any such rescue operation would be staged. The amount of time it would take to mobilize and travel here alone could be hours. Then they would have to climb to us, and get us down, and do whatever follow-up was required. I was guessing we’d be lucky to get home by midnight.

“Are we at that point?” I asked, watching his finger edge closer to the button. The three of us were silent. There was only so much pulling one could do on a stuck rope before giving in to the harsh reality.

Ella sighed. “We might be.”
The author leads the pitch 4 traverse pitch

I swore out loud, which didn’t help anything. The climb itself, a historical multi-pitch traditional route known as the Trooper Traverse (5 pitches, 5.8+) had been smooth. We’d swapped leads and made our way up the enjoyable line in decent time, even taking the more-difficult 5.9 crux variation for the final pitch. The setting for Monitor Rock was breathtaking, especially with the golds, oranges and yellows of fall at their peak. The cobalt sky was dotted with friendly, paintbrush clouds and the perfectly warm air was so still we could hear calls of “take” and “lowering” from the climbers cragging on other routes far below us at the base of the wall. I hated the stark juxtaposition of all that beauty against our current predicament.

“All right,” I said to Trent with a deep breath. “I guess we have to do it.”

Trent’s thumb hovered over the panic button.

* * *

It’s a common mountaineering axiom that the way down is the most dangerous part of an expedition. The descent occurs later in the day when we are exhausted and weather is more likely. And while going down, we are leading with our feet instead of our heads. Then there is complacency. Feeling that the summit, and the worst, is behind us, we lower our guard.

Rappelling is a special type of descent that can speed up our progress and allow us to cruise past gnarly sections that would be difficult or impossible to downclimb. Duane Raleigh, publisher of Rock & Ice magazine and first ascensionist of many Western Colorado rock climbs, asserts in his article “Rappelling-Surviving Climbing’s Diciest Business” that “of the myriad ways to kill yourself climbing, rappelling is the quickest.” This grim truism echoes through my head every time I fix myself to a rope to begin a rappel descent.

When done properly, however, rappelling is quite simple, easy and generally safe, but the consequences of any broken link in the chain are disastrous. There are many ways rappelling can go wrong, including anchor failure, knot failure, improper connections with the belay device, loss of brake-hand control, failure to tie backup knots, rappelling off the end of the rope, and more. One of the most common rappelling faux pas, however, is getting a rope stuck when pulling it.

Now, there is an advantage to this mistake over the others: you are at the bottom of the rappel when it happens. If it were just a single rappel then at worst you have to leave your expensive rope behind and hope you can come back for it later.

On a multi-rappel descent, getting your rope stuck up high can leave you stranded with hundreds, sometimes thousands, of feet still to the ground.
*               *               *
“Let me try it one more time,” said Trent, slipping the GPS tracker back into his bag. Taking both ends of the rope, he began to saw the two lines back and forth.

At first, nothing would budge. Then suddenly, a hundred feet above us, the knot popped free from whatever it had been stuck on and began pulling through the anchor. A minute later it hissed down the smooth granite and landed at our feet.

We stared at it with our mouths hanging open in shock. After more than an hour being stranded, we were free. We cheered. We hugged. We celebrated. No hours-long rescue. No Channel 5 News story. No being benighted on a two-foot-wide ledge at 10,000 feet elevation. We were going home.
Ella Wright just before the rope
became stuck

There were still two rappels to go however, and we couldn’t lose focus. The last thing we wanted was to get out of one bad situation by the skin of our teeth only to end up in a worse one. The best moment, however, of any rappel is when your feet and rope are back on the ground, and an hour later we were there. At the bottom of the rock we laid in the grass and gravel and tried to laugh off what had just happened. It seemed surreal, the sudden transition from danger to safety.

“Let’s get out of here,” Ella said after we packed up our bags. She started the march down the trail in the direction of our car.

“I couldn’t agree more,” added Trent and followed.

I looked back at sweeping heights of Monitor Rock. Evening was already almost at hand and the glistening gray rock was falling into shadow. I could still pick out the ledge where we had spent an hour stranded. I couldn’t help but think how close we’d come to still being up there.

“Maybe we need to go get a beer,” I added. I turned away from the rock to follow the others, and didn’t look back.

NOTE: This article was originally published in Our Backyard (Volume 11, Issue 3, June 2016), an outdoor publication that is inserted in The Nickel and the Moab Times-Independent. 


Visit THE ARCHIVE: A list of most of our articles sorted by department

find us on facebook

Follow us on Twitter!

Copyright notice: This website and all its contents are the intellectual property of www.coloradomountaineering.com and its authors. None of the content can be used or reproduced without the approval of www.coloradomountaineering.com.

Climbing and mountaineering are dangerous!! Please see the DISCLAIMER page
For information about how to contact us, visit this link


Monday, July 6, 2015

HOT ROUTE: Two Ears-Zanzibar Dihedral (300', 5.8+)

Trailhead: Weller Lake Campground
Distance: 1 mile
Elevation gain: 800 feet
Difficulty: 2 pitches, 5.8+

OVERVIEW
While not a summit-reaching climb, Independence Pass's Two Ears- Zanzibar Dihedral is one route that any intermediate, technical alpine climber might be interested in. This 300' climb highlights two long pitches on superb granite with good protection in a spectacular alpine setting. While a steep and rough talus approach may deter some climbers, those who brave the rocky beginning are rewarded with an excellent climb that finishes in the classic 150' dihedral pitch the "Zanzibar Dihedral."

THE ROUTE
Approach- From the Weller Campground find a climber's trail behind campsite number 6 and wind (briefly) through the pine and Aspen trails. Follow a series of cairns for the path of least resistance or pick your own way up to the base of the obvious 300' wall.

Zanzibar Dihedral, used courtesy of Mountainproject.com
Pitch One- "Two Ears" (5.7)- This long pitch is often regarded as a climb unto itself. Start just right of a pine tree on some obvious jugs. Work up and right to a series of broken cracks. The protection is good and solid throughout. There are many possibilities for cams and nuts. Small cams finger size and less are most useful. Work past two old pitons to a good splitter that ends in a pod. Work up and right to a two-bolt anchor just off a large ledge at the base of the dihedral.

Pitch 2- "Zanibar Dihedral" (5.8+)- This long, excellent pitch scales an overhanging dihedral with great protection and plentiful face holds to make it through. Several layers of cracks allow a variety of gear to protect. At the final bulge, step right on face holds and back left to easier ground at the top. A classic, granite dihedral!

DESCENT
Two double-rope raps from chain anchors will lead you to the ground. It will require two 60 meter ropes to make the descent.

DIRECTIONS
From the "S-Turn" in downtown Aspen, Colorado, follow Highway 82 south towards Independence Pass for 7.8 miles. Park either on the right side of road (heading from Aspen to Indy Pass) at the Weller Lake TH or set-up a basecamp in the excellent campground across the road.

LINKS
Zanzibar Dihedral on Mountainprojet.com

Visit THE ARCHIVE: A list of most of our articles sorted by department

find us on facebook


Copyright notice: This website and all its contents are the intellectual property of www.coloradomountaineering.com and its authors. None of the content can be used or reproduced without the approval of www.coloradomountaineering.com.

Climbing and mountaineering are dangerous!! Please see the DISCLAIMER page
For information about how to contact us, visit this link


Friday, July 3, 2015

Following the Chipped Footsteps of a Pioneer

Independence Monument home of Otto's Route (5.8, 4 pitches) in Colorado
Independence Monument in Colorado National Monument
On a windy exposed prow high above the iron-rusted desert floor, I climbed nervously toward the first piton. It is the infamous runout of pitch four of Otto’s Route on Independence Tower in Colorado National Monument. Sixty feet of un-protected climbing on a narrow, slick spire. My heart was roaring in my chest, palms damp from adrenaline. One slip now would send me careening over the edge one hundred and fifty feet to the Lunchbox Ledge below.

“You’re doing great!” Ella, my belayer and wife, yelled up in my direction. I wanted to believe her, but how could she be so sure? The hardest part was still ahead. I placed each foot with intense care, battling the sensation I was tap dancing with disaster. Finally, the first piton was in front of me and the carabiner snapped shut as the rope dropped into place. An elephant of anxiety fell from my shoulders.

“I’m in,” I yelled down. The summit was tantalizingly close, but between me and success was twenty feel of over-hanging sandstone pocked with big but slippery holds.

The spire’s phallic exposure caught up to me all at once. For a moment I could have been floating. It seemed like nothing but air was all around. The desert’s exhale filled my ears. Relax, I commanded myself. But instead of taking my own advice, I peered nervously down the sheer, three-hundred foot drops to each side.

With a deep exhale, I climbed towards the infamous and exposed crux.
*
Approaching the crux of Otto's Route
On Independence Day 1911 a man named John Otto planted the American flag atop the tallest free-standing feature in the newly minted Colorado National Monument. He’d reached the top of Independence Tower by chipping steps and drilling two-inch holes to install a serpentine pipe-ladder all the way up the majestic maroon pinnacle. Without a belayer but occasionally using a hemp rope as an anchor, Otto completed the astounding feat using a miner’s hand drill, a hammer and a set of cowboy boots. Little did he know as he chopped his way skyward, that not only was he cementing his own place in Colorado history, he was creating what would later become one of western Colorado’s most classic multi-pitch rock climbs.

But the feature that drew his eye more than any other was the impressive 300-foot spire that sat alone and proud in the open basin between Monument and Wedding Canyons. Sticking with his fervently patriotic theme, Otto named the feature Independence Monument and lived for some time in a tent at its base. By then Otto had already developed a taste for expressing his strongly American sentiment by planting flags atop other park features, such as Liberty Cap, a rounded, petrified sand dune stationed prominently in the park’s center, east of Monument Canyon. But Otto’s eye had already been turning upward for something greater.
*

Higher still, I clipped the second piton. Just a few more moves and I would be on top. The rock was getting steeper, angling towards the overhanging summit cap ten feet higher. Hesitating on a large handhold, I worked my feet high on the sandy pockets and pulled myself up toward overhanging bulge.

Sitting on top of the tower as Ella gets ready to follow
“I’m in!” I yelled down, clipping in my daisy chain to the safety of the steel bolts.As Ella prepared to climb, I basked in the magic of the place where I stood. All the hard work, the two-and-a-half mile hike, the four pitches of climbing, had led to this. Standing to the south was the Kissing Couple, perhaps the most distinguishable formation in the canyon other than Independence. And to the west the Coke Ovens, another impressive collection of sandstone spires. The wind was blowing but the sun was out. And since most of the route had been in the shade, it felt good to warm my bones under the October sun.

“Okay! On belay!” I tugged the rope through the belay device as Ella picked her way up the prow to join me.

There are people that call Otto’s Route a classic. And those who considered it a sandy, chipped abomination. Every year hundreds, perhaps thousands, of rock climbers climb their way up the shaded face of Independence Monument, following in the literal footsteps of an American pioneer. But many more avoid the route as if it were contagious, cursing the crowds, the relatively modest 5.8 grade and the overly manufactured and unnatural essence of the climb.

As for myself, I think of Otto’s Route as history. In modern days, such climbing ethics would be blasphemous. But 104 years ago, when Otto first stepped atop this astonishing pinnacle, the world was a far different place.

“Woo-hoo!” Ella cheered as she mantled over the summit cap to join me. I reeled in the last of her slack.

“What do you think?” I asked as she tied herself in to the anchor.

She looked around with a smile. “It’s amazing!”

Surrounded by an ocean of cliffs and pinnacles, “amazing” sounded just about right.

Note: This article first appeared in Volume 10, Issue Three (July 2015) of Our Backyard, published by The Nickel and Nickads.com

Visit THE ARCHIVE: A list of most of our articles sorted by department

find us on facebook


Copyright notice: This website and all its contents are the intellectual property of www.coloradomountaineering.com and its authors. None of the content can be used or reproduced without the approval of www.coloradomountaineering.com.

Climbing and mountaineering are dangerous!! Please see the DISCLAIMER page
For information about how to contact us, visit this link


Sunday, January 26, 2014

VIDEO: Finding and Climbing the Petit Grepon

This entertaining video documents one couple's quest to summit Petit Grepon in Rocky Mountain National Park. Petit Grepon was made famous after its inclusion in Steve Roper and Allen Steck's famous 1979 book Fifty Classic Climbs of North America.


Visit THE ARCHIVE: A list of most of our articles sorted by department

find us on facebook


Copyright notice: This website and all its contents are the intellectual property of www.coloradomountaineering.com and its authors. None of the content can be used or reproduced without the approval of www.coloradomountaineering.com.

Climbing and mountaineering are dangerous!! Please see the DISCLAIMER page
For information about how to contact us, visit this link


Monday, October 14, 2013

LIST: Ranked Class 5 Peaks over 13,000 feet

There are seven "ranked" peaks over 13,000 feet that require class 5 climbing to reach the top. In other words, by their easiest route, these seven mountains are the most difficult high peaks in the state. Mountains like Longs Peak or Crestone Needle which have difficult class 5 routes but easier hikes or scrambles as well would not be included. This list also does not include mountains like "Coffeepot" which require fifth-class climbing to reach their summit but do not meet the requirements for being "ranked" (i.e. they have less than 300 feet of topographical prominence).

There are three peaks in the Centennial list (100 highest) that require 5th class climbing. As you will see below, there are four other 13ers that also fall in this intimidating category. It is interesting, though not altogether surprising, that all of the mountains on this list (except the debatable "Whitney Peak") are found in the San Juan Range.

NOTE: I believe this list is complete but there are 637 mountains in Colorado that are above 13,000 feet and have more than 300 feet of topographical prominence. Many of these peaks are quite obscure and have seen only a handful of ascents. If you know of a ranked summit that requires 5th class rock climbing by its easiest route than please let me know!

Dallas Peak
Dallas Peak from Blue Lake Pass
1. Jagged Mountain (13,824 feet) (5.2)
Deep in the Weminuche Wildnerness lies one of Colorado's most reclusive and inaccessible mountains. Jagged Mountain is a jewel of Colorado mountaineering and deserves a larger reputation than it has. This hard-to-reach mountain is one of the few in the state that requires more than one day to climb. The route itself is a winding, complicated multi-pitch climb with dangerous scrambling, loose rock, tricky routefinding, and several technical cruxes that probably necessitate the use of a rope. There is a great deal of exposure, including a narrow ledge traverse with thousands of feet of air whipping at your ankles.

2. Teakettle Mountain (13,819 feet) (class 5.2)
Teakettle is part of a rugged portion of the San Juans that includes several challenging peaks: Sneffels, Coffeepot, Dallas, and Teakettle. Of the three Centennials on this list, Teakettle is probably the easiest summit to reach. There is a 50-foot 5.2-5.3 summit pitch leading up the unique summit cap (hmmm...why did this mountain get its name?) to an exhilarating and tiny summit.

3. Dallas Peak (13,809 feet) (class 5.3)
Dallas Peak is often cited as the most difficult of Colorado's 100 highest peaks. Dallas's challenging summit cap is generally given a high-end 5.3 rating. The last two hundred feet on Dallas are steep, junky and full of class 4 and 5 terrain. The most difficult moves are just below the summit. You can rappel from near the summit directly past most of the hardest difficulties.

4. Peak Fifteen (13,700) (class 5.2)
Peak Fifteen is the next-door neighbor to more famous 13er Turret Peak and both of these rugged mountains lie in Weminuche Wilderness Area in the San Juans. This technical and committing route is one of the hardest all-around climbs of all the standard routes in the state and most people bring a rope. Peak Sixteen, Peak Fifteen's unranked neighbor, is also a technical mountaineering goal requiring 5th class climbing to reach its summit and together these three mountains for an amazing and impressive massif.

5. Coxcomb Peak (13,656 feet) (class 5.3)
Probably the easiest peak on this list, Coxcomb involves just a short section of class 5 climbing. This flat-topped peak is not particularly imposing but can surprise you. Coxcomb is known for loose rock, poor protection, and some exposure on the summit ridge. Be prepared to rappel.

6. Whitney Peak (13,276') (class 5.6)
Inclusion of this peak is up for debate, as the "class 5" section of it is one boulder. Apparently, however, this boulder is the highest point on the peak and thus to truly climb the peak in the eyes of some you must stand on the top of the boulder. Apparently, scaling this boulder takes a few moves of class 5.6 "climbing."

7. Lizard's Head (13,113 feet) (5.8+ R/X)
Lizard Head Peak- Colorado's most difficult summit over 13,000'
Simply put, Lizard's Head is Colorado's hardest ranked peak above 13,000 feet. This intimidating spire is a rotten, exposed nightmare and thus is rarely climbed. The easiest route is the Southwest Chimney, a three-pitch climb on runout choss. There are other possibilities too, all of which are going to require equally or more difficult technical climbing.

Honorable mention:
Sunlight Spire (13,995 feet) (5.10c)
Though it does not meet the criteria to be a ranked peak as it has only 215 feet of topographical prominence, Sunlight Spire is one of Colorado's most dramatic and difficult summits to reach. To add to its allure, the summit pitch is a beautiful and bomber splitter-crack that clocks in at the high 5.10 level. This crack can be freeclimbed or aided (see this photograph for a good view of the amazing summit cap). Based on the more accurate but less syndicated 1988 datum, Sunlight Spire just overtops 14,000 feet, possibly making it the most difficult 14,000 foot summit in the contiguous 48, even more difficult than the famous summit cap on California's Thunderbolt Peak, which, by the way, is also "unranked" by Colorado standards yet considered one of the must-do California 14ers.

Visit THE ARCHIVE: A list of most of our articles sorted by department

find us on facebook

Follow us on Twitter!

Copyright notice: This website and all its contents are the intellectual property of www.coloradomountaineering.com and its authors. None of the content can be used or reproduced without the approval of www.coloradomountaineering.com.

Climbing and mountaineering are dangerous!! Please see the DISCLAIMER page
For information about how to contact us, visit this link


Friday, September 20, 2013

Hot Route: Independence Tower Otto's Route (III 5.9 R)

Independence Monument in Western Colorado
Approaching Independence Monument
Trailhead: Lower Monument Canyon
Distance: 5 miles
Elevation gain: 1,200 feet
Difficulty: 4 pitches, 5.9

OVERVIEW
Independence Tower is not a mountain, nor is it alpine. It is a desert tower, which makes it somewhat rare for Colorado. And this is Otto's Route, a classic of Colorado climbing established in an age before climbing was set in its course towards what we know today.

Some people are against this route because it follows of line of chipped pipe holds the entire way. In a sense, I see their point. By modern standards this route would be an abomination. But John Otto, the man who drilled the holes in 1911 so he could insert pipe handholds, was considered a steward of nature and the forefront figure for establishing protection for the Colorado National Monument. He was an adventurer who loved these desert formations. If while climbing this route you are upset by the unnatural jugs throughout, consider a couple of things first: John Otto led this climb with a hemp rope in cowboy boots, without the chipped holds this route would probably go in the 5.11 range, and the chipping occurred over 100 years ago.

I encourage people, and I feel like most climbers who have climbed this route agree, to view Otto's as a historical route and not be bothered by its manufactured feel. It is still a great climb and the climbing itself despite everything is still fun. The positions are spectacular and the exposure is invigorating. Each pitch, not just the legendary pitch 4, has sections that are runout and hard to protect.

THE ROUTE
Approach: From the Lower Monument Trail, hike 2.5 miles (gaining 800 feet) to the base of Independence Monument. The route is on the northwest side of the tower following an obvious crack system. You will have to climb a small talus cone to get to the bottom.

Pitch 1: climb a 5.easy step to a junky 5.6 corner. Pass this to a nice finger crack with chopped steps. Climb up and left and gain a large ledge with a bolted belay. 130 feet (5.6)
Bighorn in the Colorado National Monument
You might have an audience...
Otto's Route (5.9) in Monument Canyon
Starting pitch 1
Pitch 2: move the belay to the right and scale a funky, over-hanging off-width. This would be a tricky pitch without the chopped holds. Here you will probably want a #4 and possibly a #5 too, though you can get away with less if you have good technique and a go-for-it attitude. There is some ledgefall potential pulling through the OW without big pieces. Pull, claw, thrutch through the OW and gain another huge belay ledge. Once you have belayed everyone up, most people with de-rope to pass through the next section. 70 feet (5.8+).

The OW P2 on Otto's Route
Climbing the overhanging OW on Pitch 2
The Time Tunnel on Otto's Route
The Time Tunnel between pitches 2 & 3

Scramble: Squeeze through the Time Tunnel, a tight gap between a the main tower and a detached spire. It is a little scrambly in one spot, maybe some minor, non-exposed class 3. At the other side is another massive belay ledge called the Lunch Box Ledge. Here you can leave most of your gear behind for the rest of the climb. All you need to get through the last 2 pitches are draws, maybe a few slings, optional tri-cams and gear to tie into the chain anchors at every belay.

Pitch 3: Pitch three is not hard or exposed, but it is runout between pitons. Tricams can be used in several spots but just trust those slightly sandy chopped buckets and the pitch will be over in no time. Climb up a seam and move up and right following the pipe holds through spaced pitons. Mantle a ledge and arrive at a bolted belay on Sundeck Ledge, where you might see get direct sunlight for the first time. Here the exposure might hit you for the first time. While this belay ledge is also large and comfortable, pitch 4 looms above you, and for some it can look pretty intimidating. 80 feet (5.7)

P3 of the classic Colorado climbing route Otto's Route (5.9)
Pitch 3 follows this seam then goes up and
right (the chopped holds can be seen
in the center). Pitch 4 can be seen top left
Pitches 3 ad 4
Pitches 3 & 4 seen from the Lunch Box Ledge
Pitch 4: This is the classic money pitch and a great lead for the grade. The position is spectacular and the exposure is tremendous. Leave the belay on the right-ish side of the fin and climb fifty feet of unprotected but easy climbing (5.3 R/X). Pay attention to your footwork and your hands on this sandy, dangerous section and keep your mind focused on careful movement. The climbing is easy and it's over in no time. There is potential to use a few tricams to moderate the danger somewhat. Clip a couple of solid pitons and arrive at the route's excellent crux: a fun overhang on massive, bucket holds. This section is well protected by pitons and there is potential for a couple cams to back them up if you want. It may be useful to extend a draw or two at the crux to reduce drag while top-belaying your follower. 90 feet (5.9)

Climber of the Pitch 4 crux of Otto's Route
Pulling the crux on P4 of Otto's Route
The top of Indy Tower
Looking down from the top of 
Independence Tower

Pitch 5: This "pitch" is really just a couple of moves from the big belay ledge at the top of P4. There is no protection, and the climbing is probably about 5.8. Some people "aid" through the botto by standing on the old flagpole base and/or the chains. What makes it a bit scary is that you are fully exposed at the top of the tower with air all around and no protection. Some choose to do this on belay. The top is spacious. On Independence Day you will find many people up here. You also have to downclimb P5, it is hard not to use the flagpole now.... Some people will want to be on belay for the downclimb too. NOTE: The flagpole has since been removed. You will have to climb the rock. There are still chopped holds, however, making it exciting because it is so exposed but not too difficult.

summit panorama from Independence tower
Panorama from the summit of Independence Tower
A shaky but mostly comprehensive helmet cam look at this route from Youtube:


Descent: Double-rope rap from the summit to the Lunch Box Ledge (the bottom of P3). Scramble back through the Time Tunnel. From the bolted anchor you can do a double rope rap (180') from these anchors straight to the ground or rap the route to the anchors of P1 (70 feet), then from these anchors to the ground (110 feet).

The first rappel
The first rappel to the Lunch Box Ledge

The last rappel

Rack: This could be debated and depends largely on your comfort. If you wanted to protect it as well as it can be, bring a full rack of cams to BD #4 Camalot (and possibly even a #5) with extras in the small to mid size, a set of tricams, slings, possible stoppers (though we didn't use any), 6-8 slings and 6-8 quickdraws.

DIRECTIONS
Independence Monument
Otto's Route follows the crack system right of center
then the top via the right skyline
Follow Grand Avenue from downtown Grand Junction west where it turns into Broadway and crosses the Colorado River. Continue on this road 8 miles through a neighbrhood and past many intersections (the road becomes Highway 340) until you reach a small dirt road marked with a sign for Lower Monument Canyon. This turnoff is notoriously easy to miss so be alert. There is a small parking lot here at this popular trailhead.

TRIP REPORTS
What does Independence Mean to You? Four days climbing in western Colorado including Unaweep Canyon, Monument Canyon, bouldering, and an ascent of Otto's Route on Independence Monument in the Colorado National Monument.

LINKS
Check out this helmet cam video guide for Otto's Route

Otto's Route on Mountainproject.com

Otto's Route on Summitpost.org

Monument Canyon- more info on climbing/hiking in Monument Canyon

Visit THE ARCHIVE: A list of most of our articles sorted by department

find us on facebook


Copyright notice: This website and all its contents are the intellectual property of www.coloradomountaineering.com and its authors. None of the content can be used or reproduced without the approval of www.coloradomountaineering.com.

Climbing and mountaineering are dangerous!! Please see the DISCLAIMER page
For information about how to contact us, visit this link


Thursday, August 22, 2013

NEWS: Tommy Caldwell and Joe Mills Establish Diamond's Hardest Line (5.14a)

Longs Peak and the Diamond
Longs Peak, Mt. Meeker and the Diamond
Tommy Caldwell and Joe Mills have established the hardest line on the Diamond, rating their free version of Dunn-Westbay 5.14a. They climbed the route in four long pitches from Broadway, the major ledge that forms the bottom of the Diamond proper. According to the report on climbing.com, the four pitches went at 5.10+, 5.14a, 5.13a, and 5.12b.

The original Dunn-Westbay route was put up in 1972 and graded 5.10 A3. Two years ago, Josh Wharton freed the line at 5.13b, though he took substantial variations on the first pitch. Caldwell and Mills wanted to free climb a line that was more true to the original conception of the route.

Visit this link to watch a video of Caldwell working the route

Visit THE ARCHIVE: A list of most of our articles sorted by department

find us on facebook


Copyright notice: This website and all its contents are the intellectual property of www.coloradomountaineering.com and its authors. None of the content can be used or reproduced without the approval of www.coloradomountaineering.com.

Climbing and mountaineering are dangerous!! Please see the DISCLAIMER page
For information about how to contact us, visit this link


Friday, August 2, 2013

Featured Route: Wham Ridge (III 5.4) of Vestal Peak

A topo Wham Ridge
An approximate topo of Wham Ridge on Vestal Peak
Blue= standard version (5.4); Green="Center Shift" (5.6)
Molas Pass Trailhead          
Length: 19 miles
Difficulty: II 5.4 (III 5.6 for "Center Shift")
Elevation gain: 7,000 feet
Exposure: Moderate/high 
          Elk Park Trailhead
          Length: 12 miles
          Difficulty: II 5.4 (III 5.6 for "Center Shift")
          Elevation gain: 5,200 feet
          Exposure: Moderate/high

OVERVIEW
Vestal peak in the  rain
Vestal Peak towers above Vestal Basin
Wham Ridge is one of Colorado's most unique and best known technical alpine climbs. The rock is moderate, but the position and the surroundings are very rugged and dramatic. This portion of the San Juans is one of the most dramatic mountainous destinations in the entire state. Some of Colorado's most famous/infamous mountaineering peaks like in this ten square mile section of the Weminuche Wilderness, including but not limited to 14ers Eolus, North Eolus, Windom, and Sunlight, as well as thirteeners Pigeon Peak, Turret Peak, Jagged Mountain, Trinity Peak, Arrow Peak, and, of course, Vestal Peak. The Weminuche is the largest wilderness area in Colorado, and is teeming with wildlife, and beautiful flora. From both a backpacking and a mountaineering standpoint this is one of the most rugged and astounding places in the state.

Wham is a popular route for a technical alpine climb. It's moderate difficulty and ultra-aesthetic setting have made it one of the premier destinations for a first technical route for aspiring mountaineers. While it has a reputation of being easy, there are a few hazards that are worth mentioning that make any attempt at Wham become more than you bargained for.

First, Wham consists of quartzite. While it makes for some of the most solid rock in the entire range, it is akin to lubricated glass when it is wet. This stuff is slick. Play around on it even at camp after storm and you will see what I mean. This is no place to be in a storm.

Second, the descent is long and complicated. While it is only rated class 2+, it is long, loose and steep. It is easy to get sucked into class 3 terrain. Many people, too, have tried to descend directly south from the summit, only to find themselves pulled into even steeper and looser class 4.

Third, the San Juans are notorious for violent, long-lived storms. Their position on the western edge of the Rocky Mountains means that they are the first mountains to receive any weather systems blowing in with the trade winds. San Juan ski areas like Wolf Creek and Purgatory (Durango Mountain Resort) get some of the most snow in the state. The San Juans in turn get some of the most rain and some of the most violent weather of all the ranges in Colorado.

All of this being said, this one amazing part of the state, and any journey in is bound to be both challenging and rewarding. Wham Ridge of Vestal Peak is certainly worthy of its designation as a classic, and worth any trip for the mountaineer who is experienced and adventurous enough for the challenge.

THE ROUTE
The San Juans from Molas Trailhead
The Grenadiers from the Molas Trailhead
From Molas Trailhead, descend into the Animas River Canyon for five-hundred feet to an overlook at 10,100 feet. You can see the mountains in the distance, looking very far away. Still a long ways down.... Descend down the infamous 37 switchbacks (we counted 35). This arduous section drops over 1,300 feet to a very well-constructed footbridge over the Animas River at 8,800 feet. There is some limited camping in this area but the train tracks for the Durango and Silverton Narrow Gauge Railroad are only a few yards away.

Cross the tracks and find a good trail that starts to gently climb up the slopes on the east side of the river. After about half a mile, you join Elk Creek trail and come to a kiosk and register. It is a good idea, always, to take the moment to fill out the register. if you took the train in and got off at Elk Park, you will have walked an easy half mile to get to this point.

The next portion of the trail climbs a little under 1,000 feet in about two and half miles to a beautiful and obvious Beaver Pond at 9,900 feet. Arrow and Vestal can be seen up the basin from here to the south and there is good camping in the area of the beaver pond. On our last trip, we saw a moose here at the Beaver Pond.

The next section of the route is a bit arduous, especially if you are carrying a heavy backpack....

Ducking under logs heading to Vestal Basin
Ducking under logs on the way to Vestal Basin
At the east end of the beaver pond, leave Elk Creek trail and follow a strong climbers trail around a huge boulder on the east end of the pond. Follow this trail through a short wooded section with some good camping to a steep slope that drops down to Elk Creek. Crossing this creek in runoff seasons can be a bit treacherous depending on the presence/absence of a log bridge that is sometimes built here.

Cross the creek and start up what we dubbed "Hell Hill." The hill itself is only about 2 miles and gains just over 1,500 feet in elevation, but the trail is littered with downed trees and potential wrong turns. Stay high and stick to the main trail. Trying to stay closer to the creek will result only in rougher and steeper terrain you will have to negotiate.

At last you make it to the meadow at 11,500 feet in Vestal Basin. There are a couple of good campsites in the area, the best probably being on the left (east) side of the trail almost directly across from Wham itself. The mountains are beautiful and dramatic from this basin.

Climb up a steepening talus slope to the right of the obvious waterfall at the end of the meadow, and make your way to the bottom left corner of Wham Ridge (actually the peak's entire north face). Scramble up to a grassy ledge and do a rising traverse up and right to the face's west side just over 12,500 feet. So far the terrain shouldn't have exceeded class 3.

Scramble up the steepening face along its right side, roping up when and if you start feeling uncomfortable. There are a couple of decent splitter crack systems you can follow. The angle and difficulty steepen to low class 5 but just when it seems things are going to get really good, the rock becomes fractured and the climbing broken. Most people de-rope here and scramble the last few hundred feet on gunky class 4 to 5.easy to the summit.

Having fun with Wham
The Descent:
The descent is considered class 2+ but many people consider in class 3. It is long, loose and steep and not a great route to be on in a storm. From the summit descend southeast (not directly south, this leads to steep class 4 terrain) into a gully system on loose rock. Traverse when possible, following cairns for guidance, across the peak's south face, ultimately reaching the saddle between Vestal and Arrow Peaks. All that stand between you and the meadow is a gnarly downclimb down the slope Gerry Roach calls "Dues Collector" in his guidebook Colorado's Thirteeners: 13,800 to 13,999 feet. Back at the meadow you can relax (unless you have a train to catch) and be proud: you have just climbed one of Colorado's most aesthetic and classic mountaineering lines.

DIRECTIONS
The trailhead is found two miles north of Molas Pass on Highway 550 and five miles south of the town of Silverton. It is found in-between the turn offs for Molas and Little Molas Lake Campgrounds. The trailhead is a large dirt parking lot just off the highway on the canyon/mountain side.

TRIP REPORTS
Dirty (Wet) 30: or Five Rainy Days in the San Juans
Our attempt at Vestal and Arrow runs afoul of rain storms, bad navigation, and a general lack of time, but the trip was still one to remember.

LINKS
Mountainproject.com- Page on Wham Ridge standard route.

Summitpost.org- An information page on Wham Ridge (standard) route.


Visit THE ARCHIVE: A list of most of our articles sorted by department

find us on facebook

Follow us on Twitter!

Copyright notice: This website and all its contents are the intellectual property of www.coloradomountaineering.com and its authors. None of the content can be used or reproduced without the approval of www.coloradomountaineering.com.

Climbing and mountaineering are dangerous!! Please see the DISCLAIMER page
For information about how to contact us, visit this link


Sunday, March 17, 2013

Get Better at Rock Climbing...Today! (Page 2)


Bouldering in Unaweep Canyon in Colorado
V4 boulder problem in Western Colorado
III. MENTAL
   There can be no doubt that climbing is almost equally mental as it is physical. So when is your mental state getting in the way? And what can be done to improve it? Here are a few tips to help improve your mental climbing acuity.
   A. Fear- All climbing inevitably engages some degree of fear. Fear is good; it stimulates adrenaline which helps you focus and sharpens your body's abilities to perform. This is why we have adrenal glands in the first place. Only a great fool would call themselves a "fearless" climber. Those are the sort of climbers I don't like to partner with. However, excessive fears are debilitating and will ultimately hinder your ability to climb at peak performance. Two types of fears in particular are especially non-productive: fear of failure/embarrassment, and the fear of falling. Both of which are quite common and somewhat easy to remedy.
     Fear of Failure- this is perhaps the silliest and easiest type of fear to rid yourself of. Being afraid of looking bad in front of your friends will hurt your performance. Don't hold yourself to the standards of others. While some friendly competition against your friends and/or peers will help keep you motivated, climbing is an individual sport. Measure your success against yourself only. Remembering that you are trying mainly to have fun and not send every climb you attempt the first time is a good way to keep yourself from falling into this trap.
     Fear of Falling- this is a common and natural fear, and one that stands in the way of many climbers, especially ones that are at the beginner/intermediate level. While it is important not to ignore the possibility of a dangerous fall, being afraid to fall on well-protected routes is a major hindrance for your climbing. It will keep you from attempting routes at the top-end of your skill level and create a mental block on your climbing progress. This is evident for some climbers who will struggle with a certain move while leading but will fire through the same move when on top-rope. The best way to get over your fear of falling is to fall. Find a good belayer who knows how to perform a safe "soft catch" and take a few lead falls. On a safe climb, start with some short falls in the 5-8 foot range and build up to 15 footers. Soon you will learn to embrace and even enjoy falling and this fear will no longer be present.
Bouldering near the Colorado National Monument in Colorado
   B. Focus
     Another important aspect of your mental conditioning is learning to focus. There are many techniques for focusing your mind, and you may have to find the ones that work best for you. Most trainers in athletics of all types, however, will teach you a combination of visualization, breathing, and meditation. Instead of staring up at a climb you are about to attempt convincing yourself it is too hard for you and imagining all the things that could go wrong, instead convince yourself that the route is within your ability and you are in the best condition to do it. Picture yourself making the moves in detail. Imagine yourself succeeding, standing at the top of the climb having sent it. And remember that if you don't there is always tomorrow. During the climb, if you find yourself starting to lose your focus, take a moment to breath a few times and re-channel your energy. Most of all, remember that climbing is fun.

IV. NUTRITION
   Much can be said about nutrition and sports training, so I would go into too much detail here. Good nutrition, however, is a crucial part to getting your body to perform at its optimum levels and is therefore extremely important if you are training to climb. Eat well before a climb and after and you will find yourself feeling better and performing like you never dreamed. For the sake of this article I will break nutrition down into two categories: things that are good to eat, and things that aren't. For a more detailed nutrition regimen I would suggest seeking out any number of great resources that are already available.

THINGS TO EAT:
-Good carbs (in moderation) such as whole grains, oats, pastas.
-Foods high in healthy fats such as avocados, olive oil, etc. Remember that good fat is good and not all things that are "Low Fat" are healthy. Fat keeps your body satisified longer than carbs, making you feel hungry less often.
-Fruits and vegetables (but everybody knows this). If you struggle with the veggies, I suggest making smoothies or finding a taste for drinks such as V8.
-A high quality protein source is also crucial, lean meats relatively low in fat like chicken or turkey consumed as soon after a hard workout as possible will help your muscles recover and grow stronger. Protein supplements like Whey powder can also be helpful but avoid consuming too much protein, as it can lead to conditions such as gout.

THINGS NOT TO EAT:
-bad carbs high in refined sugars like soda, candy, milk chocolate, cakes, or any sweets. This group of foods is perhaps the worst thing you can consume for your body.
-Excessive amounts of saturated fat such as fatty red meats, butter, etc.
-And avoid excessive amounts of alcohol and drugs, these will certainly NOT help you to send that project!

V. SAMPLE ROUTINE 
Here is a sample workout routine that can be customized to suit your particular climbing needs and current physical conditioning. This particular workout lends itself to gym climbing where you can climb a lot of pitches in a short amount of time, as well as mix sport and/or trad with bouldering. However, this routine can be customized based on what you have available at your local climbing areas.

1. Cardio-
     A. 40 min jog. 5 min warm-up. 30 min running at a sustainable pace, gradually building in intensity followed by a 5 minute cool down walk. 3-4 times per week.

2. Climbing-
     A. 50 feet of easy warm-up climbing 2-3 number grades lower than your hardest redpoint.
     B. 250 feet (2-3 single pitch routes of 50-100' length) of onsight climbing from one letter grade to one number grade below your hardest redpoint (i.e. if your hardest redpoint is 5.11b, climb 5.10b to 5.11a onsight).
     C. 100 feet of downclimbing
     D. 75 feet of a project climb at or near your redpoint level. (recommended max: 5 attempts)
Or
           5-10 boulder problems at or near your redpoint level
     E. 2-5 boulder problems with 15-25 pounds of weight (either in the form of a weight belt or a partially loaded backpack. Could also substitute 50-100 feet of weight routed climbing 2-3 number grades below your redpoint limit. (Avoid strenuous crimps while weighted as they can cause tendon injury. Instead focus on jug holds and other "open" grip positions).
     F. 2 sets of 100 foot "sprints", climbing routes that are easy for you (3-4 number grades below your redpoint limit), focusing on moving fast without resting but still maintaining good form.

NOTE: It is recommended to alternate spending one day focusing on power and projects and the next focusing on reps and endurance on lower grades. Customize your routine to find and work your strengths and needs.

3. Muscle-
     A. Push-ups- 2 sets (enough reps that push your muscles to near failure)
     B. Sit-ups- 2 sets
     C. Wrist curls- 2 sets (enough weight to cause muscle failure in 20-30 reps).
     D. Reverse wrist curls- 2 sets
     E. Other- consider your personal weaknesses. For example, if your weakness is pure strength focus on lat pulls, bench press, bicep curls and other strength exercises.
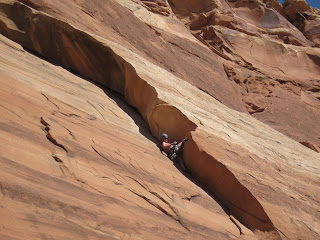
A 5.8 traditional climb in Monument Canyon
This entire routine should be performed 3-4 times a week for a solid month, at which time re-evaluate and customize your routine for at least another month or for as long as you continue to see results. It is good, however, to take a full week off from a strenuous climbing routine every two months. Gradually increase your reps, aiming for what is known as the "Overload Principal," or increasing at a rate of about 10% per week. For example, if you are doing 20 reps, move up to 22. Or if you are lifting 150 pounds, bump it up to 165 (but don't do both!). Lower weights and higher reps will benefit endurance more, increasing weight will increase strength. Gradually increasing your workout will continually challenge your muscles and stimulate them to grow. Keeping your workout static will only maintain your current conditioning level.

All of this is a very brief and abridged theory about getting better at climbing. If you are serious about improving your climbing ability, I would suggest using this article as only one reference. I recommend reading broadly about the topic. Motivation and passion will go a long way toward helping you reach your climbing goals. If you start to find that climbing is not becoming fun, stop and re-evaluate what you are doing. Be honest and trying to pinpoint the source of your feelings. Although training is not always enjoyable, keep your eyes on the prize and always remember that climbing is supposed to be fun. Be safe and enjoy yourself out there. Climb on!

-Brian Wright

OTHER HOW-TO ARTICLES

Beginner's Guide to Crack Climbing- An introduction to crack climbing sizes and basic crack climbing technique.
Mountaineering 101- A basic look at mountaineering, including recomended gear, training and technical skills and more.
No Trace Ethic- A guide to abiding "No Trace" ethic to preserve the place we like to mountaineer for many years to come.

Visit THE ARCHIVE: A list of most of our articles sorted by department

find us on facebook

Follow us on Twitter!

Copyright notice: This website and all its contents are the intellectual property of www.coloradomountaineering.com and its authors. None of the content can be used or reproduced without the approval of www.coloradomountaineering.com.

Climbing and mountaineering are dangerous!! Please see the DISCLAIMER page
For information about how to contact us, visit this link