Saturday, January 26, 2013

FEATURED ROUTE: North Mount Elbert Trail (Northeast Ridge)

North Mount Elbert Trail (Northeast Ridge)
length: 9 miles
difficulty: class 1+
elevation gain: 4,400'
special beta: busy on a summer weekend

INTRO

Mt. Elbert
Mt. Elbert, it needs little introduction. It is not the prettiest, hardest, or most remote Colorado mountain, but it is our highest. And not only is Elbert Colorado's highest mountain, but it is also the highest mountain in the American Rockies. As a result, Elbert is one of the busiest of Colorado's fourteeners.

The Northeast ridge is one of two "standard" routes up Mount Elbert and the easiest way to climb Elbert from the north. There is a decent trail all the way to the summit. Though the route is easy from a technical standpoint, it is just over nine miles in length round-trip and gains almost 4,500' of elevation. This can be a strenuous climb for those who take it on too lightly. The reward for the long hike, however, is the second highest perch in the lower 48 behind only California's Mt. Whitney.

GETTING THERE
From Highway 24 approximately 3 miles south of Leadville, turn west onto Highway 300. After .8 mile turn left (south) on CR-11. 1.2 miles farther, follow signs toward Halfmoon Creek and turn right. The North Mt. Elbert TH is five miles farther on the left (south) side of the road. There are several National Forest campsites in the area as well as dispersed camping. The more environmentally correct option is to stay in the developed, fee-based areas. If you must set-up in dispersed areas, please avoid building fire rings, there are plenty already. The North Elbert trailhead is about one half-mile east of the Mt. Massive trailhead (which is on the opposite side of the road).

 ROUTE DESCRIPTION
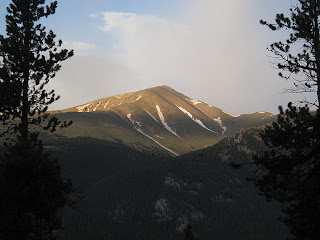
Snow on Mt. ElbertFrom the trailhead at just over 10,000', follow the North Mt. Elbert Trail as winds through a pristine forest on Elbert's northeast flank. Leave the Colorado Trail behind at mile 1.4 and turn right towards Mt. Elbert. This junction is at about 10,400'. This may be a good place for a short rest as the route becomes much steeper from here. Around mile 2.7 you reach treeline, and the upper portion of the mountain comes into view (note: you cannot see the actual summit yet). From this point you have about two miles of hiking left but you still must climb over 2,500' of elevation to reach the top.

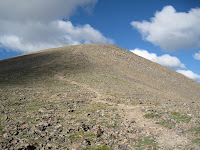
Once past treeline, the trail begins to switchback steeply up Mt. Elbert's barren northeast ridge. Though the trail is quite good, you may still have to pay close attention to your footing on the steepest sections, especially if you aren't used to hiking on scree at altitude. In terms of difficulty of terrain, this route is slightly harder than the Grays Peak trail but not as hard as the South Slopes standard route up Torreys.

The top of Mount Elbert
When you reach what has thus far appeared to be the top, you will find that it is only a false summit and the actual top is still a little farther. Depending on what kind of day you are having this may or may not be discouraging. If you're feeling exhausted, take heart knowing that Colorado's highest point is just under a half mile and four-hundred vertical feet away.

On Mt. Elbert's summit you will most likely be joined by hikers who have climbed Elbert from other routes, such as the popular South Mt. Elbert Trail. No matter, this commodious summit has something for everyone. To the north you can look out across the Halfmoon Creek area at Mt. Massive and revel at the might of its girth and lofty summits. Also visible to the north and west are centennial thirteeners Mt. Oklahoma (13,845'), French Mountain (13,940'), Casco Peak (13,908'), and "Lackawanna Peak" (13,823'). The view to the south is dominated by the familiar shapes and humps of other Sawatch fourteeners, especially La Plata (14,336') whose dramatic north face and rugged Ellingwood Ridge are particularly astounding from the vantage atop Elbert. The surrounding mountains are so impressive, in fact, that we once met a man on Elbert's summit who was convinced (and pissed off) that he'd climbed the wrong mountain because others nearby appeared taller. We tried to assure him that distance and perspective can be deceiving and that he was indeed on the highest mountain in the American Rockies.

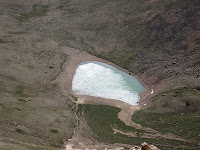
A small lake on Mount Elbert
Climbing Mount Elbert
Mount Elbert
LINKS
Mt. Elbert Profile- A more thorough examination of Mt. Elbert including this description as well as overviews of some of its other routes.
Visit THE ARCHIVE: A list of most of our articles sorted by department

find us on facebook

Follow us on Twitter!

Copyright notice: This website and all its contents are the intellectual property of www.coloradomountaineering.com and its authors. None of the content can be used or reproduced without the approval of www.coloradomountaineering.com.

Climbing and mountaineering are dangerous!! Please see the DISCLAIMER page
For information about how to contact us, visit this link


Thursday, January 24, 2013

Spring Loaded Camming Devices (SLCDs): An Explanation of the Modern "Cam"

The invention of the spring loaded camming device (commonly called simply "cams") in the 1970's revolutionized the climbing world. The ability to quickly and safely protect parallel-sided cracks opened up the world of traditional climbing to whole new realms. Perhaps no single gear invention, except maybe sticky rubber, has so directly affected the type and difficulty of routes that climbers are able to attempt. This article examines the world of spring loaded camming devices.

Trad gear
 trad gear with a smattering of cams
I. HISTORY OF THE CAM (SLCD)
The invention of cams was progressive in nature, but the first patent for a spring loaded camming device was filed by Greg Lowe in 1973. It wasn't until Ray Jardine took this idea, however, and developed his version in 1978 did the use of cams truly begin. Jardine called these original units "Friends". Although technology has developed with cams to make them more user friendly, versatile, or specialized to a particular type of crack, modern camming units work much the same as the original Friends.

Today there are several manufacturers that make their own version of the SLCD, especially Wild Country, Black Diamond, Metolius and a few others. Most companies have several different types of cams that serve different purposes, i.e. cams that are wider with more surface contact to spread the load on softer stone, or cams that have flexible stems for awkward and horizontal placements. All cams, however, function based on the same basic principles of physics.

II. CAM USE 101

Properly placed with the apex of the rounded lobes oriented at 90 degree angles from the orientation of the stem (see figure a), cams function by the action of the stem pulling on the rounded lobes of the cam which rotate and become locked with opposing outward force. The outward force generated is two times the downward force, which generates enough friction when properly placed to protect even a very nasty fall. A perfect cam placement is very solid but relies on a few key components.

The first key element is the rock itself. Not even a perfect placement is worth anything if the rock isn't strong enough to withstand the high forces generated in big fall. For this reason, avoid detached flakes and exceptionally brittle sandstone or other soft rock types.

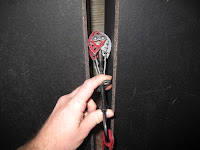
cam placement
(figure a.) a cam in a mock crack
with near perfect retraction
The second key element is shape of the crack which you are protecting. In perfectly parallel cracks, cam placements are easy. Sink them firmly in but not too deep so that they might walk deeper and become irretrievable. In jagged, angular cracks, finding the best spot to place a cam can be tricky. It is best to place a cam in the most parallel-sided part of a crack as you can find, avoiding being near flares, widenings or pockets or anywhere the cam could walk out and become dislodged. It is best to find a placement with constrictions above and below to avoid this possibility.

The third key element is the correct sizing and placement of the cam. Ideal placement is when the cam is between 50 and 90 percent retracted. Some cams have indicators showing you when a cam is at its ideal angle. It is also important to place the cam deep enough without making it hard to retrieve as well as orienting the stem in the anticipated angle of a possible fall. Keep in mind, this is only a very basic overview and mastering all of this takes many hours of practice.

III. DIFFERENT TYPES OF CAMS
As mentioned above, there are many different types of cams on the market today and knowing which is best depends a lot on you. At a basic level, modern cams consist of a stem and a set of either 3 or 4 lobes. Three-lobed units have a narrower head and can therefore fit in small points in the crack. Four-lobed units have more surface area and therefore have more holding power. It is also possible to buy offset cams where the lobes are wider on one side than the other. These specialty cams are the best way to protect flaring cracks where regular cams might not suffice. Another specialty variation is the flexible stem which allows the cam to better redirect forces when protecting horizontal cracks and other misshapen features.

Cam sizes comparison
A comparison of common sizes from large (Black Diamond Camalot C4 size 5),
medium (Black Diamond Camalot C4 size 1), and very small (Black Fixe Hardware Alien)

Comparison of cams
A comparison of the head width between a 3-lobed and 4-lobed cam of similar size
IV. CONCLUSION
Camalots are a modern trad climbers best friend. They are the technological development that allow us to climb parallel sided cracks with ease and confidence as well as allow us to climb "clean" without using rock-damaging metal gear like pitons and nails. Learning how to properly use cams is a crucial part of today's trad climbing world. While all cams are the same at their core, there is a lot of variation between different companies as well as different models of cam within the same company. Make sure to do plenty of research, bearing in mind your own climbing ability and style before investing in a set of cams to fill your rack.

V. FURTHER RESOURCES
When considering what kind of cam you want to add to your rack, it is important to do your research. Here are a few sources to further your understand of SLCDs and what is available on the market:

Rock Climbing Anchors by Craig Leubben- On Amazon.com

Black Diamond's official page covering rock protection

Wild Country's official page covering their rock protection

Metolius's official page

find us on facebook

Copyright notice: This website and all its contents are the intellectual property of www.coloradomountaineering.com and its authors. None of the content can be used or reproduced without the approval of www.coloradomountaineering.com.

Climbing and mountaineering are dangerous!! Please see the DISCLAIMER page
For information about how to contact us, visit this link


Thursday, January 17, 2013

Area Profile: Monument Canyon

OVERVIEW
Independence Tower ahead
approaching Independence Tower
in Monument Canyon
Monument Canyon is one of the premier destinations for hiking, climbing, and canyoneering in Colorado National Monument. The broad, sandstone canyon is home to many amazing rock formations and towers such as the Kissing Couple, the Coke Ovens, and, most famous of all, Independence Monument. This canyon is also home to a wealth of sport and trad routes ranging from moderately difficult to expert only. For the less technically-adept Monument Canyon offers simple hiking, bouldering, and scrambling in a pristine sandstone setting. This is a playground of recreational opportunity in a classic southwestern setting. The Colorado National Monument feels like a displaced (albeit far less-expansive) version of the Castle Valley area in Utah and the climbs more resemble what you would expect to find there than typical Colorado climbing areas.  

GETTING THERE

Upper Monument Canyon Trailhead: on Rim Rock Road in the Colorado National Monument, 8.1 miles from the park's west entrance.

Lower Monument Canyon Trailhead: Follow Grand Avenue from downtown Grand Junction west where it turns into Broadway and crosses the Colorado River. Continue on this road 8 miles through a neighbrhood and past many intersections (the road becomes Highway 340) until you reach a small dirt road marked with a sign for Lower Monument Canyon. This turnoff is notoriously easy to miss so be alert. There is a small parking lot here at this popular trailhead.

HISTORY

Pulling the crux of Otto's Route
The history of the Colorado National Monument and Monument Canyon inevitably begins with John Otto. It was thanks largely to Otto's efforts that the government recognized the Monument's value and placed it under national protection in 1911. Otto was named the park's first "custodian". Among other things, Otto established many trails through the park. He was also fond of bolting and chiseling into the rock when the climbing was too difficult. Though this, of course, is not an accepted practice in this part of the world now, Otto pioneered these routes during a different age. Signs of his work are visible on Liberty Cap trail, in Devil's Kitchen, and, most notably, on Independence Monument here in Monument Canyon. Otto's bolted rebar routes are sometimes jokingly called "Otto Ferrata".

The route Otto established on Independence Monument is still the easiest and standard route today. Named after its developer, Otto's Route is a four-pitch, 5.8+ Grade III. It is one of Colorado's few notable sandstone towers.

HIKING

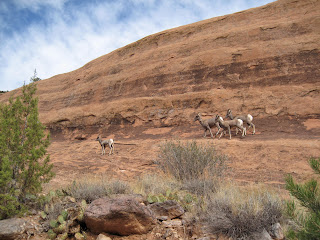
Bighorn sheep in Monument Canyon
Monument Canyon offers a variety of hiking options, all stemming from the Monument Canyon trail. This 5.2 mile route gains almost 1,500’ of elevation as it winds along the broad shoulder of Monument Canyon. At various locations along its length it offers access to many side adventures, including Independence Monument, Wedding Canyon, numerous sport-climbing routes, and other features. While hiking in Monument Canyon, please try to stay on the trail. For all its ruggedness, the desert is a remarkably fragile environment.

The main trail is one of the more popular routes in the Monument. The trail contours along the western cliffs of Monument Canyon. The usually dry creekbed is almost always far below and away from you. The trail can be accessed from either the upper trailhead off Rim Drive or from the Lower Trailhead off Highway 340. The lower trailhead is popular for casual day hikers and is also the normal approach to Independence Monument and the climbs of the lower canyon. A fun day trip is to start at the upper trailhead and hike through to the bottom with a vehicle shuttle.

From the lower trailhead, it is 1 mile to the first climbing wall where the popular First Dihedral route is located. The second main wall comes around 1.3 or so and Independence Monument is at mile 2.3.

CLIMBING

trad climbing in Monument Canyon
Monument Canyon offers some of the best climbing in the Grand Junction area. Everything from tall, multi-pitch desert towers to technical sport climbs are available. There are some serious classics in Monument Canyon. Otto's Route on Independence Monument is the most obvious example but other routes such as First Dihedral, Get a Life, Desert Solitaire,and others are also excellent quality. The nearby Kissing Couple and Sentinel Spire also provide excellent, challenging and adventurous tower climbing.

Here are just a few of the routes in the Monument Canyon area:

Trad

Tower (by easiest route):
Atop Independence Monument

Independence Monument (4 pitches, 5.8+, Grade III)
Kissing Couple (5 pitches 5.11a, Grade III)
Pipe Organ (5 pitches 5.11+)
Sentinel Spire (3 pitches 5.10)
Get a Life (Clueless Tower) (5 pitches, 5.12c, Grade III)

Wall:

Trad climbing in the Colorado National Monument
Left Dihedral (2 pitches, 5.12- or 5.8+ for first pitch only)
Right Dihedral (1 pitch; 5.9)
Out of the Fryingpan (1 pitch, 5.9)
Route 2 (1 pitch, 5.9)
Route 4 (1 pitch, 5.9+)
Desert Solitaire (6 pitches, 5.11a A1, Grade III)

Sport

Circle, Square, and the Triangle (5.10a)
Wingate Warrior (5.11a)
Higher Mind Dynamics (5.11)
Friends Cant Be Trusted (5.12b)
(note: there is a bolting ban in the Monument. For full climbing regulations please check this link to the National Park Service website.)

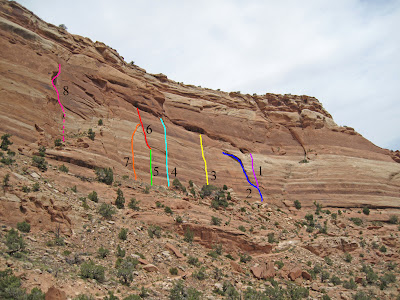
A topo of the main wall in Lower Monument Canyon:

Route topo of Lower Monument Canyon


The routes in this photo:

1- Circle, Square, and the Triangle [Sport, 100 feet, 5.10a] **
2- Luhr's Route aka Right Dihedral [Trad, 90 feet, 5.8+] **
3- Higher Mind Dynamics [Sport, 100 feet, 5.11] *
4- Friends Can't Be Trusted [Sport, 110 feet, 5.12b] **
5- First Dihedral aka Left Dihedral (first pitch) [Trad, 50 feet, 5.8+] ***
6- First Dihedral aka Left Dihedral (second pitch) [Trad/aid, 70 feet, 5.10+ C2 or 5.12a] **
7- Carter Route [Trad, 100 feet, 5.9] *
8- Euro Route [Trad, 100 feet, 5.11 (class 4 scramble just to get to base)]*

other photos:

A trad climb in Colorado National Monument
Sport climbing in the Colorado National Monument
Bighorn Ram in Colorado National Monument
Desert tower climbing in Colorado
Independence Tower in Colorado National Monument
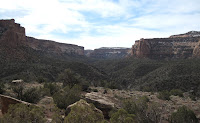
Monument Canyon in Colorado National Monument

This is only a small sample of the climbing in the area and there is likely still potential for development in the Canyon's hidden corners (which are numerous). This place is vast; the more effort you are willing to put in the more you are going to get out. For a deeper discussion of the trad and sport climbing in Monument Canyon check out the Mountain Project link in the external links section.

SPECIAL CONSIDERATIONS

Monument Canyon is within the borders of the Colorado National Monument. Check with the National Park Service for special regulations  One important rule for climbers is that bolting is no longer allowed within that canyon except to replace old dangerous hardware. The addition of new bolts is forbidden. Season raptor closures also affect several walls. Check with the National Park Service to find out when they are in effect.

TRIP REPORTS

Following in the Chipped Footsteps of a Pioneer
Is Otto's Route on Independence Monument a mega classic or chipped abomination? Explore this great route and the history of its creator.

What Does Independence Mean to You?- A weekend climbing in Unaweep and the Colorado National Monument, including a day at the Lower Monument Canyon slabs and an ascent of Otto's Route on Independence Tower.

Visit THE ARCHIVE: A list of most of our articles sorted by department
find us on facebook


Copyright notice: This website and all its contents are the intellectual property of www.coloradomountaineering.com and its authors. None of the content can be used or reproduced without the approval of www.coloradomountaineering.com.

Climbing and mountaineering are dangerous!! Please see the DISCLAIMER page
For information about how to contact us, visit this link


Friday, January 11, 2013

PEAK OF THE WEEK: Castle Peak (14,265' / 4348 m)

INTRODUCTION
Castle Peak and the Montezuma Basin
At 14,265' (4348 m) Castle Peak is the tallest mountain in Colorado's prestigious Elk Range and is the 12th highest mountain in Colorado. It is also the easiest 14er in the Elk Range to climb and a rough 4WD road stretches all the way to 12,700'. Fans of the abbreviated 14er experience who have a rugged off-road vehicle can shorten this mountain to a relatively short hike with only 1,500' of elevation gain. Using this method, Castle Peak is one of the easiest big mountains in Colorado to climb in terms of overall effort. However, Castle Peak is not immune to the Elk Range's infamous terrible rock quality, and the route itself does have some exposed and loose class "2+" sections. It is important to emphasize that it is not a walk-up in the same sense as the choss lumps of the nearby Sawatch Range. There is a  trail for most of the climb, but there is usually a permanent snow field to cross as well as several rocky sections that will require the use of your hands and careful attention to footwork.

While overshadowed by its much more famous and impressive Elk Range siblings (the Maroon Bells, Capitol Peak, Snowmass Mountain) Castle still reigns as a sort of redheaded stepchild who happens to be the oldest and biggest. The views from the summit are good and the basin between Castle and Conundrum is well worth exploring. There are several excellent couloirs on both peaks that allow for easy to moderate snow ascents as well as high quality back country skiing descents. Both Conundrum and Castle Couloirs have become more popular in recent years for this purpose.

GETTING THERE
Hiking along the approach road around 12,000'
Castle Peak is reached from Highway 82 just north of Aspen. From a large roundabout, take the Castle Creek Road turn towards the Aspen Music School, Aspen Hospital and Ashcroft. Follow this winding road along beautiful Castle Creek past the music school campus and some well to do homes. After 11 miles you will reach Ashcroft, a mini-hamlet with an excellent restaurant (The Pine Creek Cookhouse) and some other development. Continue for another two miles to a turnoff at a dirt road (FR 102) before a bridge over the creek. This is your turn. Follow the deterioration dirt road as it parallels the creek. Many passenger cars will park after only about a half mile. There is some free camping available in here as well. This is at around 9,800' elevation. If you decide to continue to the 4WD trailhead, continue along the road as it makes a tough creek crossing that will deter most passenger cars and station wagons (and all vehicles at high water). About two miles further is a common parking spot near the turnoff for Pearl Pass at 11,160'. Only the most rugged vehicles will want to continue past here. Don't go to Pearl Pass (a left turn) but continue along the road for another 2.4 miles to the highest trailhead at 12,800'. This makes your day very short and makes Castle Peak one of the fourteeners you can climb with the least amount of elevation gain.

SPECIAL CONSIDERATIONS
As previously mentioned, although Castle is technically the easiest 14er in the Elk Range, it is still home to the same notoriously rotten rock that has made the Maroon Bells, Pyramid Peak, and Capitol so infamous. This rock has cost a large number of people their lives throughout the Elk Range. Although Castle is not as exposed or difficult as these other peaks, it is still vitally important to tread very carefully on this loose mountain.

ROUTES

Northeast Ridge (Standard Route)
The Northeast Ridge route on Castle Peak became the standard summer route after a solid trail was constructed through the loose talus on this ridge. From the Castle Creek (standard, see above) trailhead, follow the road to the highest parking lot at 12,800'. Hike south from the parking lot towards Montezuma Basin between Castle (visible ahead) and Conundrum (to the southwest). There is usually a snowfield just past here to ascend. The snow is not particularly steep, but depending on conditions a ice axe might come in handy. After the snowfield follow the distinct trail through the talus as it enters the basin. Soon it will veer left and start to wind up the slope to where it reaches the ridge proper. From here the route gets a bit rougher and more exposed, though with careful routefinding should never exceed class 2. The last bands of rock are a bit steep but not too technical. Enjoy the rounded summit!
blue=Northeast Ridge; green=Castle Couloir; red=Northwest Ridge

Northwest Ridge
Before the construction of the good trail the winds through the talus on the Northeast Ridge route, this used to be the standard way to reach Castle's summit. Today it has fallen out of favor, largely due to the moderate snow climb to reach the saddle between Castle and Conundrum. When the snow melts at the top of this climb a steep, horribly slippery slope caps this route, presenting an even less attractive option. In the winter or spring, however, is snow is abound on both routes, this is probably the easiest and fastest way to reach the summit of Castle Peak. Follow the Northeast Ridge route past the 4WD trailhead and past the first snowfield into Montezuma Basin between the two mountains. Skirt a sinkhole/lake at the base of Conundum Couloir that formed a few years back (some unstable-looking geography through here). Climb the snowfield to the saddle between Castle and Conundrum at 13,800'. This is easiest when there is snow all the way to the saddle, for when the top section melts off (as in the photo above) the last hundred feet or so is on steep, dangerous ball bearings. From the saddle for the blunt ridge to Castle's summit. The terrain shouldn't exceed class 2.

Castle Couloir
A high quality snow climb on Castle Peak when the conditions are right. Follow the Northwest Ridge route into the basing between the two peaks. As you near Castle's North Face, locate the obvious couloir on its east (left) side. This couloir is only in good condition if it has snow for its full length. Climb this couloir for nearly 600 feet where you join the Northeast ridge at about 14,100' for the last pitch to the summit.

West Ridge
The West Ridge on the right skyline
This wilderness excursion offers a unique and exciting way to reach Castle's summit. This would be a good way for the mountaineer that is less concerned about ticking as many 14ers as quickly as possible but really getting the most enriching experience as possible from their mountaineering adventure. This route takes you to the Conundrum Hot Springs, one of the many wonders of the Elk Range. This route is almost certainly done as a backpack as it is 21 miles in length and gains nearly 7,000' of elevation. Most parties will camp at the Hot Springs and attempt the route the following day. While this is a wilderness trek into one of Colorado's most amazing and special basins, don't expect solitude. The Conundrum Hot Springs are notorious for crowds. Avoid holiday weekends and perhaps peak season if don't want to fight for campsites.

From the Conundrum trailhead (see this link for directions to this famous trailhead), hike for 8 miles along the well-defined trail to the Conundrum Hot Springs. This wonderful location is home to two nice hot spring pools at 11,200'. It is hard to beat the hot water at this high altitude. There is also good, designated campsites around the springs. This makes for a dreamy basecamp for your ascent of the West Ridge. Just past the springs, hike along a talus field into a bowl. Continue up along loose rock to a saddle at 13,600 west of 13,803' "Castleabra" (Colorado's 105th tallest peak). Climb up and over "Castleabra" to a 13,600' saddle at the top of "Cunning Couloir" (a reticent and climbable couloir that is also accessed from the Conundrum Trailhead). From here route gets a bit more difficult. Scramble up some class 3 to the summit of unranked Point 13,820. Descend yet again to another saddle at around 13,550' and scramble the last ridge to Castle's summit. Remember, if you are going to descend this route you have to return over Point 13,820 and "Castleabra".


TRIP REPORTS

(none available at this time)

EXTERNAL LINKS

Castle Peak on Summitpost.org
Castle Peak on 14ers.com

Friday, January 4, 2013

FEATURED ROUTE: Devil's Causeway (Flat Tops Wilderness)

Length: 6 miles (10 miles for loop extension)
Difficulty: class 2+ (exposed)
Elevation gain: 1,600'
Trailhead: Stillwater lake

INTRODUCTION

The Devil's Causeway in Colorado's Flat Tops Wilderness Area is an excellent alpine route that takes you past several pristine lakes, a deep basin, and an exposed and exciting ridge. It is one of the more popular hiking routes in this portion of the state, certainly one of the most popular areas in the Flat Tops Wilderness.

GETTING THERE
The Devil's Causeway is accessed from the small hamlet of Yampa. Exit Highway131 in Yampa and head west following signs toward Stillwater Reservoir and the Flat Tops. Follow the dirt road (CR 7) past several developed camping areas, over the dam and past Yamcolo Lake at mile 10.75 and finally to a small parking lot at the end of the road just before Stillwater Dam at mile 17. This is the trailhead for the Causeway.

 THE ROUTE

From the trailhead at Stillwater Lake, follow the well established trail west, crossing a small creek and coursing along the banks of the reservoir for .75 miles until you reach a major trail leaving the main trail on the right. Take this right through a beautiful forest as it winds its way north passes the small but beautiful Little Causeway Lake at mile 1.6 (10,800') and starts to climb more steeply towards a large bowl above you.

Climb up into the basin to where the terrain gets steeper and starts to switchback at mile 2.25 (11,250'). Climb steeply up the switchbacks for another half mile to the saddle at 11,600' on the Devil's Causeway Ridge. From here you are very close, but the exposure gets steadily more intense as you approach the Causeway. Though you shouldn't be up here for long, as it is a short out and back to the Causeway climax, this is no place to be caught in a storm.


Climb up steep terrain to a knob at 11,800'. Proceed along the narrowing fin until you reach the crux, which is only class 2-2+. It is rocky, however, and quite exhilarating. Most people cross the causeway, stop somewhere just on the other side and return back by retracing their steps to the car. For the more adventurous, however, there is a longer route.

After crossing the Causeway, the loop route continues along the rim on the basin to Mosquito Pass at 11,300' on the southwest end of the basin. From here you can descend a trail past Mosquito Lake, back down to Stillwater Lake and finally back to you car. This excellent journey has an adventurous feel and takes a full day, as it is a little more than 10 miles in length. Take a map, perhaps a Garmin, and be prepared for all sorts of alpine hazards. The payoff, however, is well worth it.

SPECIAL CONSIDERATIONS

The biggest hazard of the Devil's Causeway is alpine exposure and weather. Many people have difficulty with the exposure at the crux of the causeway, and some have been known to crawl through the most exposed section. Remember that the Flat Tops are known for protracted, apocalyptic thunderstorms. While this route is a quick out and back and therefore doesnt't keep you exposed for too much time, it is still important to consider the weather before committing to the most serious portion of this route.

EXTERNAL LINKS

The Colorado Hiker- a webpage with beta on hikes in Colorado. This link takes you to the page for the Devil's Causeway.


Visit THE ARCHIVE: A list of most of our articles sorted by department
find us on facebook


Copyright notice: This website and all its contents are the intellectual property of www.coloradomountaineering.com and its authors. None of the content can be used or reproduced without the approval of www.coloradomountaineering.com.

Climbing and mountaineering are dangerous!! Please see the DISCLAIMER page
For information about how to contact us, visit this link