Showing posts with label scrambling. Show all posts

Wednesday, October 9, 2013

Peak of the Week: Crestone Peak (14,294 feet)

INTRO
Crestone Peak and Crestone Needle
Late fall dusting of snow of Crestone Peak and
its neighbor Crestone Needle
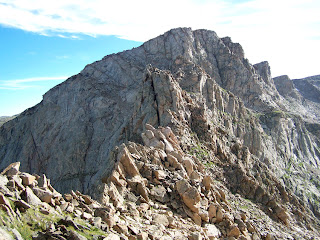
Without question, Crestone Peak is one of Colorado's most spectacular mountains. It is the anchor of the Sangre De Cristo Range, and its crown jewel. It is rugged, picturesque and intimidating. In terms of mountaineering, climbers will find that "The Peak" is one of the most challenging and technically difficult of Colorado's 14ers. But for the advanced mountaineer, more options are available on the rugged peaks of this massif than almost anywhere else in the state.

Crestone Peak is a classic mountain, one that Colorado can be proud of. The Sangres in general leap from the surrounding valleys with abrupt and awe-inspiring sharpness. These mountains define what it means to be rugged. As Colorado's 7th highest peak, Crestone Peak is the tallest mountain in the state that requires class 3 scrambling to obtain its summit.

Composed of cobbled, conglomerate rock, Crestone Peak and its neighbors are unique to Colorado geology, and climbing them is an experience that no mountaineer, either native or visiting, could ever forget. It is a mountain and a range with a unique personality.

DIRECTIONS
South Colony Lake Trailhead- South Colony Lake is the ideal and most popular base camp for the majority of Crestone Peak routes. It is a good base of operations, in fact, for most of the neighboring peaks as well, making multiple-summit trips logistically viable. From Westcliffe, follow Highway 69 for 4.5 miles south. Veer south (right) onto Colfax Lane (County Road 119). Follow this road straight until you reach a T-intersection with Country Road 120 (South Colony Road). Turn right and follow this road 1.5 miles to the trailhead. 4WD vehicles can continue for as many as four more miles to a high trailhead at 11,000 feet. This road is notoriously bad and sometimes a gate may block it off at 9,800 feet.

ROUTES
South Face (class 3, moderate snow)-
The South Face route on Crestone Peak is almost always the easiest route on the peak. However, this route is long, complicated and almost always entails ascending some moderate sections of snow. From South Colony Lakes, climb a couloir to Broken Hand Pass. Descend to Cottonwood Lake (accessible via a long trail through private property with permission) and climb a vague couloir up the south face to a notch between the main summit and a sub-summit. Scramble a couple hundred more feet to the top.

Northwest Couloir (class 3, steep snow/ice)-
Crestone Peak stands proud
This route is more straightforward and entails less elevation gain than the South Face route, but is generally more difficult and dangerous. Depending on conditions, the couloir with either be a steep but good snow climb, or a mess of icy, rubble-infested ledges. A helmet, crampons and ice axe are recommended in almost any season.

Peak to Needle Traverse (class 5.2, moderate snow)- This popular and challenging traverse is listed in Gerry Roach's guidebook Colorado's Fourteeners: From Hikes to Climbs as "one of Colorado's four great Fourteener traverses" and for good reason. This route is a spectacular way to visit both of these astounding Colorado peaks. Though originally listed as class 4, standard consensus these days is that there is some limited low class 5 terrain on this route. The most popular way to tackle this route is by climbing Crestone Peak's Northwest Couloir route first, traversing from Peak to Needle, and descending Crestone Needle's South Face. Arguments have been made for doing the traverse in the opposite direction of for starting on the Peak's South Face route instead. This all depends on your skill and mountain conditions. One thing is for sure that this route is long, committing and complicated so plan accordingly.

North Pillar (class 5.8)-
This is the premier technical route on Crestone Peak, and one of the harder alpine climbing in the Sangres. It is not as popular or well-known as the Ellingwood Arete (see a video of climbers on the Ellingwood Arete) on Crestone Needle but is still worth mentioning here. The North Pillar is a ten-pitch climb on the mountain's northeast face, with the crux 5.8 pitch coming about two-thirds of the way up. Be prepared for runouts, complicated route-finding, and some unforgettable knob-pulling on the famous Sangre conglomerate!

SPECIAL CONSIDERATIONS
The South Colony Lakes are in the Sangre De Cristo Wilderness Area and special regulations apply. These mostly focus on the carryout of waste. Check out the fact sheet for the Sangre De Cristo Wilderness Area for more information.

LINKS
Crestone Peak on 14ers.com

The Crestones on mountainproject.com

Crestone Peak on Summitpost.org

Visit THE ARCHIVE: A list of most of our articles sorted by department

find us on facebook


Copyright notice: This website and all its contents are the intellectual property of www.coloradomountaineering.com and its authors. None of the content can be used or reproduced without the approval of www.coloradomountaineering.com.

Climbing and mountaineering are dangerous!! Please see the DISCLAIMER page
For information about how to contact us, visit this link


Thursday, April 11, 2013

Ten Class 3 Colorado Classics

There is something fun about class 3. The thrill of climbing meets the freedom of not (usually) needing a rope. I have always enjoyed this grade. I feel mostly comfortable but it occupies my mind more than the long, grunt climbs of the easier class 2 peaks. This article is a toast to the great class 3 scrambles of Colorado.

The Sawtooth
The Sawtooth Ridge between Evans and Bierstadt
Mt. Bierstadt/Mt. Evans- The Sawtooth
The Sawtooth is a classic alpine ridge that connects two popular 14ers, Mt. Bierstadt and Mt. Evans. After ascending to the top of Bierstadt, this amazing ridge is immediately apparent, and nearly impossible looking. The long, engaging scramble is what makes this route a classic, ending in an exposed ledge that provides reasonable access to the west face of Mt. Evans.

Longs Peak- The Keyhole
No mountain deserves the designation of "classic" more than Longs Peak and no route in Colorado is climbed more often than the Keyhole. Although the approach hike is long, the effort to climb the Keyhole is well worth the trouble. Once you have passed through the Keyhole, the rest of the route is beautiful, exposed and classic. This climb's main detraction, however, is the sheer number of people who attempt this climb. However, if you can get past the crowds, this is truly one of Colorado's best scrambles.

Crestone Peak- The South Face
The South Face of Crestone Peak perhaps the best route on one of Colorado's best mountains. Crestone Peak is a dramatic mountain. The South Face is astounding route with great exposure, fantastic position and a plethora of high-quality class 3 scrambling.

Crestone Needle- The South Face
Crestone Needle along with its companion Crestone Needle form two of Colorado's most rugged and dramatic peaks. The South Face of Crestone Needle is a mega classic, with great sscrambling, engaging route-finding and some tremendous exposure. It is highly recommended by the writers of Colorado Mountaineering to do both the South Face of the Peak and the South Face of the Needle on a single trip, perhaps with a backpack basecamp at Cottonwood or South Colony Lakes.

Snowmass Lake and Peak
Snowmass Peak & Snowmass Lake

Snowmass Mountain- East Slopes
Snowmass Mountain is one of my favorite Colorado 14ers and this route takes you through an amazing place. A long alpine approach leads to Snowmass Lake, one of the most dramatic and breathtaking lakes of its size you will find anywhere. From here the route is thrilling. You ascend a long slope of class 2+ before finding a notch through a sharp ridge. The last few hundred feet is loose but engaging class 3.


Mt. Meeker- The Loft
Mt. Meeker (13,911') shares a ridgeline and a dramatic alpine cirque with Longs Peak. The Loft Route on Mt. Meeker takes you through this famous and classic alpine destination via a moderate class 3 scramble. The final ridge after climbing to the Loft is exposed a dramatic, finishing in an astonishing move to the summit block.

Mt. Sneffels Southwest Ridge
Mt. Sneffels is one of the San Juan's most popular mountains and for good reason. It is beautiful and well featured. Even the class 2 standard southeast ridge route is excellent and lively. The Southwest Ridge, however, is a classic route with long section of stout class 3, beautiful scenery, and excellent exposed positions. This route is one of my favorite class 3 scrambles. If weather moves in or time becomes an issue, you can descend the easier and faster standard route.

The south face of Mt. Sneffels
Relaxing on Sneffels Southwest Ridge route
Torreys Peak- Kelso Ridge
This Front Range classic is a great way to get a little solitude and make a little more of a mountain that is known for being easy. In general, Kelso is a mellow scramble but with a few cruxes that will get your attention. The knife-edge of Kelso, at the very end, is not the most difficult section, but often gets the most press. This exposed section is short lived but will get your attention. It is a good place to warm-up for more exposed and difficult climbing on other Colorado peaks.

Wetterhorn- Southeast Ridge
This standard route on Wetterhorn in Colorado's San Juan Range ranks as one of the best and most exciting class 3 scrambles. This route up Wetterhorn is relatively short, fun, and ends with an exciting scramble to an excellent summit. This excellent climb on this excellent is certainly worthy of this list.

La Plata Peak- Ellingwood Ridge
La Plata was my first 14er, and therefore will always have a special place in my heart. The Ellingwood Ridge route, however, is quite likely the best, and most complicated class 3 route on all of Colorado's 14ers. This route will challenge all but the most hardened of mountaineers with its long, snakelike ridge and devious up and down scrambling. This ridgeline is famous, and time consuming, so don't take it lightly. There are almost infinite variations which allow you to customize the difficulty of your climb. The easiest route is class 3 but you can easily make it class 5 with a more direct line.
Colorado's Ellingwood Ridge
The Ellingwood Ridge from La Plata's summit 
RELATED ARTICLES
Ten Class 5 Colorado Mountaineering Classics- is this list too tame for you? Check out or list of ten classic technical (class 5) routes on Colorado's high peaks.
Five Hardest 14er Cruxes- Five of the hardest cruxes on the standard routes of any 14er. Included: the Knife Edge on Capitol, the Leap of Faith on Sunlight, the Hourglass on Little Bear and others.

Visit THE ARCHIVE: A list of most of our articles sorted by department

find us on facebook

Follow us on Twitter!

Copyright notice: This website and all its contents are the intellectual property of www.coloradomountaineering.com and its authors. None of the content can be used or reproduced without the approval of www.coloradomountaineering.com.

Climbing and mountaineering are dangerous!! Please see the DISCLAIMER page
For information about how to contact us, visit this link


Wednesday, November 7, 2012

FEATURED ROUTE: Mt. Sneffels (Southwest Ridge)

FEATURED ROUTE: Mt. Sneffels (Southwest Ridge)


Miles: 8.0
Elevation gained: 3,500'
Difficulty: Class 3

The Southwest Ridge of Mt. Sneffels is an excellent scrambling route that is exciting, scenic, exposed yet not too difficult. It makes an excellent alternative to the popular standard route which, as Sneffels is likely the most popular mountain in the San Juans Range. The Southwest Ridge takes the same approach, from Yankee Boy Basin, but avoids much of the loose scree of the standard route. For someone who is comfortable with class 3-4 scrambling on exposed rock, this is one of the better more challenging ways to climb Mt. Sneffles.

From Ouray, take Highway 550 south towards Silverton and Durango. About a half mile outside of Ourday, turn right onto a dirt road (CR 361) that enters Yankee Boy Basin. Measure from this point. Around mile 3-4 there is good camping. Pass an exposed shelf section of road at mile 5. The usual trailhead is found at mile 7 where there is good parking and a bathroom. Some passenger cars can make it to this point. 4WD only after here and even then the road gets pretty rough. The highest possible trailhead is at mile 9.7 at 12,440'. Continue past the parking lot for a short ways, taking a left at a fork in the trail towards Blue Lakes Pass (the right fork goes to the standard route). Follow the switchbacking trail for three-quarters of a mile past the end of the 4WD road to the summit of the pass. The approach is over.


Leave the trail and turn north along the southwest ridge proper to a set a jagged gendarmes. These spires are foreboding in appearance during the approach but as you will find at this point, they are easy to avoid on the west (left) side.

After the gendarmes, veer slightly left into a gully. Cinch down your helmet here if you havent already, for the crux moves are not far ahead and the rest of the route from here to the summit is steep, exposed, and littered at times with loose rock. Follow the well-cairned path of least resistance up class 3-ish terrain through a series of disjunct gullies to a prominent notch at 13,500'. Cross through the notch and downclimb to the east (right) into a prominent, loose gully. Ascend the gully to a large notch in the ridge, easily visible on approach.


Turn right at the top of the gully and face what I thought was the route's crux, a steep class 4-ish section. We found ice in early September here and were forced into what was definitely class 4 terrain. I am told that even a good line here might have some class 4 moves. Above this crux headwall you ascend a steep gully, passing the "Kissing Camels" formation on the left, and exit onto the ridge proper at 13,700'. Cross over to the south face and climb the last few hundred feet and easy but wonderfully exposed class 3 rock directly to the summit.


Visit THE ARCHIVE: A list of most of our articles sorted by department

find us on facebook


Copyright notice: This website and all its contents are the intellectual property of www.coloradomountaineering.com and its authors. None of the content can be used or reproduced without the approval of www.coloradomountaineering.com.

Climbing and mountaineering are dangerous!! Please see the DISCLAIMER page
For information about how to contact us, visit this link


Sunday, September 16, 2012

PEAK OF THE WEEK: La Plata Peak

La Plata Peak

La Plata Peak
La Plata from near the trailhead
INTRODUCTION

Located just south of Independence Pass, La Plata is Colorado’s fifth highest mountain. With easy access and a mild class 2 route that follows the northwest ridge, La Plata is an understandably popular mountain. It was also my first fourteener and thus holds a special place in my heart as well. For the more adventurous mountaineer, the Ellingwood Ridge on the northeast flank of the mountain is a long, exciting class 3 route with class 5 potential should you want to challenge yourself on the ridge crest.

DIRECTIONS

From the summit of Independence Pass drive east/southeast towards Granite for 6.9 miles to a pull off on the south (right) side of the road. There is a good trailhead here, but there is no car camping at the trailhead itself. If you are coming from the other direction, this parking area is 14.5 miles west of the Highwsy 82-US 24 intersection near Granite.


ROUTES

Northwest Ridge (class 2)- the scenic route is the most easily accessible and most popular route on La Plata. It is a mellow hike on a mostly class 1 trail with some scree and loose rock in the last 1,000 feet. It offers tremendous views of the Ellingwood Ridge as you climb toward the summit of this huge peak.

Southwest Ridge (class 2)- this quieter alternative is often considered easier than the popular northwest ridge, but is not as easy to access.

Ellingwood Ridge (class 3)- This excellent route is a scramble up La Plata’s most rugged feature. This is a long a complicated route with plenty of route-finding challenges. Give yourself plenty of time to do this one. Descend the Northwest Ridge.

SPECIAL CONSIDERATIONS

La Plata is as clean and easy to access as 14ers come. Keep in mind that as opposed to other 14ers, when you get to 14,000’ you still have a good ways to go. There is no camping at the trailhead (although I have heard of people who slept in the back of their cars). There is good camping nearby at Parry Peak Campground just upstream of Twin Lakes, though this spot can fill up on busy summer weekends.


STANDARD ROUTE (Northwest Ridge)

Length: 9.8 miles
Elevation gained: 4,400'

From the trailhead hike along up South Fork of Lake Creek Road over a bridge and past some No Trespassing signs. When the road veers right find a trail off left toward the creek. Cross the South Fork of Lake Creek at a solid bridge. The creek looks rather heavy with heavy metals here and there are signs telling you not to drink, even if filtered, from this toxic slurry. Not environmentally sound mining practices of previous generations have badly marred this beautiful stream. Bring enough water with you or filter from Lake Creek (preferably above the confluence of its tributary the South Fork). Continue along the well-defined trail through the woods near the creek’s east bank and cross La Plata Gulch Creek at mile .4. Hike up next to La Plata Gulch creek on its east side for a little over a mile to where the trail leaves the creekside and starts up the steep slopes towards La Plata’s Northwest Ridge. The approach is over.

The trail switchbacks steeply up the slope on a good trail for a couple miles, gaining 1,700’ of elevation, before arriving at the 12,800’ saddle. The view of Ellingwood Ridge here is amazing. La Plata also towers above you to the south. You can see much of the rest of the route from here. The trail turns right and begins its ascent of the ridge proper. Though the trail is always present, it does get loose and slippery at times. Watch out for ankle-twisting loose rocks and try not to kick anything down on your climbing partners. You will have to negotiate some minor class 2 sections.

La Plata’s proud summits sits amidst a sea of Sawatch giants. Depending on your level of Sawatch experience you will recognize many summits. Enjoy!


Visit THE ARCHIVE: A list of most of our articles sorted by department

find us on facebook

Copyright notice: This website and all its contents are the intellectual property of www.coloradomountaineering.com and its authors. None of the content can be used or reproduced without the approval of www.coloradomountaineering.com.

Climbing and mountaineering are dangerous!! Please see the DISCLAIMER page
For information about how to contact us, visit this link


Thursday, October 20, 2011

Mt. Bierstadt and Mt. Evans: A Tale of Two Mountains

Mt. Bierstadt (14,060') and Mt. Evans (14,264')
distance hiked: 11.06 miles
elevation gained: 3,864 feet

I'm not a fan of the overused "A Tale of Two..." allusions to Dickens famous novel, but the title seemed appropriate for this day in more ways than one. First of all, Mt. Bierstadt is a true fourteener, with a beautiful trailhead and a quiet summit, while Mt. Evans (which boasts the "highest paved road in America") has the over-exploited feel of a raucous amusement park ride. The "Tale of Two Mountains" cliche is also applicable to our experience on Bierstadt and Evans because of the two very different experiences we had: an exciting, wonderful ascent and a grueling, despairing descent. Regardless of these negatives, our experience on these two mountains was one of the most memorable climbs of the summer, and a day I wont soon forget.

The day after a relatively easy stroll up Grays and Torreys Peaks, we made it to the trailhead for Mt. Bierstadt high on Guanella Pass feeling tired but invigorated by excitement. Guanella Pass is a beautiful area, and the trailhead is at a lofty 11,669'. The lush landscape around us was socked-in by glorious tumbles of fog, and the air was crisp. The famous shape of the Sawtooth (the augural moniker for the connecting ridge between Bierstadt and Evans) loomed through the haze, looking as menacing and terrible as its namesake.

Sunrise over Mt .Bierstadt (right) and the Sawtooth:

The hike up Bierstadt was easy and relatively short. A few climbers were spread out above us, and a long line of cars/people were amassing behind. In less than three hours we achieved our first summit for the day. I quietly celebrated my twentieth fourteener.

View to the southeast from near the summit of Bierstadt (the white in the background is a thick coating of fog):

Ella finishing her ascent of Bierstadt:

View to the west toward Guanella Pass (Grays and Torreys Peaks visible in the center in the distance):

Group photo of the three of us atop Bierstadt:

After a few moments' rest, we strapped on our helmets and turned to face the most challenging portion of our day: Bierstadt's famous Sawtooth Ridge.

The view of the Sawtooth Ridge from Bierstadt:

The same photo with the route drawn in:

The Sawtooth is a renowned traverse between two popular Front Range peaks. It was also the first official Class III route of our summer. Most of what we'd heard about the route focused the difficulties and exposure of the ascent on the Sawtooth's far end (relative to Bierstadt) and said little about the descent on the near side. As a result, we were surprised to find challenging class III terrain almost immediately upon departing the summit.

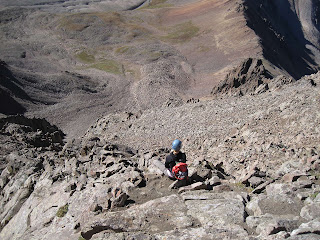
The first obstacle was a steep, loose gully descending north from Bierstadt. We had to be cautious with each step not to slip or stumble or loosen rocks onto each other. Near the ridge's low point we had to traverse across an exposed face, pressing ourselves against a cliff and tiptoeing across a tiny ledge above a tall drop. At the bottom of the Tooth, we approached the crux section (the part we'd read so much about) of our day: a tall series of broken cliffs and ledges with extended class III climbing and class IV variations.

Approaching the most difficult section of the Sawtooth:

The next half-hour was exemplary of the great joys of semi-technical climbing. We had to tediously investigate our route, searching for breaks in the mountain's defenses. We had to plan ahead to avoid stranding ourselves on dead-end ledges. We had to focus on hands, feet, and rock to assure that all were working together in harmony. Each and every movement was an exercise in skill and focus. This type of climbing was a far cry from the numb ascents of solid trails that had dominated much of our fourteener experience to this point. For the first time in the summer, in many ways, we felt like true mountaineers.

The crux section of the climb:

Too quickly, we reached easier terrain, and the difficult scrambling was over. We took a short respite and scouted the next (still interesting but less technical) portion of the climb. Here the route maneuvered left onto the vertical west face of the Tooth's most jagged promontory via a narrow, gravel ledge sandwiched between tall cliffs both above and below. We watched with some trepidation as several climbers ahead of us carefully negotiated this tremendously exposed section.

Ella and Michelle resting before the last portion of the Tooth:

Our fears about this portion, it turned out, were mostly in vain as the ledge was wider and more stable than it initially appeared. The climbing did not exceed class II, and as long as we did not focus too intently on the airy drop to our left, the exposure was not problematic. This would not be a comfortable place, however, for someone afflicted with acrophobia.

Ella and Michelle negotiating The Sawtooth's narrow ledge:

Another climber overlooking a drop into oblivion:


Once past the exposed ledge we were on the west ridge of Mt. Evans, and we convinced ourselves that we had little more than a simple stroll to the summit. This stroll, however, turned out to be hotter, longer, and more tedious than anticipated. It took the better portion of an hour to accomplish.
At long last we crested the final ridge, and the view of Mt. Evans' summit opened before us. To our surprise we were greeted by the chaos of a bustling endpoint of a busy bike race. Standing abreast of the finish line was one of the race's officials, encouraging the riders with proclamations such as: "You can do it! Only a few more feet" or "You're almost there!" Her encouragement, we took the liberty of assuming, was actually meant for us.

Mt. Evan's summit and the bike race finish line:

The summit of Mt. Evans is like a different world compared to the rest of the mountain. It is, in fact, an anomaly in a sea of quiet, amazing Colorado mountaintops. A paved road achieves it. It is festooned with an observatory and summit house. It is so well equipped, in fact, that I was able to un-encumber my bladder in the relative luxury of a summit bathroom.

A mountain goat who stood by uninterested as I waited in line for the summit privy:

After lounging amongst the rocks for nearly an hour looking down on streams of bikes careening both up and down the mountain, we turned our backs on the scene of Mt. Evans' summit and began the long descent.

While undertaking this long downclimb, however, what had been one our best, most-enjoyable days of the summer took a sour turn.

The descent route (we didn't have to return over the Sawtooth) took us down an unpleasant gully that was a loose, tedious, and treacherous bowling alley of rubble and scree. We had to descend to a point lower than the trailhead and engage in the infamous Bierstadt willows (a muddy slog through bug-infested marshes and clawing, scratching brush). To complicate matters, the afternoon thunderstorms arrived on schedule, and we spent the last mile being pelted by harsh rain and stinging hail while searching for an often non-existent trail. Lightning crashed like the snarl of some great minion of Hell, and when we finally reached the car the air was statically charged with enough sufficiency to lift our hair straight from the tops of our heads.

Back at camp, foolishly thinking the worst was behind us, we were dismayed to discover four inches of hail piled against our tent and our sleeping bags resting in a pool of water several inches deep. These tribulations, however, were only a small price to pay for a great day spent teetering on the blade of a saw.

This waterfall was the only high point of an unpleasant descent:

High-alpine flowers on the slopes of Mt. Evans:


Visit THE ARCHIVE: A list of most of our articles sorted by department

find us on facebook


Copyright notice: This website and all its contents are the intellectual property of www.coloradomountaineering.com and its authors. None of the content can be used or reproduced without the approval of www.coloradomountaineering.com.

Climbing and mountaineering are dangerous!! Please see the DISCLAIMER page
For information about how to contact us, visit this link