Showing posts with label class 3. Show all posts

Friday, August 19, 2016

Peak of the Week: Grays (14,270') and Torreys (14,267')

INTRO
Gray and Torreys in the morning light
Grays and Torreys are two of the most popular 14ers in Colorado. The reasons for this are simple: located just off I-70 they are two of the most accessible 14ers in the state, they boast a bevy of high-quality and highly varied routes, and the popular traverse between the two peaks in one of the most user-friendly 14er routes in the state, making it handy for mountaineering newbies and pets and less-fit hikers.

We have included these two peaks together for the popularity of climbing the two peaks at once, but these peaks are each worthy in and of themselves. Grays Peak offers multiple routes other than the standard Grays Peak Trail hike (such as the fun Lost Rat Couloir). Torreys Peak also offers numerous alternative, such as the class 3 Kelso Ridge. The popular traverse between the two makes for an easy way to tick off two great mountains in a single day and a great way to get elevation in this beautiful part of the state.

DIRECTIONS
From I-70 take exit 221 (Bakersville) about six miles east of the Eisenhower Tunnel and cross a dirt parking lot. Find Forest Road 189 and follow signs for 3 miles to the obvious trailhead (11,268'). This road may be a bit bumpy but I have seen passenger cars make it all the way to the top. There are places to park earlier if you wish to avoid vehicular abuse. I had no trouble whatsoever making it to the top in my Subaru.

ROUTES
Grays/Torreys Traverse (class 1-2) 
Looking across at Torreys from Grays
This easy route is one of the most popular climbs in the state. With a high trailhead and a solid trail for nearly the entire section (except for a few very small stretches) this route is famous for its brevity, allowing less-fit hikers to bag two 14ers in a relatively short amount of time. From the trailhead, follow the main artery up an easy-to-follow class 1 trail to the summit of Grays Peak. From here descend to the saddle between the peaks (some small class 2 perhaps) at aboout 13,700 feet, and ascend to the summit of Torreys (perhaps some class 2 again). Descend back to the saddle, rejoin the Grays Peak trail and return to your car. Simple, classic.

Lost Rat Couloir (Grays Peak) (Class 3, moderate snow)
This fun snow climb is a great introduction to snow couloir climbing and a great way to make more of this gentle mountain. Follow the Grays Peak trail for a bit over a mile until just before a sign. You can see the couloir on the face of Grays a bit left of the summit. Follow a small, faint road left into a snow basin and contour towards the base of the couloir. Enter the couloir around 12,800' and climb moderately steep snow to the ridge (snow and avalanche gear recommended). Turn right and follow the ridge to the summit.

Kelso Ridge (Torreys Peak) (class 3)
This is a great scramble that makes more of Torreys Peak. It is a bit exposed and includes some excellent class 3 scrambling. Follow the Grays Peak trail for nearly two miles. Turn right around 12,300 onto a climber's trail that ascends to the saddle between Torreys and Kelso Mountain. Reach the saddle at 12,450' and turn up Kelso Ridge toward Torreys Peak. Scramble up the ridge (with some routefinding issues) to the summit. Enjoy the white-colorado "knife edge" just before the summit.

SPECIAL CONSIDERATIONS
Grays and Torreys are two of the most popular mountains in Colorado. Do NOT expect solitude! Arrive early and beat the crowds, or just enjoy the social experience that is these mountains. If hiking in the winter, be prepared for avalanches and all of the usual objective hazards of winter mountaineering. Just because they have a reputation for being easy doesn't mean they are in the winter!

TRIP REPORTS
Grays and Torreys- An ascent of the standard traverse in the summer time with photos, description and more

LINKS
Grays and Torreys on 14ers.com

Torreys Peak on Summitpost.org

Grays Peak on Summitpost.org


Visit THE ARCHIVE: A list of most of our articles sorted by department

find us on facebook

Follow us on Twitter!

Copyright notice: This website and all its contents are the intellectual property of www.coloradomountaineering.com and its authors. None of the content can be used or reproduced without the approval of www.coloradomountaineering.com.

Climbing and mountaineering are dangerous!! Please see the DISCLAIMER page
For information about how to contact us, visit this link


Monday, July 13, 2015

Peak of the Week: Mount Massive

INTRO
Mt. Massive's South Slopes route
The South Slopes route from just above treeline
Mount Massive is one of Colorado's most magnificent and gigantic peaks. With seven distinct summits, four of which are over 14,000 feet, Massive is almost more of a sub-range or a massif than a singular peak. As most everyone knows by now, Massive is the second-highest peak in Colorado and the third highest in the lower 48. By almost any measure, Massive is one of Colorado's most impressive mountains.

There are several routes up Mount Massive, from the relatively easy South Slopes standard route (class 2) to the scrambling ridgeline that connects North Massive to Massive proper to the marathon nine-summit "Massive Mania," which truly traverses the entirety of this great mountain. By the time you have completed your visit to this majestic peak you will understand its reputation and its name.


DIRECTIONS
Mount Massive TH
From Leadville, drive 3.5 miles south on Highway 24. Turn onto CR 300. Follow this road for 7 miles to the obvious trailhead just past the trailhead for Mt. Elbert on the left side of the road, Half Moon Campground (right side of road) and over a creek crossing. The trailhead on the right.

North Half Moon TH
Follow the directions for the Mount Massive TH. Continue past the Mount Massive TH for 2 miles to a junction. The road may be 4WD beyond this point. Continue straight for another half mile to the trailhead.

Windsor Lake TH
From downtown Leadville drive 4.5 miles west to Turquoise Lake. Cross over the dam and follow Hagerman Pass Road for 7 miles. Park on the north side of the road, cross over the Carlton Diversion tunnel and find the start of the trail after crossing a small stream.


ROUTES
East Slopes (13.5 miles; 4,531' elevation gain; class 2)
This is the standard route on Mount Massive and is a walk-up classic. One drawback, however, is that being the easiest route on Colorado's second highest peak, it is popular. Don't expect solitude unless you go in the off season.

rotten snow on Mt. Massive in the late spring
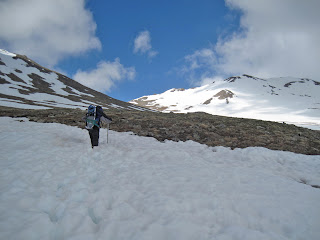
Slogging up snowfields on the South Slopes in late spring
This route starts at the popular Mount Massive TH very close to the Mount Elbert TH and Half Moon Creek campground. It contours along the base of the peak, following the Colorado Trail for 3.5 miles. Turn left (don't miss this junction) onto the Mount Massive Trail at 11,300' and follow it through the trees until you emerge in the gigantic basin on Massive's east side. The summit doesn't look far away, but the distance is deceiving.

Follow the well-trodden trail for 3 miles as it climbs to the saddle on Massive's southern shoulder (between Massive and unranked "South Massive". This saddle is at 13,900'. Follow the rocky ridgeline to the summit and take in the view.

Southwest Slopes (5.8 miles; 4,001' elevation gain; class 2)
This steep, abridged route is the shortest way to climb Massive and avoids most of the crowds of the South Slopes. From the Half Moon TH, follow the trail northwest  to 11,200' and locate a tricky-to-find hiker's trail that cuts north up a gully. Weave through some broken cliffs, climbing very steeply and join the Eat slopes route just above the saddle and follow this to the summit.

Massive Mania (11.9 miles; 4,953' elevation gain; class 3)
This impressive route is accomplished via a car-shuttle and collects all nine of Massive's numerous summits. This incredible journey gives you the full Massive experience. Starting at the Lake Windsor TH follow the Continental Divide along the lofty ridge of Massive's massif until you reach North Massive, a "possibly ranked" 14er. Descend southwest along a scrambly class 3 ridge to "Massive Green" and continue the traverse along easier terrain to Massive's main summit. Continue the exposed ridge traverse to "South Massive" and "South South Massive" and finally over Point 12,381. Descend to the Mount Massive TH and congratulate yourself on an incredible journey.

SPECIAL CONSIDERATIONS
By every route, Massive is a big mountain. The standard route is long and exhausting, and almost every route on the mountain will carry you high above treeline for long periods of time. Take careful consideration about the weather forecast and don't get caught on Massive's long ridges in a thunderstorm.


LINKS
Mount Massive on 14ers.com

Mount Massive on Summitpost.org

Visit THE ARCHIVE: A list of most of our articles sorted by department

find us on facebook


Copyright notice: This website and all its contents are the intellectual property of www.coloradomountaineering.com and its authors. None of the content can be used or reproduced without the approval of www.coloradomountaineering.com.

Climbing and mountaineering are dangerous!! Please see the DISCLAIMER page
For information about how to contact us, visit this link


Wednesday, October 9, 2013

Peak of the Week: Crestone Peak (14,294 feet)

INTRO
Crestone Peak and Crestone Needle
Late fall dusting of snow of Crestone Peak and
its neighbor Crestone Needle
Without question, Crestone Peak is one of Colorado's most spectacular mountains. It is the anchor of the Sangre De Cristo Range, and its crown jewel. It is rugged, picturesque and intimidating. In terms of mountaineering, climbers will find that "The Peak" is one of the most challenging and technically difficult of Colorado's 14ers. But for the advanced mountaineer, more options are available on the rugged peaks of this massif than almost anywhere else in the state.

Crestone Peak is a classic mountain, one that Colorado can be proud of. The Sangres in general leap from the surrounding valleys with abrupt and awe-inspiring sharpness. These mountains define what it means to be rugged. As Colorado's 7th highest peak, Crestone Peak is the tallest mountain in the state that requires class 3 scrambling to obtain its summit.

Composed of cobbled, conglomerate rock, Crestone Peak and its neighbors are unique to Colorado geology, and climbing them is an experience that no mountaineer, either native or visiting, could ever forget. It is a mountain and a range with a unique personality.

DIRECTIONS
South Colony Lake Trailhead- South Colony Lake is the ideal and most popular base camp for the majority of Crestone Peak routes. It is a good base of operations, in fact, for most of the neighboring peaks as well, making multiple-summit trips logistically viable. From Westcliffe, follow Highway 69 for 4.5 miles south. Veer south (right) onto Colfax Lane (County Road 119). Follow this road straight until you reach a T-intersection with Country Road 120 (South Colony Road). Turn right and follow this road 1.5 miles to the trailhead. 4WD vehicles can continue for as many as four more miles to a high trailhead at 11,000 feet. This road is notoriously bad and sometimes a gate may block it off at 9,800 feet.

ROUTES
South Face (class 3, moderate snow)-
The South Face route on Crestone Peak is almost always the easiest route on the peak. However, this route is long, complicated and almost always entails ascending some moderate sections of snow. From South Colony Lakes, climb a couloir to Broken Hand Pass. Descend to Cottonwood Lake (accessible via a long trail through private property with permission) and climb a vague couloir up the south face to a notch between the main summit and a sub-summit. Scramble a couple hundred more feet to the top.

Northwest Couloir (class 3, steep snow/ice)-
Crestone Peak stands proud
This route is more straightforward and entails less elevation gain than the South Face route, but is generally more difficult and dangerous. Depending on conditions, the couloir with either be a steep but good snow climb, or a mess of icy, rubble-infested ledges. A helmet, crampons and ice axe are recommended in almost any season.

Peak to Needle Traverse (class 5.2, moderate snow)- This popular and challenging traverse is listed in Gerry Roach's guidebook Colorado's Fourteeners: From Hikes to Climbs as "one of Colorado's four great Fourteener traverses" and for good reason. This route is a spectacular way to visit both of these astounding Colorado peaks. Though originally listed as class 4, standard consensus these days is that there is some limited low class 5 terrain on this route. The most popular way to tackle this route is by climbing Crestone Peak's Northwest Couloir route first, traversing from Peak to Needle, and descending Crestone Needle's South Face. Arguments have been made for doing the traverse in the opposite direction of for starting on the Peak's South Face route instead. This all depends on your skill and mountain conditions. One thing is for sure that this route is long, committing and complicated so plan accordingly.

North Pillar (class 5.8)-
This is the premier technical route on Crestone Peak, and one of the harder alpine climbing in the Sangres. It is not as popular or well-known as the Ellingwood Arete (see a video of climbers on the Ellingwood Arete) on Crestone Needle but is still worth mentioning here. The North Pillar is a ten-pitch climb on the mountain's northeast face, with the crux 5.8 pitch coming about two-thirds of the way up. Be prepared for runouts, complicated route-finding, and some unforgettable knob-pulling on the famous Sangre conglomerate!

SPECIAL CONSIDERATIONS
The South Colony Lakes are in the Sangre De Cristo Wilderness Area and special regulations apply. These mostly focus on the carryout of waste. Check out the fact sheet for the Sangre De Cristo Wilderness Area for more information.

LINKS
Crestone Peak on 14ers.com

The Crestones on mountainproject.com

Crestone Peak on Summitpost.org

Visit THE ARCHIVE: A list of most of our articles sorted by department

find us on facebook


Copyright notice: This website and all its contents are the intellectual property of www.coloradomountaineering.com and its authors. None of the content can be used or reproduced without the approval of www.coloradomountaineering.com.

Climbing and mountaineering are dangerous!! Please see the DISCLAIMER page
For information about how to contact us, visit this link


Tuesday, September 10, 2013

Peak of the Week: Arrow Peak (13,803 feet or 4207 m)

INTRO
There are those in the Colorado mountaineering community who are convinced that the best mountains to climb in our great state are not the ultra-popular 14ers but the lesser-known but just as mighty 13ers. Arrow Peak, in the heart of the San Juan Mountains, is a testament to this.

At 13,803 feet, Arrow Peak falls just shy of hitting the "Centennial" List (Colorado's 100 highest peaks). In terms of rock quality, route aesthetics, and general fun potential, there is hardly a peak anywhere in the state that is more dramatic and fun to climb than Arrow.

When seen from the Colorado Trail alongside its more-famous companion, Vestal Peak, Arrow looks like a peak removed perhaps from the Tetons or one of the rugged ranges of Europe. Arrow Peak is a mountain Colorado can be proud of.

What makes Arrow even more enticing is that its foreboding slopes are not easy to climb. The easiest route, the Northeast Face, is a class 3-4 scramble with many thoughtful and complicated vertical feet. Luckily, the climb is on surprisingly solid quartzite which is unique to the San Juans. Though this route does not require a rope, it is exposed and intricate and not for the beginner.

Not surprisingly, Arrow's rugged escarpments are also home to several technical climbs, especially the North Ridge, a high-quality class 5.6 alpine route.

Arrow Peak in the Grenadier Range
The Northeast Face of Arrow Peak
DIRECTIONS
The trailhead at Elk Park at the edge of the Weminuche Wilderness Area is accessible either by taking the Durango-Silverton Narrow Gauge Railroad from Durango or by hiking in from the Molas Pass Trailhead. The Molas Pass trailhead is two miles north of Molas Pass on Highway 550 in-between the turnoffs for Molas and Little Molas Lake campgrounds. This large dirt lot and trailhead is five miles south of Silverton.

ROUTES
Northeast Face (class 3)
This is the standard and easiest route on Arrow Peak. It is an amazing scramble up remarkably solid rock with amazing positions and views. Most people establish a base camp near 11,500 feet in Vestal Basin right at the foot of this route. From basecamp, follow the spiraling ramp up the northeast face of Arrow peak through some sustained and excellent scrambling to the summit.

North Ridge (class 5.6)
Though not as famous and not as aesthetic as its neighbor Wham Ridge, many argue that the North Ridge of Arrow is quite possibly the better climb of the two. It is longer and more sustained and a bit more difficult than its Vestal Peak sibling. The quartzite is as good as any in the San Juans, and the pitches and high quality and generally fairly well protected.

Arrow and Vestal Peak
Arrow and Vestal Peak from the Colorado Trail
Arrow Spire (class 5.8)
An incredible route that climbs a buttress on the peak's west side. This incredible spire to a sub-summit can be see from the Beaver Ponds at 10,000 feet on the Colorado Trail. This is perhaps the most rugged and spectacular of all the Grenadier routes.

SPECIAL CONSIDERATIONS
Arrow Peak is in the Weminuche Wilderness. As with all wilderness areas, special regulations apply. Arrow Peak has some unique features worth noting. Taking the train from Durango to the Elk Park station will cut off over 6 miles and 1,800 feet of additional gain and loss of elevation. This is helpful but costs $85 one way. Visit durangotrain.com for more information.

TRIP REPORTS
Dirty (Wet) 30: An Attempt at Arrow and Vestal Peaks to celebrate turning 30.

LINKS
Arrow Peak on summitpost.org

North Ridge on mountainproject.com

Northeast Face on summitpost.org

Arrow Spire on mountainproject.com

Visit THE ARCHIVE: A list of most of our articles sorted by department

find us on facebook


Copyright notice: This website and all its contents are the intellectual property of www.coloradomountaineering.com and its authors. None of the content can be used or reproduced without the approval of www.coloradomountaineering.com.

Climbing and mountaineering are dangerous!! Please see the DISCLAIMER page
For information about how to contact us, visit this link


Thursday, July 11, 2013

Peak of the Week: The Maroon Bells (14,156' or 4315 m)

INTRO
The Maroon Bells
The Maroon Bells in the Elk Range
The Maroon Bells are two of Colorado's iconic 14,000 foot peaks. They are beautiful, treacherous and infamous. Hardly any mountain in the state has killed as many alpinists as Maroon Peak and its subsidiary North Maroon. Tragedies have been so common on the Bells, in fact, that they have earned the nickname "The Deadly Bells". As someone who has lived in the Roaring Fork Valley for over 15 years, I can tell you that almost every year at least one mountaineer is killed on either of the Bells or its neighbor Pyramid. Some years there are multiple accidents. These are beautiful peaks, but it is important to stress that they are NOT FOR CASUAL HIKERS!!! These are mountains where experience is crucial, though even that might not always save you. With as numerous of objective hazards as you find on crumbling mountains like these, anybody at any time can become a victim.

I am going to group these two peaks together, as they are part of one massif. North Maroon, though on most people's 14er list, does not qualify as an official peak, as it has only 234 feet of topographical prominence. Anyone who scales this traverse, however, will surely argue that these are two distinct peaks. Just about any aficionado of Colorado mountaineering would raise a suspicious eye if you claimed to have climbed all of Colorado’s 14ers and hadn’t been to the top of North Maroon.

DIRECTIONS
Heading north on Highway 82 from Aspen, find an obvious roundabout and take the turn for Maroon Lake Road. Follow this road for almost 10 miles to the end at the parking lot for Maroon Lake. This is the trailhead.
The backside of the Maroon Bells
The backside of the Maroon Bells from
Frigid Air Pass.

ROUTES
Maroon Peak- South Ridge (class 3)
This 11-mile route is the easiest way to climb Maroon Peak, but it is very loose and route-finding is notoriously challenging. This route has killed several climbers over the years. The primary threats are falls (usually due to loose rocks breaking), and rockfall. The bottom line is, while this route isn't particularly difficult, it is a rotting mess and therefore not to be taken lightly. Don’t climb below anyone, go one at a time through the worst sections, and for sure without question wear a helmet!

Maroon Peak- Bell Cord Couloir (class 4, steep snow/ice)
Bell Cord is an excellent way to climb Maroon Peak and possibly one of the best snow climbs in the Elk Range. The route ascends the obvious couloir—visible from your car and in all of those famous photos—on the east side of the Maroon Peak massif, ascending directly to the saddle between the two mountains. The best time to climb the Bell Cord depends greatly on the year but usually comes in late spring when the snow is stable but still continuous. This steep gully exceeds 40 degrees for its entire length and is prone to avalanching. An ice axe and a helmet is highly recommended, as well as other technical gear depending on the conditions. This couloir is an excellent alternative to the standard route for the more advanced mountaineer.
The Bells from Pyramid Peak. The Bell Cord is visible
in the center

North Maroon Peak- Northeast Ridge (class 4)
The Northeast Ridge of Maroon Peak is the easiest way to climb North Maroon and is generally considered class 4. I have heard some people describe the chimney move at around 13,600 feet as “the hardest single move on any fourteener.” Other people disagree. Regardless, just about everyone agrees that North Maroon is one of the hardest fourteeners. Certainly, this route is considered a classic.

North Face (North Maroon Peak) (class 4, steep snow/ice)
This slightly obscure line is notable because it ascends the middle of the most prominent face of either of the Maroon Bells when viewed from the parking lot (and again, most of the classic photos). It is also the north face, which while doesn’t mean as much in North America as it does in Europe should still count for something. The problem with this route is that it becomes horribly rotten in bad conditions and thus very dangerous. People have sometimes used this route for a winter ascent or a ski descent. There are several variations that tackle the face with varying degrees of directness.

Peak-to-Peak Traverse (class 4-5.2)
The north face of North Maroon Peak
Classically rated class 4, it seems that by the standards of today this route deserves a slight upgrade, especially if you rate the route with idea of the “single, hardest move.” I do believe that the crux pitch, on the North Maroon side of the ridge traverse proper, has some 5.easy climbing moves. It is not to be taken lightly, especially at elevation and in hiking boots. Traversing from North Maroon to Maroon Peak allows you to rappel over this pitch. Still, there are several other high-end class 4 to 5.easy sections of this traverse. However, the beautiful positions and thrilling exposure are highly rewarding and worth putting on the ticklist of any experienced Colorado mountaineer.

SPECIAL CONSIDERATIONS
The Maroon Bells are made of some of Colorado's worst rock and the pair of these peaks have wreaked havoc on many mountaineers in the past. Take great care when climbing on these peaks, especially if you are new to class 3 and 4 scrambling. THESE MIGHT NOT BE GOOD PEAKS FOR YOUR FIRST CLASS 3 ROUTE!!!

It is also important to note that if you plan to bivy, there are some campsites available at Crater Lake. You do need to fill out a permit and carry it with you at the trailhead before you start.

TRIP REPORTS
(none available at this time. Have an epic Maroon Bells story? Email it to Coloradomountaineering2010@gmail.com for consideration to be published on this site)

LINKS
The Maroon Bells on 14ers.com- a close look with great photos of the standard routes on both of the Maroon Bells

Visit THE ARCHIVE: A list of most of our articles sorted by department

find us on facebook


Copyright notice: This website and all its contents are the intellectual property of www.coloradomountaineering.com and its authors. None of the content can be used or reproduced without the approval of www.coloradomountaineering.com.

Climbing and mountaineering are dangerous!! Please see the DISCLAIMER page
For information about how to contact us, visit this link


Tuesday, June 25, 2013

NEWS: Another Climber Killed in the Elks (6/25/13)

Pyramid Peak and the Maroon Bells
Pyramid Peak (left) and the Maroon Bells (right).
"Thunder Pyramid" lies behind Pyramid Peak in this photo
The Elk Range claimed the life of experienced mountaineer Steve Gladbach, 52, on Sunday. Gladbach went missing after summiting the notorious Thunder Pyramid with some companions. According to a person who was with him, Gladbach had successfully summited Thunder Pyramid and separated from his companions to side-hill traverse out onto "Lightning Pyramid" where the accident occurred. 

Gladbach was a highly experienced mountaineer who had climbed all 584 of Colorado's 13ers, and all of Colorado's 14ers during wintertime. He was also a father of two and a high school math teacher. Gladbach resided in Pueblo, Colorado.

Both "Thunder Pyramid" and "Lightning Pyramid" are regarded as some of Colorado's most dangerous mountains. The massif has been site of several deadly accidents over the years, including that of David Morano in September 2011. At 13,932 feet, Thunder Pyramid is Colorado's 65th highest mountain and "Lightning Pyramid" is Colorado's 137th highest peak. They are both located along the same ridge as 14er Pyramid Peak and near famous mountains, the Maroon Bells.

NOTE: The original story when posted included several incorrect details, including that the accident occurred on Thunder Pyramid when in fact Mr. Gladbach was actually on "Lightning Pyramid" when he fell. His group had summited Thunder Pyramid earlier that day and were on descent when he decided to traverse off Thunder Pyramid towards its neighboring peak. We also originally reported that he had "wanted to check out a waterfall he was interested in climbing in the winter." Though he was interested in climbing Thunder Pyramid during winter, no "waterfall" exists on this aspect of the mountain nor was he scouting one as a potential route at the time. We regret the errors.

RELATED STORIES
-Climber Killed on Thunder Pyramid
-Statistical Analysis of Deaths on 14ers This Decade
-Sixty Highest Peaks in the Elk Range

Visit THE ARCHIVE: A list of most of our articles sorted by department

find us on facebook


Copyright notice: This website and all its contents are the intellectual property of www.coloradomountaineering.com and its authors. None of the content can be used or reproduced without the approval of www.coloradomountaineering.com.

Climbing and mountaineering are dangerous!! Please see the DISCLAIMER page
For information about how to contact us, visit this link


Monday, June 3, 2013

Featured Route: Snowmass Mountain East Slopes

EAST SLOPES OF SNOWMASS MOUNTAIN
Length: 22 miles
Total Elevation gain: 5,700'
Difficulty: class 3

OVERVIEW
Snowmass Peak and Snowmass Lake
The East Slopes (standard) route on Snowmass Mountain is one of Colorado's most spectacular 14er adventures. At 22 miles, it is a very long hike, and I recommend 2 days. Though the hike in and out will be more difficult with the extra gear, the extra time will allow you to take your time and enjoy this beautiful place. Although Snowmass Lake is very likely one of the busiest lakes in the Colorado's backcountry, it is quite beautiful and offers numerous opportunities for places to camp.

Like most climbs in the Elk Range, the East Slopes of Snowmass Mountain is steep, loose and dangerous. It has proven fatal for several mountaineers over the years. Almost the entire route once you have passed the Snowmass Lake is one slippery scree and once you have pass around 13,500' the route becomes particularly dangerous. Wear a helmet, use caution, and be careful not to climb directly underneath another party.

THE ROUTE
Snowmass Lake at sunrise
The long approach to the East Slopes of Snowmass Mountain is one of the longest for any standard route on a 14er in Colorado. The approach alone is over 8 miles and gains over 2,500' in elevation. The hike is long an provides some beautiful views. After 6.5 miles you must cross the creek. This can be a challenge at high spring runoff levels. Depending on the flow level/wood conditions people usually tiptoe across a log jam. If the water is low you can sometimes cross the creek directly below the jam. Not far after negotiating this obstacle, you reach the lake itself. There are many good campsites here. Beware, however, of rules against camping too close to the lake and against fire in general.

the East Slopes of Snowmass Mountain
Hike along the east and south sides of the lake and find a climber's trail that starts up the loose rock on the lake's west end. The approach is over. Climb up the steepening slope along a vague climber's trail into the huge basin on Snowmass Peak's east slopes. Depending on the time of year and conditions there may be some snow to climb at the top of this basin. The usual route veers a bit south as you approach the ridge and finds a notch through the cliffs to reach the summit ridge. In dry, late-summer conditions, or if the snow covering is complete, you can hike more directly towards the summit, finding a breach in the cliffs and reaching the summit ridge near 13,900'. From here you traverse slightly onto the west side of the mountain and pick your way through some class 3 boulders to the summit.

From the summit of Snowmass Mountain looking towards Capitol Peak
 Looking across to Capitol Peak from Snowmass's summit
DIRECTIONS
From Highway 82 28 miles south of Glenwood Springs (or 13 miles north of the roundabout in Aspen) turn west at the town of Old Snowmass (not to be confused with Snowmass Village, the ski area) onto Snowmass Creek Road. Turn left at a T-junction after a mile and a half (right will take you to Capitol). You hit the dirt road seven miles after turning off Hwy 82 and cross the creek at mile 10.5. Take a right at another intersection a half mile later and the trailhead is only about a quarter-mile beyond that.

TRIP REPORTS
the summit area of Snowmass Mountain in the Elk Mountains of Colorado
The summit of Snowmass Mtn
Geneva Lake, Snowmass Mountain, and the Four Pass Loop- A seven day backpack trip following the Four Pass Loop but also with extensions to Geneva Lake and an ascent of the East Slopes (standard) route of Snowmass Mountain.

LINKS
East Slopes on Summitpost.org

East slopes on 14ers.com


Visit THE ARCHIVE: A list of most of our articles sorted by department

find us on facebook


Copyright notice: This website and all its contents are the intellectual property of www.coloradomountaineering.com and its authors. None of the content can be used or reproduced without the approval of www.coloradomountaineering.com.

Climbing and mountaineering are dangerous!! Please see the DISCLAIMER page
For information about how to contact us, visit this link


Thursday, April 11, 2013

Ten Class 3 Colorado Classics

There is something fun about class 3. The thrill of climbing meets the freedom of not (usually) needing a rope. I have always enjoyed this grade. I feel mostly comfortable but it occupies my mind more than the long, grunt climbs of the easier class 2 peaks. This article is a toast to the great class 3 scrambles of Colorado.
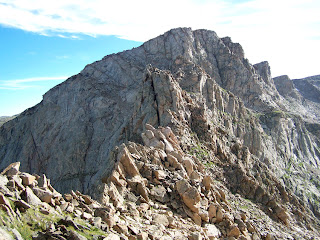
The Sawtooth
The Sawtooth Ridge between Evans and Bierstadt
Mt. Bierstadt/Mt. Evans- The Sawtooth
The Sawtooth is a classic alpine ridge that connects two popular 14ers, Mt. Bierstadt and Mt. Evans. After ascending to the top of Bierstadt, this amazing ridge is immediately apparent, and nearly impossible looking. The long, engaging scramble is what makes this route a classic, ending in an exposed ledge that provides reasonable access to the west face of Mt. Evans.

Longs Peak- The Keyhole
No mountain deserves the designation of "classic" more than Longs Peak and no route in Colorado is climbed more often than the Keyhole. Although the approach hike is long, the effort to climb the Keyhole is well worth the trouble. Once you have passed through the Keyhole, the rest of the route is beautiful, exposed and classic. This climb's main detraction, however, is the sheer number of people who attempt this climb. However, if you can get past the crowds, this is truly one of Colorado's best scrambles.

Crestone Peak- The South Face
The South Face of Crestone Peak perhaps the best route on one of Colorado's best mountains. Crestone Peak is a dramatic mountain. The South Face is astounding route with great exposure, fantastic position and a plethora of high-quality class 3 scrambling.

Crestone Needle- The South Face
Crestone Needle along with its companion Crestone Needle form two of Colorado's most rugged and dramatic peaks. The South Face of Crestone Needle is a mega classic, with great sscrambling, engaging route-finding and some tremendous exposure. It is highly recommended by the writers of Colorado Mountaineering to do both the South Face of the Peak and the South Face of the Needle on a single trip, perhaps with a backpack basecamp at Cottonwood or South Colony Lakes.

Snowmass Lake and Peak
Snowmass Peak & Snowmass Lake

Snowmass Mountain- East Slopes
Snowmass Mountain is one of my favorite Colorado 14ers and this route takes you through an amazing place. A long alpine approach leads to Snowmass Lake, one of the most dramatic and breathtaking lakes of its size you will find anywhere. From here the route is thrilling. You ascend a long slope of class 2+ before finding a notch through a sharp ridge. The last few hundred feet is loose but engaging class 3.


Mt. Meeker- The Loft
Mt. Meeker (13,911') shares a ridgeline and a dramatic alpine cirque with Longs Peak. The Loft Route on Mt. Meeker takes you through this famous and classic alpine destination via a moderate class 3 scramble. The final ridge after climbing to the Loft is exposed a dramatic, finishing in an astonishing move to the summit block.

Mt. Sneffels Southwest Ridge
Mt. Sneffels is one of the San Juan's most popular mountains and for good reason. It is beautiful and well featured. Even the class 2 standard southeast ridge route is excellent and lively. The Southwest Ridge, however, is a classic route with long section of stout class 3, beautiful scenery, and excellent exposed positions. This route is one of my favorite class 3 scrambles. If weather moves in or time becomes an issue, you can descend the easier and faster standard route.
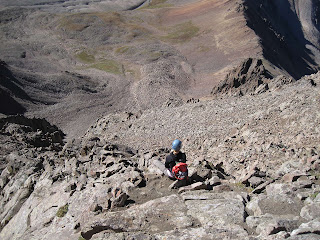
The south face of Mt. Sneffels
Relaxing on Sneffels Southwest Ridge route
Torreys Peak- Kelso Ridge
This Front Range classic is a great way to get a little solitude and make a little more of a mountain that is known for being easy. In general, Kelso is a mellow scramble but with a few cruxes that will get your attention. The knife-edge of Kelso, at the very end, is not the most difficult section, but often gets the most press. This exposed section is short lived but will get your attention. It is a good place to warm-up for more exposed and difficult climbing on other Colorado peaks.

Wetterhorn- Southeast Ridge
This standard route on Wetterhorn in Colorado's San Juan Range ranks as one of the best and most exciting class 3 scrambles. This route up Wetterhorn is relatively short, fun, and ends with an exciting scramble to an excellent summit. This excellent climb on this excellent is certainly worthy of this list.

La Plata Peak- Ellingwood Ridge
La Plata was my first 14er, and therefore will always have a special place in my heart. The Ellingwood Ridge route, however, is quite likely the best, and most complicated class 3 route on all of Colorado's 14ers. This route will challenge all but the most hardened of mountaineers with its long, snakelike ridge and devious up and down scrambling. This ridgeline is famous, and time consuming, so don't take it lightly. There are almost infinite variations which allow you to customize the difficulty of your climb. The easiest route is class 3 but you can easily make it class 5 with a more direct line.
Colorado's Ellingwood Ridge
The Ellingwood Ridge from La Plata's summit 
RELATED ARTICLES
Ten Class 5 Colorado Mountaineering Classics- is this list too tame for you? Check out or list of ten classic technical (class 5) routes on Colorado's high peaks.
Five Hardest 14er Cruxes- Five of the hardest cruxes on the standard routes of any 14er. Included: the Knife Edge on Capitol, the Leap of Faith on Sunlight, the Hourglass on Little Bear and others.

Visit THE ARCHIVE: A list of most of our articles sorted by department

find us on facebook

Follow us on Twitter!

Copyright notice: This website and all its contents are the intellectual property of www.coloradomountaineering.com and its authors. None of the content can be used or reproduced without the approval of www.coloradomountaineering.com.

Climbing and mountaineering are dangerous!! Please see the DISCLAIMER page
For information about how to contact us, visit this link